Welcome back. In the previous lesson, you built a resilient, asynchronous API that can gracefully handle long-running ML inference tasks, timeouts, and failures. This is a significant step towards building the robust backend systems required by companies like Infilect. However, having complex logic for retries and fallbacks introduces a new challenge: how can we test it reliably and efficiently?
Running your full ML model for every test is impractical. It's slow, consumes significant memory and CPU, and makes your test suite dependent on the model file itself. This lesson tackles that problem head-on. You will learn how to mock ML inference results, allowing you to write fast, isolated, and comprehensive tests for your backend API workflows without ever loading a real model.
This skill is fundamental for professional software development, especially in ML-driven applications, as it directly supports robust code management and ensures your application logic is sound, independent of the ML model's behavior.
The "Why" of Mocking in ML Systems
Testing a system that integrates an ML model involves more than just checking the model's accuracy. As a backend engineer, your responsibility is to ensure the entire system around the model is reliable. This includes data validation, API contracts, asynchronous task handling, and error fallbacks.
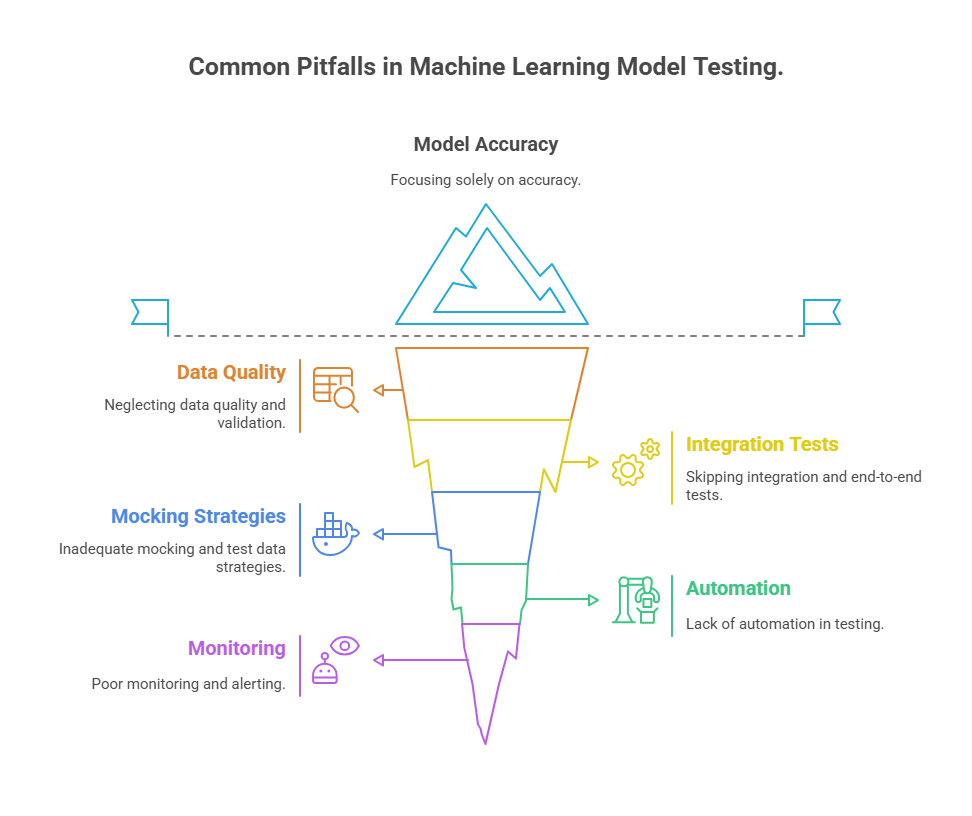
Mocking is a technique where you replace a real object or function with a "fake" or "mock" version during testing. This fake object is under your complete control. In our case, we will replace the slow, heavy ML model with a lightweight mock object that can instantly return any prediction we want or simulate any failure we need to test.
The primary benefits of this approach are:
- Speed: Unit tests should run in milliseconds. Mocking eliminates the time spent loading and running a real model.
- Isolation: Your tests for the API logic won't fail just because the model file is missing or the model code has a bug. You test one component at a time.
- Control & Determinism: You can force the "model" to return specific outputs (e.g., "Diabetic," "Not Diabetic") or to raise specific errors (e.g.,
Timeout,ValueError) to ensure your application's logic handles every scenario correctly.
Introducing Python's Mocking Toolkit
Python's standard library includes a powerful module for creating and managing mocks: unittest.mock. This library provides the tools we need to replace parts of our system during tests.
To get a solid grasp of the core concepts, please read the introductory sections of the Real Python article, "Understanding the Python Mock Object Library."
Understanding the Python Mock Object Library
This article is a comprehensive guide to Python's mocking framework. It will give you the foundational knowledge needed for our hands-on task.
Please read the following sections: Start with What is Mocking? to understand the fundamental concept. Then, read about the Mock object and its flexibility. Next, focus on managing a mock's return value using .return_value. This is how we'll simulate a successful prediction. Finally, read about managing side effects using .side_effect. This is how we'll simulate errors.
The most crucial function you'll use from this library is patch(). It temporarily replaces a function or object within a specific scope (like a single test function) with a mock. The Net Ninja channel has an excellent video demonstrating how to mock an external API call using patch(), which is a perfect analogy for what we're about to do with our ML model.
Testing in Django Tutorial #12 - Mocking External Services
This video provides a practical, step-by-step guide to mocking an external service in a Django application, which closely parallels our goal of mocking an ML model.
Watch these key segments: The introduction explains mocking external services. The section on why we should mock reinforces the benefits of speed and control. Pay close attention to the demonstration of mocking a successful API call, where the presenter uses @patch and configures the mock's return_value. Finally, see how to mock a failure condition by setting the side_effect to raise an exception.
Hands-On: Testing the Asynchronous Prediction Workflow
Now, let's apply these concepts to our diabetes prediction application. We will write unit tests for two separate components:
- The API View (
DiabetesPredictionAPIView): We'll verify that it correctly receives data and queues the Celery task. - The Celery Task (
run_diabetes_prediction): We'll verify that it correctly calls the model and processes its output or handles its errors.
This separation of concerns is a best practice in unit testing.
Part 1: Unit Testing the API View
The API view's primary responsibility is to validate incoming data and trigger a background task. It should not be concerned with the result of the ML model itself. Our test will confirm that the task is correctly initiated.
First, let's create a test file. In your predictions app directory, create a new tests folder if it doesn't exist, and add an __init__.py file inside it. Then, create tests/test_views.py.
# predictions/tests/test_views.py

from unittest.mock import patch
from rest_framework.test import APITestCase
from rest_framework import status

class DiabetesPredictionAPITests(APITestCase):

    @patch('predictions.tasks.run_diabetes_prediction.delay')
    def test_prediction_api_queues_task_successfully(self, mock_delay):
        """
        Test that the prediction API endpoint successfully queues a Celery task.
        """


        # 1. Arrange
        # Define the input data for the API call
        input_data = {
            "preg": 6, "plas": 148, "pres": 72, "skin": 35,
            "test": 0, "mass": 33.6, "pedi": 0.627, "age": 50
        }


        # Configure the mock to return a mock task object with an ID
        mock_delay.return_value.id = 'fake-task-id-123'


        # 2. Act
        # Make a POST request to our API endpoint
        response = self.client.post('/api/predict/diabetes/', input_data, format='json')


        # 3. Assert
        # Check that the API returned a 202 Accepted status
        self.assertEqual(response.status_code, status.HTTP_202_ACCEPTED)


        # Check that the response contains the task ID
        self.assertEqual(response.data['task_id'], 'fake-task-id-123')


        # Check that our Celery task's .delay() method was called exactly once
        mock_delay.assert_called_once()


        # Check that it was called with the correct arguments
        expected_features = [6, 148, 72, 35, 0, 33.6, 0.627, 50]
        mock_delay.assert_called_once_with(expected_features)
This test perfectly illustrates the Arrange-Act-Assert pattern, a standard structure for writing clear and understandable tests.

A critical detail here is the string we passed to @patch: 'predictions.tasks.run_diabetes_prediction.delay'. The rule is to patch the object where it is looked up. Since our predictions.views module imports run_diabetes_prediction from predictions.tasks, we must patch it within the tasks module's namespace.
For a deeper dive into this crucial rule, please review this section of the Real Python article.
Understanding the Python Mock Object Library
This section explains a common and critical point of confusion when using patch().
Please read the section titled Knowing Where to Patch. Understanding this will save you hours of debugging in the future.
Part 2: Unit Testing the Celery Task
Now that we've tested the view, let's test the task itself in isolation. We'll mock the ML model to control its output and test our task's logic.
Create a new test file: predictions/tests/test_tasks.py.
# predictions/tests/test_tasks.py

import pytest
from unittest.mock import patch
from ..tasks import run_diabetes_prediction, TransientInferenceError


# Sample features for testing
SAMPLE_FEATURES = [6, 148, 72, 35, 0, 33.6, 0.627, 50]

@patch('predictions.tasks.PredictionsConfig.model')
def test_run_prediction_success_diabetic(mock_model):
    """Test task returns 'Diabetic' for a prediction of 1."""


    # Arrange: Configure the mock model to return a '1' prediction
    mock_model.predict.return_value = [1]


    # Act: Run the task function directly
    result = run_diabetes_prediction(SAMPLE_FEATURES)


    # Assert: Check the output and that the model was called
    assert result == "Diabetic"
    mock_model.predict.assert_called_once_with([SAMPLE_FEATURES])

@patch('predictions.tasks.PredictionsConfig.model')
def test_run_prediction_success_not_diabetic(mock_model):
    """Test task returns 'Not Diabetic' for a prediction of 0."""


    # Arrange: Configure the mock model to return a '0' prediction
    mock_model.predict.return_value = [0]


    # Act
    result = run_diabetes_prediction(SAMPLE_FEATURES)


    # Assert
    assert result == "Not Diabetic"
    mock_model.predict.assert_called_once_with([SAMPLE_FEATURES])

@patch('predictions.tasks.PredictionsConfig.model')
def test_run_prediction_model_failure(mock_model):
    """Test that the task propagates an exception from the model."""


    # Arrange: Configure the mock to raise an exception
    mock_model.predict.side_effect = ValueError("Invalid input shape")


    # Act & Assert: Use pytest.raises to check that the expected exception is raised
    with pytest.raises(ValueError, match="Invalid input shape"):
        run_diabetes_prediction(SAMPLE_FEATURES)

    mock_model.predict.assert_called_once_with([SAMPLE_FEATURES])
Note: These tests are written for the simplified task function, not the resilient version with retries from the previous lesson. You can adapt these patterns to test the more complex version by mocking the self.request object passed to bound tasks.
In these tests, we patch the loaded model object, PredictionsConfig.model, where it's accessed inside the tasks module. We use .return_value to simulate successful predictions and .side_effect to simulate a model failure, allowing us to test our task's logic under different conditions.
If you need to test more complex scenarios, such as a function being called multiple times with different arguments or mocking multiple dependencies in one test, the side_effect attribute and stacking @patch decorators are powerful tools.
Unit Testing in Python with pytest | Advanced Mocking (Part-10)
This video covers advanced mocking scenarios, including multiple calls and multiple dependencies.
Watch the segment on using side_effect to return different values or raise exceptions on subsequent calls. Then, review the powerful technique for patching multiple dependencies in a single test, noting how the decorator order maps to the function arguments.
Conclusion
In this lesson, you've learned one of the most important skills for a backend engineer working with complex systems: mocking. By replacing heavy dependencies like ML models with lightweight, controllable fakes, you can build a fast, reliable, and comprehensive test suite for your application.
Key Takeaways:
- Mocking is essential for testing components in isolation, especially when they interact with slow, non-deterministic, or external systems like ML models.
unittest.mock.patchis the primary tool for temporarily replacing objects during tests.- Always patch an object where it is looked up, not where it is defined.
- Use
.return_valueto simulate successful outcomes and.side_effectto simulate errors or more complex behaviors. - Structure your tests using the Arrange-Act-Assert pattern for clarity and maintainability.
- Writing separate unit tests for views and business logic (like Celery tasks) leads to a more robust and modular test suite.
You are now equipped to ensure your backend logic is correct, regardless of what the integrated ML model is doing. In the next module, we will shift our focus from serving models to the critical task of managing the data that powers them, starting with designing a database schema for an image annotation pipeline.