Introduction
In our previous lesson, we established the critical difference between public and private IP addresses and how Network Address Translation (NAT) enables your local network to communicate with the global internet. Now that we understand these addressing concepts, our next logical step is to learn how to interact with and diagnose connections to these addresses.
This lesson will equip you with a foundational toolkit for network diagnostics. We will explore three essential command-line utilities: ping, traceroute, and nslookup. You will learn how to use ping to test if a target is online, traceroute to map the network path to that target, and nslookup to query the Domain Name System (DNS) for information about it. These are the first tools an ethical hacker uses to "touch" a target system, forming the basis of active reconnaissance. Since you are currently on Windows, you can run all of today's exercises directly in the Command Prompt.
ping: Checking for a Pulse
The first and most fundamental test in network troubleshooting is to see if you can reach a target device. The ping command does exactly this. It sends a small data packet, called an ICMP Echo Request, to a target IP address or hostname and waits for an ICMP Echo Reply.
To get a clear visual understanding of what ping does and what its responses mean, let's start with a short animated video.
PING and TRACERT (traceroute) networking commands
The PowerCert Animated Videos channel provides a great explanation of ping.
Watch the first part of the video covering the ping command. Pay close attention to the different potential outcomes: a successful reply, "request timed out," and "destination host unreachable," as each one tells you something different about the network status.
As the video explained, a successful ping confirms two things:
- Connectivity: There is a valid network path between your computer and the target.
- Name Resolution: If you ping a hostname (e.g.,
google.com), a successful result also confirms that your DNS server correctly resolved that name to an IP address.
Let's dissect the output of a successful ping command.

From this, we can extract valuable information:
- Time (Latency): This is the round-trip time in milliseconds (ms) for the packet to go to the target and return. Lower numbers mean a faster, more responsive connection.
- TTL (Time To Live): This value is not a measure of time, but rather a limit on the number of "hops" (routers) a packet can pass through before being discarded. Every time the packet crosses a router, the TTL value is decreased by one. This mechanism prevents packets from getting stuck in infinite loops on the network. As a hacker, you can sometimes use the initial TTL value to make an educated guess about the target's operating system (e.g., Windows systems often start with a TTL of 128, while Linux systems often start with 64).
traceroute: Mapping the Journey
What if a ping fails or the latency is very high? Your next question should be, "Where is the problem occurring along the path?" The traceroute command (named tracert on Windows) is designed to answer this. It maps out the sequence of routers your packets traverse to reach a destination.
PING and TRACERT (traceroute) networking commands
Let's return to the PowerCert video to see how traceroute works.
Watch the second part of the video explaining the tracert utility. This will show you how it reveals each "hop" on the network path and helps pinpoint where a connection might be failing.
tracert works by cleverly manipulating the TTL value we just discussed. It sends out a series of packets, starting with a TTL of 1. The first router receives the packet, decrements the TTL to 0, and sends back an error message ("Time Exceeded"). tracert records that router's IP. It then sends another packet with a TTL of 2, which makes it past the first router but is dropped by the second, and so on. This continues until the packet finally reaches the destination.
This tool is invaluable for diagnosing network slowdowns. If you see a sudden jump in latency at a specific hop, you've likely found the source of the delay.
nslookup: The Internet's Phonebook
Before you can ping or tracert a hostname like google.com, your computer needs to translate that name into an IP address. This is the job of the Domain Name System (DNS). The nslookup (Name Server Lookup) command is your tool for directly querying DNS servers.
As an ethical hacker, nslookup is a primary reconnaissance tool. It not only gives you a target's IP address but can also reveal other critical information, such as their mail servers or the authoritative DNS servers for their domain.
This video from Steve Cope provides a thorough, practical introduction to nslookup.
We'll watch this in a few parts to cover the key functionalities: First, watch the introduction and the demonstration of a basic lookup in interactive mode: basic usage. Next, see how you can query for different types of DNS records, such as mail servers (MX records): setting query types. This is a powerful feature for information gathering. Finally, understand how to use nslookup for single, quick queries in non-interactive mode: non-interactive mode.
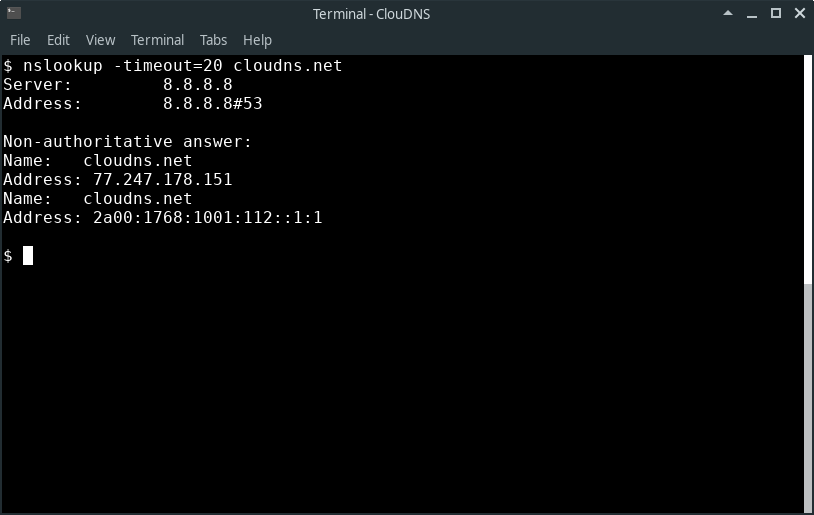
By using nslookup to query for different record types, you can start to build a map of a target organization's infrastructure. For example:
- A/AAAA Records: The IPv4/IPv6 addresses of a host.
- MX Records: The mail servers responsible for handling email for a domain. These are often high-value targets.
- NS Records: The name servers for a domain.
- PTR Records: Used for reverse lookups (finding a hostname from an IP address).
Hands-On Practice
Now it's time to use these tools yourself. Open the Windows Command Prompt (cmd) and work through the following exercises. They will help you solidify your understanding of each command.
Day 9: Mastering System Networking Commands — The Tools ...
This article from Medium provides a concise set of practical exercises that cover exactly what we've learned.
Navigate to the Activity Section of the article. Complete each of the challenges listed for ping, tracert, and nslookup in your Command Prompt. For the traceroute exercise, remember to use the Windows command tracert.
Conclusion
In this lesson, you've added three of the most fundamental network tools to your arsenal. These commands are the building blocks for the reconnaissance phase of any ethical hack. They allow you to verify a target's status, map its network location, and query the DNS for vital information.
Key Takeaways:
pingis used to check for basic reachability and network latency using ICMP packets.tracert(ortraceroute) maps the hop-by-hop path your data takes to a destination, helping to diagnose failures and slowdowns.nslookupis a powerful tool for querying DNS to resolve hostnames to IPs and discover other infrastructure information like mail servers.- Information like TTL can provide subtle clues about a target system's operating system.
In our next lesson, we will turn our focus inward. While today's tools look at external hosts, the netstat command will allow us to inspect the active network connections and listening ports on our own local machine, a key skill for both system administration and security analysis.