Hello! Welcome back to your Go course.
In our last lesson, you successfully installed Go, initialized your first project using Go modules, and executed a "Hello, World!" program with the go run . command. This gave you a taste of Go's command-line tooling.
Today, we'll dive deeper into that workflow. You'll learn how to write, run, and compile basic Go programs using the command line. We will distinguish between running code for quick development and compiling it into a standalone binary—a crucial step for distributing the tools and services you'll be building. This process is central to the build-and-deploy cycle you're familiar with from your DevOps work. We will focus on three core commands: go run, go build, and go install.
1. The Development Workflow: go run
The go run command is your go-to for rapid development and testing. It compiles and runs your code in a single step without leaving a binary file in your project directory. This is similar to executing a script with python my_script.py or bash my_script.sh—it provides immediate feedback.
Let's use the main.go file from our last lesson:
package main

import "fmt"

func main() {
    fmt.Println("Setup complete. Ready to build DevOps tools with Go!")
}
You've already used go run . to execute this. The . tells Go to run the main package in the current directory.
The following video provides a concise demonstration of creating a simple program and executing it with both go run and go build.
Watch this short clip from the 'Learn GO Fast' tutorial by Alex Mux to see the go run and go build commands in action.
Watch from 05:05 to 06:18. The video will first show how to use go build to create a binary and run it, then demonstrate the go run command as a more direct alternative for development.
As your programs grow, you might split your code into multiple files within the same package. go run can handle this seamlessly. If you have main.go and helpers.go in the same directory (and both are part of package main), you can run them together.
To see how this works, watch this brief segment.
Golang Made Easy: Learn the Basics in Just 10 Minutes
This clip from 'Golang Made Easy' by Gerald Yerden shows how to run a project split across multiple files.
Watch from 02:40 to 03:09. The instructor demonstrates using go run *.go to compile and run all Go files in the current directory.
The two common ways to run a multi-file main package are:
go run .(idiomatic and recommended)go run *.go(explicitly includes all.gofiles)
2. The Build & Deploy Workflow: go build
While go run is for development, go build is for production. It compiles your code into a single, standalone executable binary.
This is a significant advantage of Go, especially in a DevOps context. The resulting binary contains all the necessary code to run and does not require the Go runtime or any external libraries to be installed on the target machine. You can copy this single file into a Docker container or onto a server, and it just works. This simplifies deployment pipelines and reduces the attack surface of your images.
The following guide from DigitalOcean provides an excellent, detailed walkthrough of the go build and go install commands.
How To Build and Install Go Programs
This article, 'How To Build and Install Go Programs', clearly explains the process of creating and distributing Go executables. We'll focus on the sections covering go build.
Please read the sections titled 'Step 2 — Creating a Go Module to Build a Go Binary', 'Step 3 — Building Go Binaries With go build', and 'Step 4 — Changing the Binary Name'. This will guide you through building an executable and customizing its name.
Let's try it out:
-
Navigate to your
my-first-toolproject directory. -
Run the build command:
go buildNow, list the files in your directory (
lson Linux/macOS ordiron Windows). You'll see a new executable file namedmy-first-tool(ormy-first-tool.exe). The name is derived from your project's directory/module name. -
Run the binary directly:
./my-first-toolYou will see the output:
Setup complete. Ready to build DevOps tools with Go! -
Customizing the Output: In a CI/CD pipeline, you often want to control the name and location of the build artifact. The
-oflag lets you do this.go build -o bin/helloThis command compiles your code and places the executable named
helloinside abindirectory (Go will create the directory if it doesn't exist). This is a common practice for organizing project artifacts.Run the new binary:
./bin/hello
3. Making Tools System-Wide: go install
The go install command takes building one step further. It compiles your program and places the executable in a central location, $GOPATH/bin (or the directory specified by the $GOBIN environment variable).
If this directory is in your system's PATH, you can run your tool from anywhere in the terminal, just like any other system command (e.g., git, docker, kubectl). This is ideal for the CLI tools you'll be building. It's conceptually similar to running pip install or npm install -g.
Let's install the hello tool you just built.
How To Build and Install Go Programs
Now, read the final part of the same DigitalOcean article, which covers go install.
Read the section 'Step 5 — Installing Go Programs with go install'. It explains what the command does and how to use it.
- From your project directory, run:
go install - The command builds the binary and moves it to your Go
bindirectory. The executable name will be based on the module name. - Now, open a new terminal or navigate to your home directory (
cd ~) and run the command by its name:
It works! You've just built and installed your first Go command-line tool.my-first-tool
Test your understanding!
You are working on a Go project. For each scenario, which command would you use: go run, go build, or go install?
- You need to create a binary to include in a minimal Docker image for deployment.
- You've made a small change to a function and want to quickly see if the output is correct.
- You have just finished writing a utility script that you want to use frequently from any directory on your local machine.
Show answer
go build: This is the correct choice because you need to create a distributable binary artifact for the Docker image.go run: This is perfect for quick, iterative testing during development without creating a persistent executable.go install: This command is designed to place the executable in a location on your system'sPATH, making it globally accessible.
Tying It All Together: A Simple Echo Tool
Let's make our program a little more useful to demonstrate a real command-line tool. We'll modify main.go to act like a simple echo command, printing any arguments passed to it.
This introduces the os package, which is Go's standard library for interacting with the operating system. os.Args is a slice of strings that holds the command-line arguments, where os.Args[0] is the program name itself.
Replace the code in main.go with the following:
package main

import (
	"fmt"
	"os"
	"strings"
)

func main() {
	// os.Args contains all command-line arguments.
	// os.Args[0] is the command name, so we check if there are more arguments.
	if len(os.Args) > 1 {
		// Join the arguments after the command name with a space and print them.
		message := strings.Join(os.Args[1:], " ")
		fmt.Println("You said:", message)
	} else {
		fmt.Println("Usage: my-echo <message>")
	}
}
Now, run it with go run, passing some arguments:
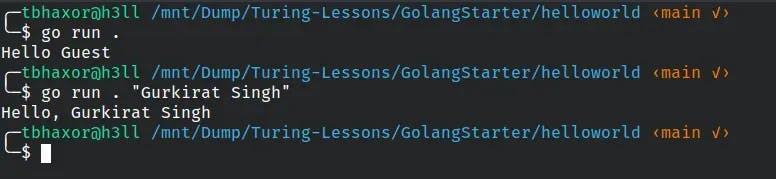
go run . this is a test
You'll see this output:
You said: this is a test
This simple example already feels like a real CLI tool. You can now use go build to create a distributable my-echo binary or go install to make it available everywhere on your system.
Key Takeaways
go run: Compiles and runs in one step. Use for development and rapid testing. Does not produce a lasting binary.go build: Compiles and creates a standalone executable in your project directory. Use for creating distributable artifacts for deployment (e.g., in a server or Docker container).go install: Compiles and moves the executable to your Gobindirectory ($GOPATH/bin). Use for installing CLI tools you want to use system-wide.- Go's build tools create statically linked binaries by default, which simplifies deployment and distribution significantly.
Next Up
You now have a solid grasp of the fundamental Go development workflow from writing code to building and installing it. In the next lesson, we will start building the logic inside our programs. You will learn how to declare and use variables with Go's static type system and type inference, which is the foundation for handling data in any application.