Welcome back! In our last lesson, we completed the final quality assurance checks on your webpage, ensuring every image, link, and interactive element works perfectly. Your site is now polished, functional, and ready for its public debut.
Today, we take the exciting leap from local development to the live web. We're going to set up the service that will host your website and make it accessible to anyone, anywhere in the world.
1. What We Are Learning
Our goal for this lesson is to create a Vercel account and connect it to your GitHub account. This is the foundational step for deploying your website.
2. Why This Matters
So far, your website only exists on your computer. To share it, we need to put its files on a server that's always on and connected to the internet. This is called hosting. Vercel is a modern platform that specializes in hosting and deploying websites with incredible ease.
Analogy: Think of your project on GitHub as the master file for a design—like your main Figma file. Vercel is the high-tech production and distribution service. It takes your master file (your code), "builds" the final product (the live website), and makes it available globally through a fast delivery network.
Connecting Vercel to GitHub is the key to this process. It creates an automated workflow. Whenever you update your "master file" (push new code to your GitHub repository), Vercel will automatically detect the change, rebuild your site, and deploy the new version. This is a powerful concept in modern development called Continuous Deployment, and it means you never have to manually upload files.
To get a better sense of what Vercel does, let's start with a quick read.
Getting Started with Vercel: Deploy Your First Project in 5 Minutes
This article, 'Getting Started with Vercel', gives a great overview of what Vercel is and what makes it special. It will help you understand the 'why' behind the steps we're about to take.
Please read the first two sections, 'What is Vercel?' and 'What makes Vercel special'. This will give you the context you need for the rest of the lesson.
3. Step-by-Step Instructions
Ready to get set up? This process is quick and straightforward. We'll create a free "Hobby" account, which is more than enough for our project.
For a visual guide to follow along with, you can watch the first minute of this video. It walks through the exact process we're about to undertake.
How to Host a Website for Free using Vercel and GitHub
The video 'How to Host a Website for Free using Vercel and GitHub' by Andy's Tech Tutorials clearly shows the signup process. Watching the beginning will help you visualize each step.
Watch from the beginning (0:09) until the 0:48 mark. Pay attention to how the user chooses to 'Continue with GitHub' and authorizes the connection.
Now, let's go through it step-by-step.
Step 1: Go to the Vercel Signup Page
Open your web browser and navigate to vercel.com/signup.
You will see a page asking you to create an account, with options to continue with GitHub, GitLab, or Bitbucket.
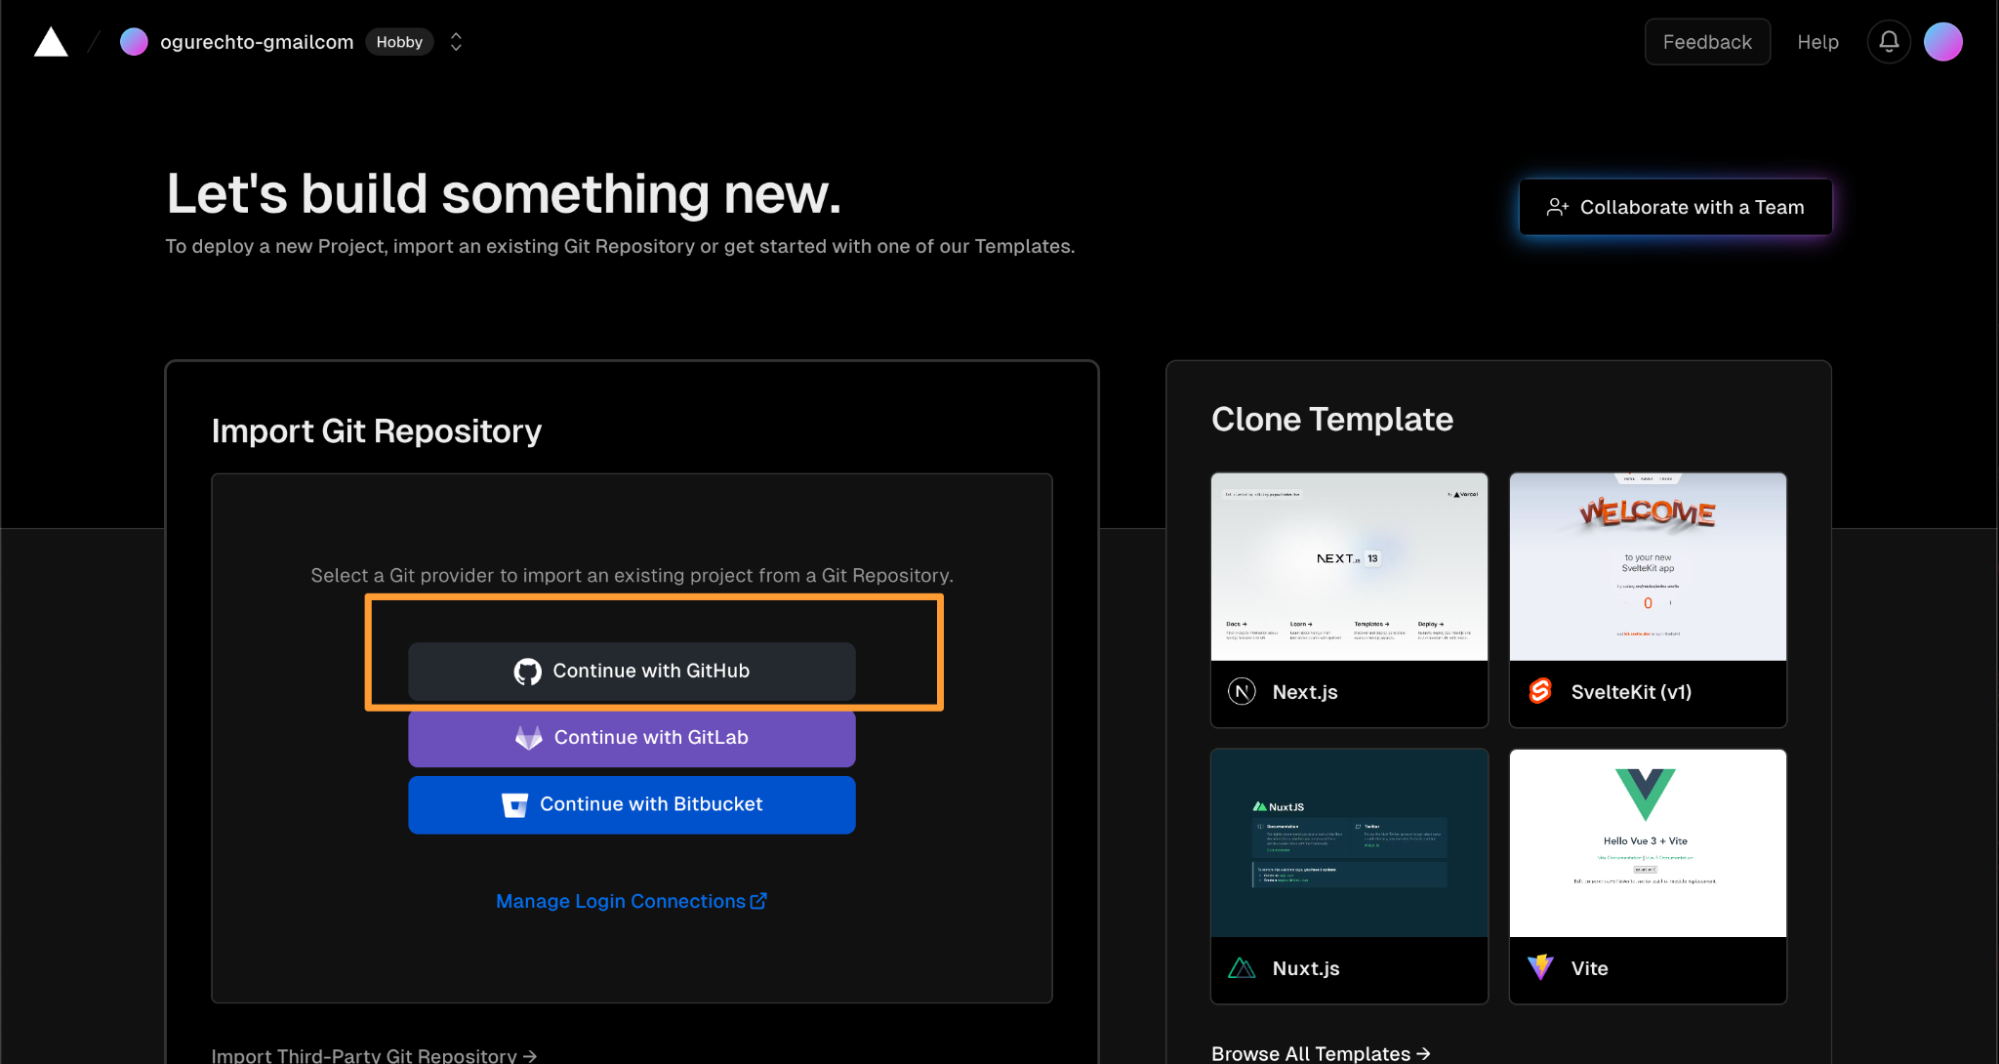
Step 2: Choose "Continue with GitHub"
This is the most important step. Instead of creating an account with an email and password, click the "Continue with GitHub" button. This will redirect you to GitHub to ask for your permission.
Step 3: Authorize Vercel
GitHub will now ask you to authorize Vercel. This is a standard and secure process. Vercel is asking for permission to see your repositories so that it can access your code to build and deploy it.
Read through the permissions and click the green "Authorize Vercel" button. You may be asked to enter your GitHub password to confirm.
Step 4: Complete Your Vercel Profile
Once authorized, you'll be sent back to Vercel to finish setting up your account.
- You'll be asked to choose a plan. Select the "Hobby" plan. It's completely free and perfect for personal projects.
- Enter your name.
- Click "Continue".

That's it! You should now be logged into your new Vercel dashboard. It might look a little empty right now, but it's connected and ready for our project.
4. What Could Go Wrong
- You accidentally signed up with your email instead of GitHub.
- Reason: You might have missed the "Continue with GitHub" button.
- Fix: No problem. Find the logout button in your Vercel profile (usually by clicking your profile icon in the top-right). Log out, then go back to vercel.com/signup and start over, making sure to select "Continue with GitHub." This connection is essential for the automated workflow.
- You are hesitant to grant Vercel permission to access your GitHub account.
- Reason: It's smart to be cautious about granting permissions!
- Fix: Rest assured this is a standard and secure practice for all modern hosting platforms. Vercel is a highly reputable company, and it needs read-only access to your code to do its job. It cannot make changes to your repository.
- Vercel asks to install an "app" on GitHub and gives options for "All repositories" or "Only select repositories".
- Reason: This happens during the authorization step. Vercel is asking which of your projects it should be allowed to see.
- Fix: While "All repositories" is simpler, the best practice is to choose "Only select repositories". This gives you more control. If you see this option, select it, and then choose the specific repository for the landing page project we've been working on. If you're not sure, choosing "All repositories" for now is also fine.
5. Mini Exercise
Time to put this into practice. Follow the steps below to create and connect your account.
- Go to vercel.com/signup.
- Click the "Continue with GitHub" button.
- When redirected to GitHub, click the "Authorize Vercel" button.
- Back on Vercel, select the "Hobby" plan.
- Enter your name and click "Continue".
- Confirm that you have landed on the Vercel dashboard.
6. Checklist Before Moving Ahead
- I understand that Vercel is a platform that will host my website and make it live.
- I have successfully created a free "Hobby" account on Vercel.
- I have connected my Vercel account to my GitHub account by using the "Continue with GitHub" option.
- I understand that this connection is what enables automatic deployments when I update my code.
- I am logged in and can see my main Vercel dashboard.
Fantastic work! You've just set up a crucial piece of infrastructure used by developers and companies all over the world. The bridge between your code and the live internet is now built.
A Look Ahead
In our next lesson, we'll walk across that bridge. You will learn how to import your GitHub repository into Vercel, trigger your very first deployment, and get the public URL for your live site. Get ready to share your work