Hello! In our last lesson, you did an excellent job building an interactive contact form with React, complete with robust client-side validation using react-hook-form and Zod. The form is polished and user-friendly, but currently, its "submit" button only triggers an alert.
Today, we will make that form fully functional. This lesson directly addresses the learning outcome: Handle form submissions by sending data to a serverless function or third-party service. We'll explore two professional-grade methods to achieve this, connecting your frontend form to a backend process that can, for example, send an email.
Given your background with PHP and MySQL, you're familiar with the classic model of a form posting data to a server script. The approaches we'll cover are the modern, Jamstack-era equivalents, designed for security, scalability, and developer experience.
1. The Quickest Route: Third-Party Form Services
The simplest way to handle form submissions on a static or hybrid site is to use a "form-as-a-service" provider like Formspree or Netlify Forms.
The concept is straightforward:
- You create a form on their platform.
- They provide you with a unique URL endpoint.
- You configure your HTML form to
POSTits data to that endpoint. - The service handles the rest: it validates for spam, sends you an email notification with the form data, and often provides a dashboard to view submissions.

For a React component like ours, these services often provide helpful libraries to make integration seamless.
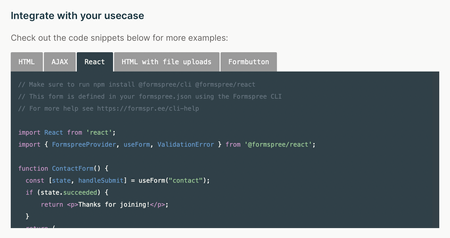
While this approach is incredibly fast to implement, the trade-offs are a dependency on an external service, potential costs, and less control over the submission process. It's a fantastic option for simple projects or when speed is the highest priority.
For your goal of building a maintainable, scalable accounting website, you might want more control. That brings us to a more integrated and powerful approach.
2. The Integrated Solution: Astro Actions
Astro provides a first-class feature called Actions for exactly this scenario. Astro Actions allow you to define server-side functions that can be called securely from your client-side code without you having to manually build API endpoints, handle fetch requests, or parse FormData.
The official Astro documentation provides a great introduction to what Actions are and why they are beneficial. This will give you a solid theoretical foundation before we dive into the code.
Please read the introduction and the 'Basic usage' section. Focus on understanding: The problems Actions solve compared to traditional API endpoints. The core idea of defining actions in src/actions/index.ts and calling them from the astro:actions module.
To use Actions, we need to enable a server-side rendering environment for our project. This doesn't mean your whole site becomes server-rendered; it just means you have a server or serverless function available to execute your actions when they are called.
Let's implement this step-by-step for our contact form. We'll use a popular email service, Resend, to handle the actual email delivery.
Step 1: Configure Your Project for Server-Side Logic
First, we need to add a server adapter to our Astro project. This adapter tells Astro how to create the server-side part of your application. We'll use the Node.js adapter, which is versatile for many hosting environments like Vercel, Netlify, or a traditional VPS.
In your terminal, run:
npx astro add node
Follow the prompts to update your astro.config.mjs file. It should now look something like this, with the node adapter added and output set to 'server':
// astro.config.mjs
import { defineConfig } from 'astro/config';
import node from '@astrojs/node';
import react from '@astrojs/react';

export default defineConfig({
  output: 'server', // or 'hybrid'
  adapter: node({
    mode: 'standalone'
  }),
  integrations: [react()]
});
Note: Using an adapter typically changes output from 'static' to 'server' or 'hybrid'. This is necessary for on-demand code execution.
Step 2: Set Up the Email Service and Environment Variables
We can't send emails directly from a serverless function without an external service. We'll use Resend for its simple API.
-
Install the Resend SDK:
npm install resend -
Get a Resend API Key:
- Sign up for a free account at resend.com.
- Navigate to the "API Keys" section in your dashboard and create a new key. Copy it immediately—you won't be able to see it again.
-
Configure Environment Variables:
Create a.envfile in the root of your project to securely store your API key and other secrets. Never commit this file to Git.# .env RESEND_API_KEY="re_YOUR_API_KEY_HERE" # For testing, Resend allows sending from this address. For production, you'd verify your own domain. FROM_EMAIL="onboarding@resend.dev" TO_EMAIL="your-personal-email@example.com" # The email that receives the contact form submissions
Astro has built-in support for environment variables and ensures that server-side variables are not accidentally exposed to the client.
Step 3: Define the Server Action
Now for the core logic. We will define an action that takes the form data, validates it again on the server (a crucial security step!), and uses Resend to send the email.
Contact Forms in Astro with Server Actions and Resend
The article 'Contact Forms in Astro with Server Actions and Resend' provides a fantastic walkthrough of this entire process. We will follow its structure to build our action.
Please read the section that details how to define the server action. In the code block provided in the article, pay close attention to: How defineAction is used. The accept: 'form' property, which is crucial for handling form data. The input property, which re-uses a Zod schema for server-side validation. The handler function, which contains the logic to call the Resend API.
Let's create our action. Make a new file at src/actions/index.ts:
// src/actions/index.ts
import { defineAction, z } from 'astro:actions';
import { Resend } from 'resend';

// Import the schema you created in the last lesson
import { contactFormSchema } from '../schemas/contactFormSchema';

// Initialize Resend with the API key from our .env file
const resend = new Resend(import.meta.env.RESEND_API_KEY);

export const server = {
  sendEmail: defineAction({
    // We expect JSON data from our React form
    accept: 'json',
    // Use the same Zod schema for server-side validation
    input: contactFormSchema,
    handler: async ({ name, email, message }) => {
      try {
        await resend.emails.send({
          from: import.meta.env.FROM_EMAIL,
          to: import.meta.env.TO_EMAIL,
          subject: `New message from ${name} on your website`,
          html: `<p>You received a new message from your contact form.</p>
                 <p><strong>Name:</strong> ${name}</p>
                 <p><strong>Email:</strong> <a href="mailto:${email}">${email}</a></p>
                 <p><strong>Message:</strong></p>
                 <p>${message}</p>`,
        });

        // Return a success response
        return { success: true, message: "Email sent successfully!" };

      } catch (error) {
        console.error(error);
        // Return an error response
        return { success: false, message: "There was an error sending the email." };
      }
    },
  }),
};
Notice we are re-using the contactFormSchema from the previous lesson. This is a key benefit of Zod: a single source of truth for validation on both the client and the server.
Step 4: Connect the React Form to the Action
The final step is to update our ContactForm.tsx component. Instead of showing an alert, we will call our new sendEmail action and handle the response.
// src/components/ContactForm.tsx
import React, { useState } from 'react';
import { useForm } from 'react-hook-form';
import { zodResolver } from '@hookform/resolvers/zod';
import { contactFormSchema } from '../schemas/contactFormSchema';
import type { ContactFormData } from '../types/forms';
import { actions } from 'astro:actions'; // Import the auto-generated actions

// ... (errorStyles from previous lesson)

export default function ContactForm() {
  // Add state to manage submission status
  const [submissionStatus, setSubmissionStatus] = useState<'idle' | 'submitting' | 'success' | 'error'>('idle');
  const [serverMessage, setServerMessage] = useState('');

  const { register, handleSubmit, formState: { errors }, reset } = useForm<ContactFormData>({
    resolver: zodResolver(contactFormSchema),
  });

  const onSubmit = async (data: ContactFormData) => {
    setSubmissionStatus('submitting');

    // Call the server action
    const result = await actions.sendEmail(data);

    setServerMessage(result.data.message);

    if (result.data.success) {
      setSubmissionStatus('success');
      reset(); // Clear the form on success
    } else {
      setSubmissionStatus('error');
    }
  };

  if (submissionStatus === 'success') {
    return (
      <div>
        <h3>Thank you!</h3>
        <p>{serverMessage}</p>
      </div>
    );
  }

  return (
    <form onSubmit={handleSubmit(onSubmit)}>
      {/* ... your form fields and error messages from the previous lesson ... */}

      {submissionStatus === 'error' && <p style={{ color: 'red' }}>{serverMessage}</p>}

      <button type="submit" disabled={submissionStatus === 'submitting'}>
        {submissionStatus === 'submitting' ? 'Sending...' : 'Send Message'}
      </button>
    </form>
  );
}
In this updated component, we:
- Import
actionsfrom the specialastro:actionsmodule. - Add
useStateto track the form's submission status (submitting,success,error). - Make the
onSubmitfunctionasync. - Call
actions.sendEmail(data)andawaitits result. - Update the UI based on the response from the action, showing a success message or an error.
- Disable the submit button while the form is submitting to prevent multiple submissions.
Test your understanding!
In the previous lesson's exercise, we added an optional companyName field. How would you modify the sendEmail action in src/actions/index.ts to include the company name in the email body if it's provided?
Show answer
You would need to update the handler function inside defineAction. First, you would destructure companyName from the input. Then, you'd conditionally add it to the HTML string for the email.
// src/actions/index.ts

// ... imports

export const server = {
  sendEmail: defineAction({
    // Make sure your contactFormSchema includes the optional companyName
    input: contactFormSchema,
    handler: async ({ name, email, message, companyName }) => { // 1. Destructure companyName
      try {
        await resend.emails.send({
          from: import.meta.env.FROM_EMAIL,
          to: import.meta.env.TO_EMAIL,
          subject: `New message from ${name} on your website`,
          // 2. Conditionally add the company name to the email body
          html: `<p>You received a new message from your contact form.</p>
                 <p><strong>Name:</strong> ${name}</p>
                 ${companyName ? `<p><strong>Company:</strong> ${companyName}</p>` : ''}
                 <p><strong>Email:</strong> <a href="mailto:${email}">${email}</a></p>
                 <p><strong>Message:</strong></p>
                 <p>${message}</p>`,
        });

        return { success: true, message: "Email sent successfully!" };

      } catch (error) {
        // ... error handling
      }
    },
  }),
};
This shows how easily you can pass and process additional data through the type-safe action.
Conclusion
You have now successfully bridged the gap between your frontend form and a secure backend process. Your contact form is fully operational!
Key Takeaways:
- Third-party services like Formspree offer a very fast way to handle form submissions with minimal setup.
- Astro Actions provide a powerful, type-safe, and integrated method for adding server-side logic to your Astro project without needing a separate backend.
- Using an email delivery service like Resend is standard practice for sending emails reliably from a server.
- Environment variables (
.env) are essential for securely managing API keys and other secrets, and Astro helps prevent them from being exposed on the client side. - Reusing a Zod schema for both client and server validation ensures consistency and is a hallmark of a robust, modern application.
Up Next:
With the contact form complete, we'll now turn to the second advanced feature of this module: site search. In the next lesson, you will learn how to generate a JSON search index from your content collections during the build process, laying the groundwork for a fast, client-side search experience.