Hello again! In our last lesson, you did a fantastic job implementing smooth CSS transitions for interactive elements, which is a hallmark of a polished user interface. We made buttons and links feel more responsive and refined.
Today, we're taking that concept of smooth animation to the next level. Instead of animating individual components, we will animate the transitions between entire pages. This lesson is the final one in our Styling and Professional Design module. The learning outcome is to leverage the Astro View Transitions API to create smooth, animated page transitions. This will give your multi-page application the fluid, instant feel of a single-page application (SPA), directly contributing to the "premium" and "high-performance" experience you're aiming for.
Part 1: What are View Transitions?
In a traditional multi-page website, clicking a link triggers a full browser refresh. The screen goes white, and then the new page loads. This can feel slow and disjointed. You're familiar with how SPAs solve this by updating the page content with JavaScript without a full refresh, but that comes with its own complexity.
Astro's View Transitions API offers the best of both worlds. It uses a new browser API to intelligently animate the changes between two pages. It captures a "snapshot" of the old page, loads the new one, and then creates a seamless animated transition between the two states.

This approach preserves the simplicity and performance of Astro's static-first architecture while delivering the fluid user experience of an SPA.
Part 2: Enabling View Transitions with a Single Component
One of the most powerful features of Astro is how simple it is to get started with view transitions. It often takes just two lines of code to enable site-wide, client-side navigation.
To get started, we'll follow a quick tutorial from the official Astro documentation.
Tutorial - Extend with View Transitions - Astro Docs
The official Astro tutorial 'Extend with View Transitions' provides the most direct path to enabling this feature. We will start by implementing the first, most impactful step.
Please read the section titled 'Add the router'. This short section will guide you through importing the component and adding it to your base layout.
As the guide explains, all you need to do is edit your src/layouts/BaseLayout.astro file:
- Import the
ViewTransitionscomponent in the frontmatter script. - Add the
<ViewTransitions />component inside the<head>tag.
// src/layouts/BaseLayout.astro
---
import { ViewTransitions } from 'astro:transitions';
import Header from '../components/Header.astro';
import Footer from '../components/Footer.astro';
import '../styles/global.css';

const { pageTitle } = Astro.props;
---
<html lang="en">
  <head>
    <meta charset="utf-8" />
    <link rel="icon" type="image/svg+xml" href="/favicon.svg" />
    <meta name="viewport" content="width=device-width" />
    <meta name="generator" content={Astro.generator} />
    <title>{pageTitle}</title>

    {/* Add this component! */}
    <ViewTransitions />

  </head>
  <body>
    <Header />
    <main>
      <slot />
    </main>
    <Footer />
  </body>
</html>
That's it! Now, when you navigate between pages on your site, you will see a subtle cross-fade animation instead of a harsh full-page reload.
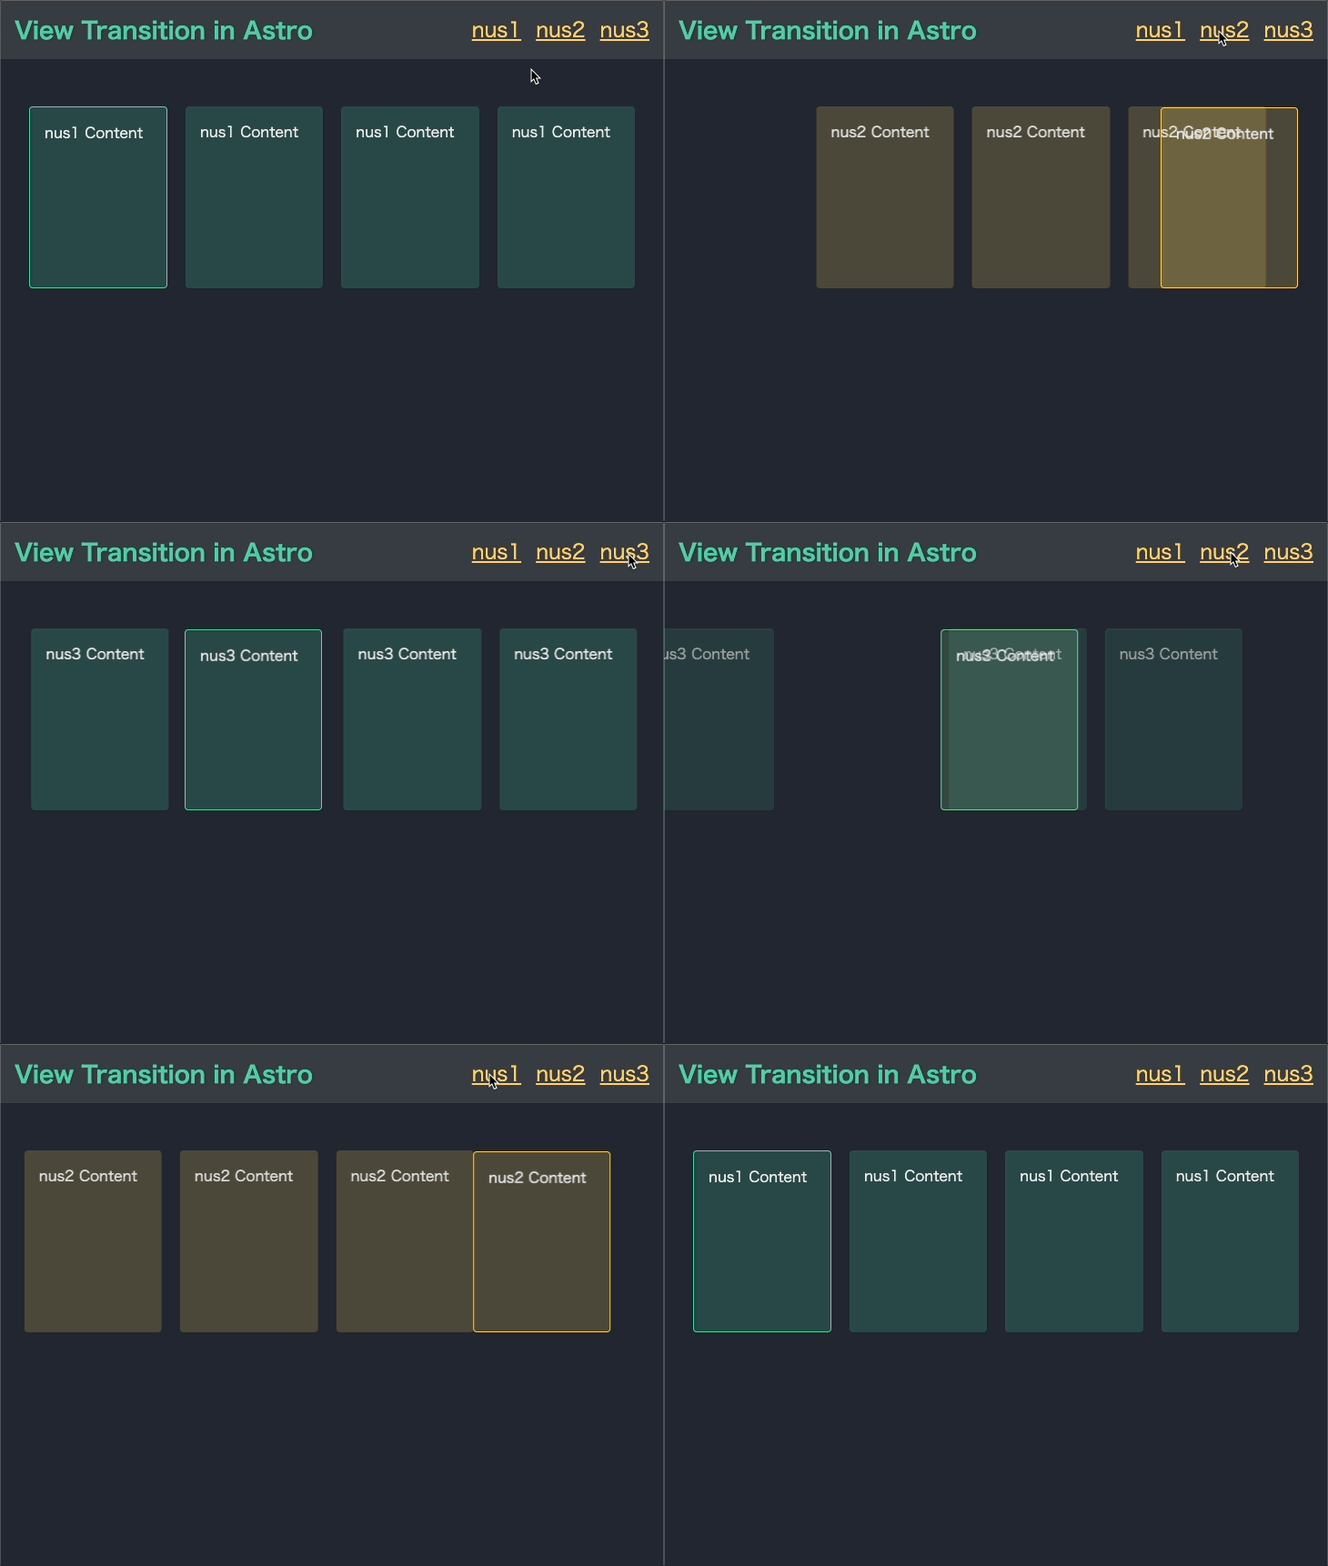
A Quick Note on Naming: In some older articles or documentation (like the second resource for this lesson), you might see a component named <ClientRouter />. This was the original name for the View Transitions component in older Astro versions. The current and correct component to use is <ViewTransitions />.
Part 3: Handling Scripts During Navigation
When Astro handles navigation on the client, it swaps out the content of the <body> but doesn't re-execute all scripts by default. This is a performance optimization, but it means that any JavaScript you have for event listeners (like for a mobile menu toggle or a theme switcher) will break after the first page navigation.
Astro provides a set of lifecycle events to solve this problem. The most common one you'll use is astro:page-load, which fires after every page transition.
Let's see how to fix this.
Tutorial - Extend with View Transitions - Astro Docs
The same Astro tutorial also covers how to update your scripts to work correctly with client-side navigation. This is a critical step for any interactive site.
Please read the section 'Update scripts'. Focus on how the example wraps the event listener for the hamburger menu inside a listener for the astro:page-load event. This is the pattern you will use for your own scripts.
The key pattern is to wrap any code that adds event listeners inside a document.addEventListener('astro:page-load', () => { ... });.
For example, if you had a script for a mobile menu:
// This script might be in a <script> tag in your Header.astro

// Original code that breaks after navigation
document.querySelector('.hamburger-menu').addEventListener('click', () => {
  document.querySelector('.nav-links').classList.toggle('expanded');
});

// Corrected code that works with View Transitions
document.addEventListener('astro:page-load', () => {
  document.querySelector('.hamburger-menu').addEventListener('click', () => {
    document.querySelector('.nav-links').classList.toggle('expanded');
  });
});
By using astro:page-load, you ensure your setup code runs on the initial page load and after every subsequent client-side navigation.
Part 4: Crafting Custom Animations
The default fade is nice, but for a "premium" feel, you'll want more control. The View Transitions API provides directives to customize animations on a per-element basis.
Tutorial - Extend with View Transitions - Astro Docs
Let's return to the tutorial to learn how to customize the default transition effects. This will allow you to add more character and hierarchy to your page navigations.
Read the section 'Customize Transition animations'. Pay attention to the transition:animate directive and how it can be used with built-in animations like slide, and how to import and customize animations like fade.
There are two main ways to customize animations:
-
Using built-in animations: You can apply a different animation to any element using the
transition:animatedirective. For example, to make the main page title slide in:// In BaseLayout.astro or another page/layout <h1 transition:animate="slide">{pageTitle}</h1> -
Customizing an animation's properties: You can import an animation from
astro:transitionsand pass it to the directive with custom options. This is great for fine-tuning the duration or easing to match your design system.// In a blog post layout, for example --- import { fade } from 'astro:transitions'; const { frontmatter } = Astro.props; --- <BaseLayout pageTitle={frontmatter.title}> {/* ... other frontmatter ... */} <p transition:animate={fade({ duration: '0.8s' })}>{frontmatter.description}</p> {/* ... rest of the content ... */} </BaseLayout>
Part 5: Advanced Control for Production Sites
For a real-world project like your accounting website, you'll need a couple more tools in your belt.
Persisting Elements Across Pages (transition:persist)
Sometimes, you don't want an element to be replaced at all. Imagine a music player or a video that should continue playing as the user navigates. The transition:persist directive tells Astro to keep the element and its state.
This is especially powerful for interactive islands. Since you have a background in React, consider a scenario where you have a complex React component with its own internal state. If that component exists on both the old and new pages, adding transition:persist will prevent it from re-rendering, preserving its state.
// src/components/MyInteractiveCalculator.jsx
// (A React component with internal state using useState)

// src/pages/page-one.astro
<MyInteractiveCalculator client:load transition:persist />

// src/pages/page-two.astro
<MyInteractiveCalculator client:load transition:persist />
When navigating between page-one and page-two, the calculator component will not be destroyed and recreated; its state will remain intact.
Opting Out of Transitions (data-astro-reload)
Not every link should trigger a client-side transition. For example, if you link to a PDF file or an external site, you need a standard browser navigation. You can force a full-page reload on any link by adding the data-astro-reload attribute.
<!-- This link will use the View Transition animation -->
<a href="/services">Our Services</a>

<!-- This link will force a full browser refresh -->
<a href="/reports/annual-report-2024.pdf" data-astro-reload>Download PDF Report</a>
Test your understanding!
For the accounting website, you have a header that is present on every page. To create a stable, professional feel, you decide that the header should not participate in the page transition animation (i.e., it shouldn't fade out and back in). How would you achieve this?
Show answer
You would use the transition:persist directive on the header component within your BaseLayout.astro file.
// src/layouts/BaseLayout.astro
---
import Header from '../components/Header.astro';
import { ViewTransitions } from 'astro:transitions';
// ...
---
<html>
  <head>
    <ViewTransitions />
    {/* ... */}
  </head>
  <body>
    <Header transition:persist />
    <main>
      <slot />
    </main>
    {/* ... */}
  </body>
</html>
By adding transition:persist to the <Header />, you instruct Astro to keep this component in place during page navigations, preventing it from being animated and creating a stable anchor point for the user.
Conclusion
Excellent work! You've just unlocked one of Astro's most compelling features. By implementing View Transitions, you've bridged the gap between performant static sites and fluid single-page applications, adding a significant layer of professional polish that will set your project apart.
Key Takeaways:
- Enabling View Transitions: Simply add the
<ViewTransitions />component to your base layout's<head>to get site-wide, animated page navigations. - Script Lifecycle: Client-side navigation requires you to re-initialize scripts. Use the
astro:page-loadevent to reliably run your JavaScript after every navigation. - Custom Animations: Use the
transition:animatedirective to apply different built-in animations (fade,slide) or to customize their properties for a unique feel. - Persisting State: The
transition:persistdirective is a powerful tool for keeping elements (and their state) alive across navigations, perfect for media players or complex interactive components. - Opting Out: Use the
data-astro-reloadattribute on links to force a traditional full-page refresh when needed.
Up Next:
This lesson concludes the module on styling and design. You now have the tools to make your site not only look good but also feel great to use. In our next module, SEO and Web Accessibility, we'll shift our focus to making your site discoverable and usable by everyone. We'll start by creating a reusable SEO component to manage meta tags, canonical URLs, and other critical data for search engines.