Introduction
In our previous lessons, we successfully architected the Layer 3 topology for Aperture Logistics. We defined a centralized routing model using a Layer 3 switch, planned the placement of all Switched Virtual Interfaces (SVIs) to act as gateways for our VLANs, and established how the network will connect to the outside world. The result is a fully functional, routed network where any device can communicate with any other device, regardless of its VLAN.
While functional, this open connectivity presents a significant security risk. Our goal is not just to enable communication but to control it. This lesson directly addresses that need. The learning outcome is to design the inter-VLAN security policies using Access Control Lists (ACLs).
We will introduce ACLs as the fundamental tool for network security, explore how they work, and then translate high-level security requirements into specific, line-by-line ACL configurations that can be applied to our SVIs. You'll learn how to move from a written policy, like "The Finance department can't access the Facilities network," to the exact Cisco CLI commands required to enforce it.
1. ACL Fundamentals: The "What" and "Why"
An Access Control List (ACL) is a sequence of rules, known as Access Control Entries (ACEs), that are processed in order from top to bottom. Each rule either permits or denies traffic based on a set of criteria. On a Layer 3 switch, ACLs are the mechanism we use to filter traffic as it gets routed between VLANs.
Before we start writing them, let's cover the foundational concepts.
Access Control Lists | Cisco CCNA 200-301
This video from CertBros provides a clear, concise overview of what ACLs are, the different types, and the most critical concepts like rule order and the 'implicit deny'.
Watch from the beginning to 04:32. Focus on these key points: Purpose: How ACLs identify and filter traffic. Processing: The top-down, first-match logic of ACLs. Implicit Deny: The invisible 'deny all' rule at the end of every ACL. Types: The difference between Standard (source IP only) and Extended (source, destination, protocol, and port) ACLs.
To summarize the key takeaways:
- Standard ACLs: Filter only on the source IP address. They are less flexible and are generally used for simple tasks like restricting management access.
- Extended ACLs: Filter on source and destination IP, protocol (TCP, UDP, ICMP), and source/destination port numbers. This granular control makes them the tool of choice for implementing detailed inter-VLAN security policies. We will focus almost exclusively on extended ACLs.
- Named vs. Numbered: You can identify an ACL with a number (e.g.,
101for an extended ACL) or a descriptive name (e.g.,FINANCE_OUTBOUND). Best practice, especially in a large architecture, is to use named ACLs for clarity. - The Golden Rules:
- Rules are checked sequentially.
- The first rule that matches the packet is applied.
- Processing stops after the first match.
- If no rule matches, the packet is dropped due to the implicit deny any rule at the end.
For a quick reference, the article "Advanced IPv4 Access Control Lists" provides a solid text summary of these fundamentals.
Advanced IPv4 Access Control Lists (CCNA 200-301)
This article by AlphaPrep is a great resource to bookmark. For now, let's just review the introductory section, which reinforces the concepts from the video.
Read the section 'ACL Fundamentals: What, Why, and How'. It provides a table of ACL types and excellent context on top-down processing and the implicit deny.
2. Applying ACLs to Control Inter-VLAN Traffic
Now that we know what ACLs are, where do we apply them? In our L3 distribution design, the perfect place is on the Switched Virtual Interfaces (SVIs). Since the SVI is the gateway for its VLAN, any traffic attempting to leave its own VLAN to be routed to another must pass through its SVI. By placing an ACL on the SVI, we intercept and filter all inter-VLAN traffic.
When you apply an ACL to an interface, you must specify a direction: in or out.
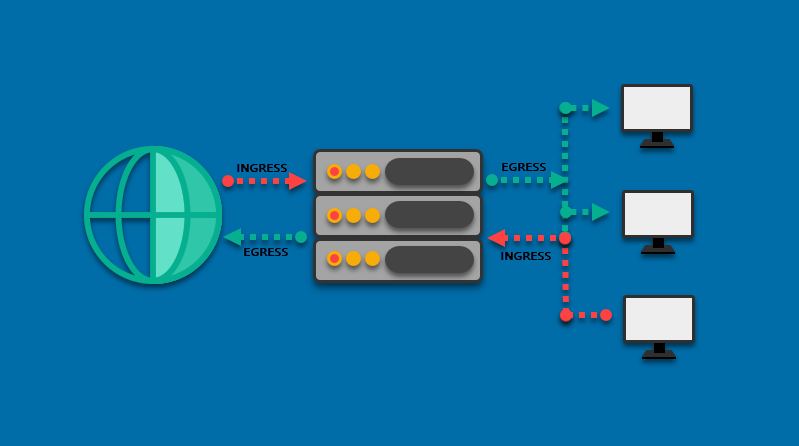
- Inbound (
in): The ACL is checked as soon as a packet arrives at the SVI, before the switch makes a routing decision. - Outbound (
out): The ACL is checked after the switch has made a routing decision and is about to send the packet out toward its destination VLAN's SVI.
Best Practice: For Extended ACLs, the rule of thumb is to apply them as close to the source of the traffic as possible. In our inter-VLAN routing scenario, this means applying the ACL inbound on the SVI of the source VLAN. This is more efficient because it filters unwanted traffic before the switch wastes CPU cycles on a routing lookup.
This next video demonstrates this principle in action.
Network#20: Control Inter-VLAN routing by ACLs
This practical demonstration from SASiteNet shows how to configure an extended ACL to block traffic from one VLAN (Sales) to another (Server Farm) by applying it inbound on the Sales VLAN's SVI.
Watch from 02:34 to 07:26. Pay close attention to: The Goal: Block VLAN 200 (Sales) from reaching VLAN 50 (Servers). The ACL: How he defines a rule to deny the source network and a final 'permit ip any any' to allow other traffic. The Application: He applies the ACL to interface Vlan 200 in the inbound direction. The Verification: He uses show access-list to see the 'hit counts' on the rules, confirming the ACL is working.
3. Translating Policy to Configuration
This is where your work as an architect comes into play. You'll be given a set of business or security requirements, which you must translate into a precise sequence of ACL commands.
Let's use the Aperture Logistics VLAN plan to work through an example.
Scenario: We need to implement the initial security policy for the Finance and Operations departments.
-
Network Info:
- Finance VLAN 115:
10.15.0.0/23 - Operations VLAN 120:
10.20.0.0/22 - Servers VLAN 50:
10.50.0.0/22
- Finance VLAN 115:
-
Security Policy:
- The Finance department must be able to access all servers in the Servers VLAN.
- The Finance department is strictly prohibited from accessing any resources in the Operations VLAN.
- All other traffic from the Finance department is permitted (for now).
We will create an ACL named FINANCE_IN and apply it inbound to interface Vlan115.
Step 1: Permit Required Traffic
The first rule should explicitly permit what is allowed. We need to allow traffic from the Finance subnet to the Servers subnet.
The wildcard mask is the inverse of the subnet mask.
- For Finance (
/23or255.255.254.0), the wildcard is0.0.1.255. - For Servers (
/22or255.255.252.0), the wildcard is0.0.3.255.
If you need a refresher on wildcard masks, refer to the "Calculating and Using Wildcard Masks" section in the AlphaPrep article we looked at earlier.
The command would be:permit ip 10.15.0.0 0.0.1.255 10.50.0.0 0.0.3.255
Step 2: Deny Prohibited Traffic
The second rule should deny what is forbidden. We need to block traffic from Finance to Operations.
The command would be:deny ip 10.15.0.0 0.0.1.255 10.20.0.0 0.0.3.255
Step 3: Allow Everything Else
Finally, to override the implicit deny, we add a rule to permit all other traffic originating from the Finance VLAN.
The command would be:permit ip any any
Putting It All Together
Here is the complete configuration block for our policy:
! Enter global configuration mode
conf t

! Create the named extended ACL
ip access-list extended FINANCE_IN

  ! Add a remark for documentation
  remark ACL for traffic originating from the Finance VLAN

  ! 10: Permit access to the Server VLAN
  permit ip 10.15.0.0 0.0.1.255 10.50.0.0 0.0.3.255

  ! 20: Deny access to the Operations VLAN
  deny ip 10.15.0.0 0.0.1.255 10.20.0.0 0.0.3.255

  ! 30: Permit all other traffic
  permit ip any any

! Apply the ACL to the Finance SVI
interface Vlan115
  ip access-group FINANCE_IN in

end
The case study at the end of the AlphaPrep article provides another excellent, real-world example of building ACLs from requirements for multiple VLANs.
Advanced IPv4 Access Control Lists (CCNA 200-301)
Let's revisit the 'Advanced IPv4 Access Control Lists' article and look at the final case study.
Read the section 'Case Study: Branch Office Security with Multiple ACLs'. This demonstrates how different policies for Finance, Guest, and Operations VLANs are translated into three separate ACLs and applied to their respective SVIs.
4. Practical Design Exercise: Securing the Management VLAN
Now, let's have you design a policy. This is one of the most important security controls in any network: restricting access to the dedicated network management VLAN.
-
Network Info:
- IT Admins VLAN 110:
10.10.0.0/24 - Network Management VLAN 99:
10.99.0.0/24
- IT Admins VLAN 110:
-
Security Policy:
- Only users in the IT Admins VLAN are allowed to initiate SSH connections (TCP port 22) to devices in the Network Management VLAN.
- Devices in the Network Management VLAN (like monitoring servers) must be able to send ICMP echo requests (pings) to any other device on the network and receive replies.
- No other traffic should be allowed to be initiated from other VLANs into the Management VLAN.
Your task is to design an extended ACL named MGMT_IN that will be applied inbound on interface Vlan99. Think through the rules you would need.
Click here to see the solution and explanation.
Here is a well-structured ACL to enforce the policy.
ip access-list extended MGMT_IN
 remark --- ACL to protect the Network Management VLAN ---

 remark 10: Permit SSH initiated from IT Admins
 permit tcp 10.10.0.0 0.0.0.255 10.99.0.0 0.0.0.255 eq 22

 remark 20: Permit ICMP replies back into the VLAN (for pings initiated from MGMT)
 permit icmp any any echo-reply

 remark 30: Permit return traffic for any other established TCP connections
 permit tcp any any established

 remark 40: Explicitly deny and log all other traffic
 deny ip any any log
Explanation of the rules:
- Rule 10 (
permit tcp ... eq 22): This is straightforward. It allows TCP traffic from the IT Admins source network to the Management destination network, specifically for port 22 (SSH). - Rule 20 (
permit icmp ... echo-reply): This rule is crucial for allowing monitoring tools to work. A monitoring server in VLAN 99 sends anecho-request. The reply, anecho-reply, comes back into VLAN 99. This rule permits that return traffic. - Rule 30 (
permit tcp ... established): This is a powerful rule. Theestablishedkeyword checks if the TCP packet has the ACK or RST bit set, which indicates it is part of an existing conversation. This allows devices inside VLAN 99 to initiate connections (e.g., to download updates) and receive the return traffic, without allowing new connections to be initiated from the outside. - Rule 40 (
deny ip any any log): We explicitly deny everything else. Usinglogat the end creates a syslog message for every packet that is dropped by this rule, which is invaluable for troubleshooting and identifying unauthorized access attempts. This is much better than relying on the invisible implicit deny.
Conclusion
Today, you've taken a major step from network connectivity to network security. You've learned how to use extended Access Control Lists as a precise tool to enforce security policies in a multi-VLAN environment.
Key Takeaways:
- ACLs are the foundation of network security, acting as filters on routed interfaces.
- Extended Named ACLs are the best practice for creating clear, granular, and manageable inter-VLAN security policies.
- ACLs are applied to SVIs to control traffic between VLANs. The best practice is to apply them inbound on the source VLAN's SVI.
- A security policy is a list of requirements that you must translate into a specific sequence of permit and deny statements.
- The
logandestablishedkeywords are powerful tools for troubleshooting and creating more secure, stateful-like filtering rules.
Preview of the Next Lesson:
We have designed the ACLs on paper. The next logical step is to implement and verify them. In our next lesson, we will focus on applying ACLs and verifying their operation. We will dive deeper into the importance of statement order, explore common troubleshooting scenarios, and use show commands to confirm that our security policies are working exactly as intended.