Hello! Welcome back to our Django journey.
In the last lesson, we created our first function-based view. It successfully prepared some dummy task data, but when we tried to display it, we ran into a TemplateDoesNotExist error. This was intentional! It perfectly highlighted the separation between your application's logic (the view) and its presentation (the template).
Today, we'll fix that error and bring your data to life on a webpage. This lesson is all about the learning outcome: Use the Django Template Language to render dynamic HTML pages. You'll learn how to create HTML files that can display data from your views, use loops and logic, and create a consistent layout for your entire application.
1. Fixing the TemplateDoesNotExist Error
First, let's understand why the error occurred. When your view called render(request, 'tasks/task_list.html', context), Django searched for a template at that specific path but couldn't find one. By default, Django looks for a templates subdirectory inside each of your installed apps.
To fix this, we need to create the file in the right place. A common best practice is to namespace your templates by creating a subdirectory with the same name as the app. This prevents potential name clashes if another app has a template with the same name.
Action Steps:
- Inside your
tasksapp directory, create a new folder namedtemplates. - Inside that new
templatesfolder, create another folder namedtasks. - Finally, inside the
tasks/templates/tasks/directory, create a new file namedtask_list.html.
Your project structure should now look like this:
your_project/
├── tasks/
│   ├── migrations/
│   ├── templates/
│   │   └── tasks/
│   │       └── task_list.html  <-- Create this file
│   ├── __init__.py
│   ├── admin.py
│   ├── apps.py
│   ├── models.py
│   ├── tests.py
│   ├── urls.py
│   └── views.py
└── ...
Now, add some simple HTML to task_list.html just to confirm it's working:
<!-- tasks/templates/tasks/task_list.html -->
<h1>My Tasks</h1>
<p>The template is working!</p>
With your development server running (python manage.py runserver), refresh your browser at http://127.0.0.1:8000/. The TemplateDoesNotExist error should be gone, and you should see your "My Tasks" heading.
2. The Django Template Language (DTL)
Now that we can render a static HTML page, let's make it dynamic. The Django Template Language (DTL) allows you to embed Python-like logic and variables directly into your HTML.
DTL has two main types of syntax:
- Variables:
{{ variable_name }}. These are used to output the value of a variable from the context dictionary your view passed. - Tags:
{% tag_name %}. These are used for logic, like loops (for) and conditionals (if), or other commands likeextendsorinclude.
Let's watch a short video that provides a great overview of this syntax and shows how to use a for loop to render a list of items.
Rendering Data to Templates | Template Tags | Django (3.0) Crash Course Tutorials (pt 8)
The video "Rendering Data to Templates" by Dennis Ivy gives a clear and concise demonstration of using template variables and tags to display dynamic data from a view.
Watch from the beginning to 03:32. Pay attention to the two types of template syntax ({{ ... }} and {% ... %}) and how a for loop is used to iterate over a list of products passed from the view.
3. Displaying Your Tasks
Let's apply what you just saw to our task_list.html file. Recall from the last lesson that your tasks/views.py passes a context dictionary like this: context = {'tasks': dummy_tasks}. This means we have a variable named tasks available in our template.
Modify your task_list.html to loop through this list and display each task's title.
<!-- tasks/templates/tasks/task_list.html -->

<h1>My Tasks</h1>

<ul>
    {% for task in tasks %}
        <li>{{ task.title }}</li>
    {% endfor %}
</ul>
Let's break this down:
{% for task in tasks %}: This starts a loop.tasksis the list from our context, andtaskis the variable name for each item in the list during each iteration.<li>{{ task.title }}</li>: Inside the loop,taskis a dictionary (e.g.,{'id': 1, 'title': 'Learn Django Views', ...}). We access the value of the'title'key using dot notation:task.title. DTL is flexible and allows dot notation for dictionary lookups, attribute access, and method calls.{% endfor %}: This closes theforloop tag.
Refresh your browser. You should now see the list of task titles from your dummy_tasks list in the view!
Test your understanding!
Modify the <li> element in your template to also display whether a task is completed. For example, "Learn Django Views - Completed: True".
Show answer
You would change the line inside the loop to:<li>{{ task.title }} - Completed: {{ task.completed }}</li>
4. Template Inheritance: Don't Repeat Yourself (DRY)
As you build more pages (like an "About" page or a "Task Detail" page), you'll find yourself copying the same HTML boilerplate (<!DOCTYPE html>, <head>, <body>, navigation bars, etc.) over and over. This violates a core programming principle: Don't Repeat Yourself (DRY).
Django's solution is template inheritance. You create a base template with the common layout and define "blocks" that child templates can override.
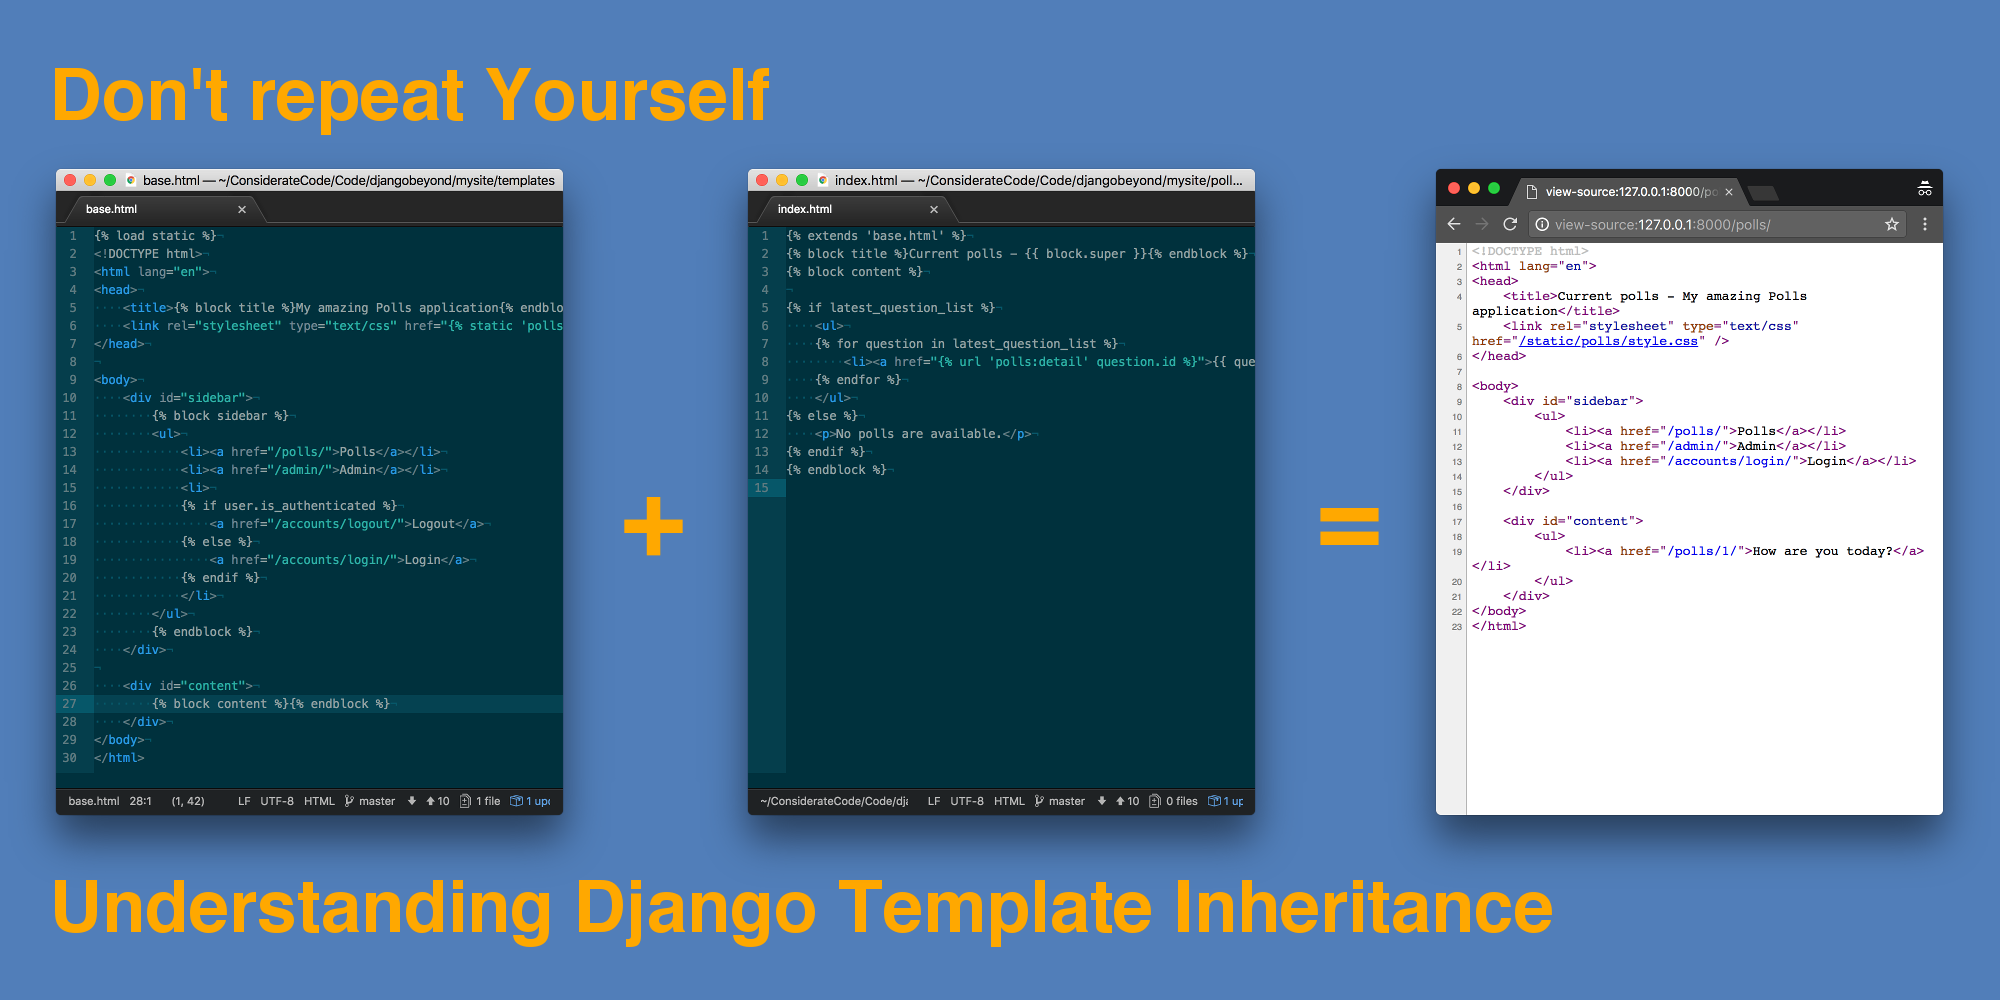
Let's put this into practice by watching a detailed walkthrough. This video will show you how to set up a project-level templates folder (a good practice for base templates shared by the whole project), create a base.html, and use {% extends %} and {% block %}.
Rendering Dynamic HTML - Day 3 - Django Bootcamp
The video "Rendering Dynamic HTML" by CodingEntrepreneurs provides a comprehensive guide to setting up and using template inheritance.
Watch from 04:35 to 07:15 to see how to configure a project-level templates directory. Then, watch from 10:58 to 16:11 for a step-by-step demonstration of creating a base.html file and using {% extends %} and {% block %} in a child template.
Following the video, let's implement this.
Action Steps:
-
Configure
settings.py: In your project'ssettings.pyfile, find theTEMPLATESsetting. Modify theDIRSlist to tell Django to look in a project-leveltemplatesfolder.# your_project/settings.py import os # Make sure os is imported TEMPLATES = [ { 'BACKEND': 'django.template.backends.django.DjangoTemplates', 'DIRS': [os.path.join(BASE_DIR, 'templates')], # Add this line 'APP_DIRS': True, 'OPTIONS': { # ... }, }, ] -
Create
base.html: At the root of your project (the same level asmanage.py), create a folder namedtemplates. Inside this new folder, create a file namedbase.html.<!-- templates/base.html --> <!DOCTYPE html> <html lang="en"> <head> <meta charset="UTF-8"> <meta name="viewport" content="width=device-width, initial-scale=1.0"> <title>{% block title %}Task Manager{% endblock %}</title> </head> <body> <main> {% block content %} {% endblock %} </main> </body> </html>Here,
{% block title %}and{% block content %}are placeholders. We've provided a default title "Task Manager". -
Update
task_list.html: Now, modify yourtask_list.htmlto inherit from this base template.<!-- tasks/templates/tasks/task_list.html --> {% extends "base.html" %} {% block title %}My Task List{% endblock %} {% block content %} <h1>My Tasks</h1> <ul> {% for task in tasks %} <li>{{ task.title }} - {% if task.completed %} Done {% else %} Pending {% endif %} </li> {% endfor %} </ul> {% endblock %}Notice a few things:
{% extends "base.html" %}must be the very first line.- We are overriding both the
titleandcontentblocks. - I've also added a simple
{% if %}tag to make the completion status more readable. This demonstrates how you can embed conditional logic directly in the template.
Refresh your browser. The page should look similar, but now the page title in your browser tab should say "My Task List", and if you "View Page Source", you'll see the full HTML from base.html.
Conclusion
Great work! You've bridged the gap between your backend logic and frontend presentation. This is a fundamental skill for any full-stack developer. You took a TemplateDoesNotExist error and turned it into a dynamic, reusable page structure.
Key Takeaways:
- Django templates are HTML files that live in a
templatesdirectory inside your apps or project root. - The Django Template Language (DTL) uses
{{ variable }}to display data and{% tag %}for logic (for,if). - Template inheritance with
{% extends %}and{% block %}is the key to creating a consistent and maintainable site layout (the DRY principle). - You can separate your presentation logic (like an
ifstatement for display purposes) from your business logic (which stays in the view).
Preview of the Next Lesson:
In this lesson, we passed a simple list of dictionaries to our template. In the next lesson, "Pass context data from views to templates," we'll explore this in more depth. We'll get ready to work with real database objects and see how to pass more complex data structures from the view to the template, and introduce template filters to easily format that data.