Hello! Welcome to the final lesson in our "Building the Task Manager Project" module.
In our previous lessons, you've done an excellent job building the complete CRUD (Create, Read, Update, Delete) functionality for our task management application. Users can now manage their tasks from start to finish. However, the entry point to our app is still just a basic list.
This lesson ties everything together by focusing on a key aspect of user experience: implementing a user-specific dashboard that serves as the main project landing page. We will transform our simple task list into a proper, personalized dashboard that greets the user and provides a summary of their activity.
What is a Dashboard?
In web applications, a dashboard is a user's home base. It's the first thing they see after logging in and it provides a high-level overview of their data and quick access to common actions.
For our task manager, a good dashboard should:
- Greet the user by name.
- Show a summary, such as the number of pending tasks.
- Display the list of their tasks.
- Provide a clear way to add a new task.
Let's build it!
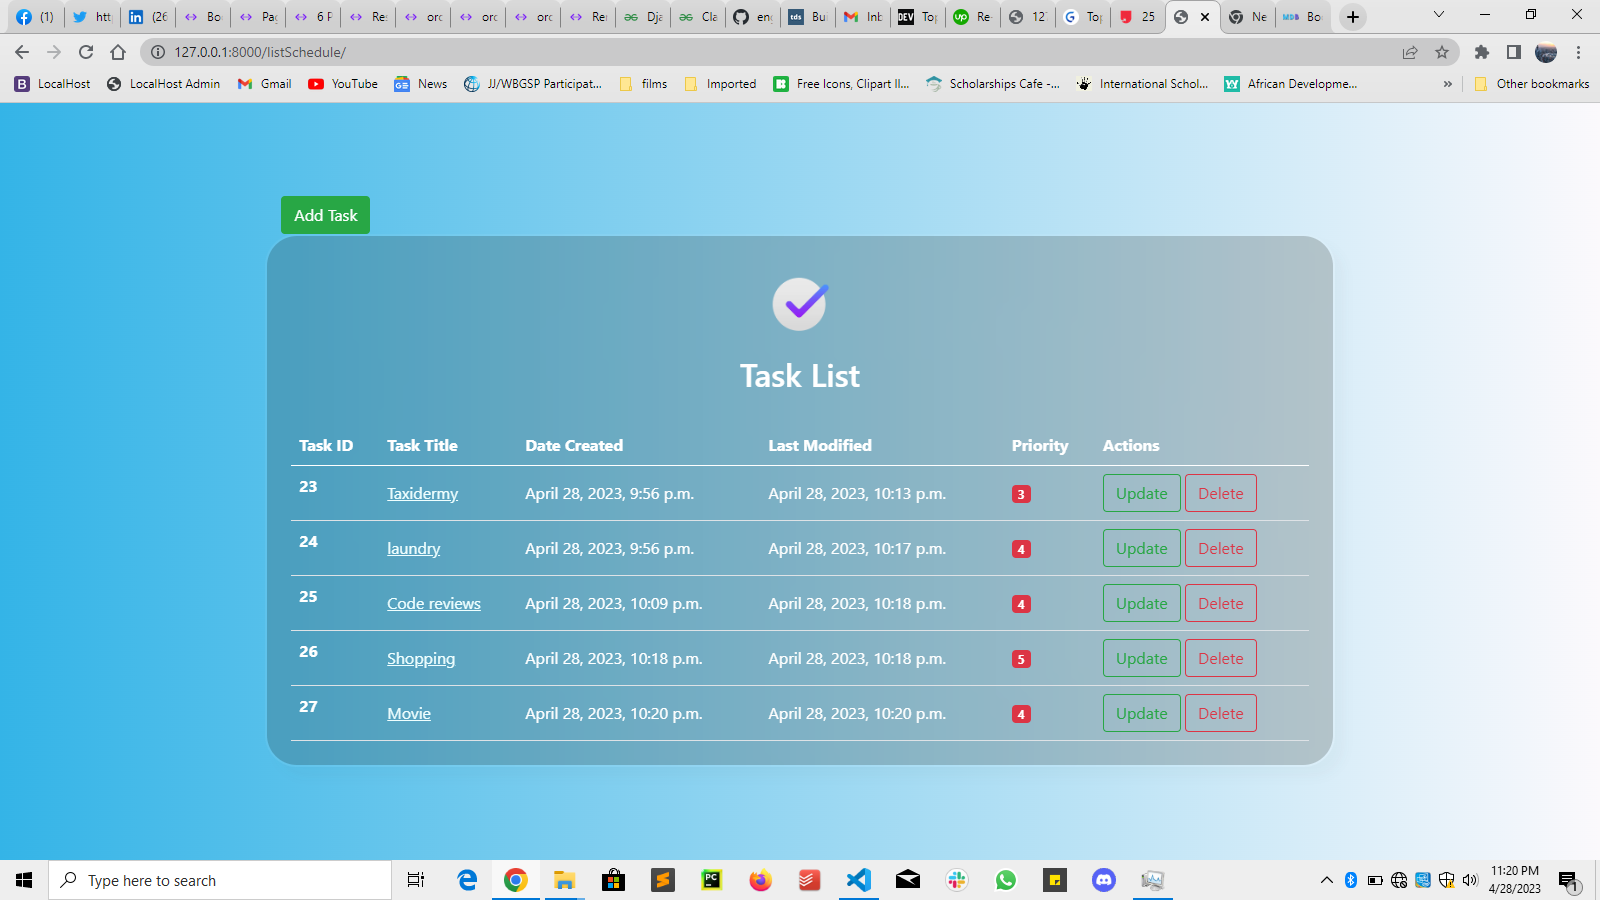
Step 1: Making the Task List the Main Landing Page
Right now, a user probably has to navigate to a specific URL like /tasks/ to see their list. We want this list to be the very first page they see when they visit the site's root URL (e.g., http://127.0.0.1:8000/). This involves a two-part URL configuration.
First, we need to ensure our project's main urls.py file directs traffic from the root URL to our application's urls.py file.
Get Done ✅ : A step-by-step guide in building a Django To ...
The article 'Get Done ✅' explains how to connect the project's URLs to an app's URLs. We will follow this pattern.
Find the subsection 'Project-Level urls.py (mysite/urls.py)'. Notice the line path('', include('todoList.urls')). This is the key piece that routes all traffic from the base URL to our app.
Make sure your project-level urls.py (e.g., myproject/urls.py) looks similar to this, replacing todoList with the name of your app:
# In myproject/urls.py
from django.contrib import admin
from django.urls import path, include

urlpatterns = [
    path('admin/', admin.site.urls),
    path('accounts/', include('django.contrib.auth.urls')), # Django's auth URLs
    path('', include('your_app.urls')), # Routes root URL to your app
]
Next, we need to configure our app-level urls.py to map the empty path '' to our task list view.
Get Done ✅ : A step-by-step guide in building a Django To ...
The same article shows how to set up the app-level URLs. Let's look at how it maps a view to the root path.
Now, examine the 'Step 5: Configure URLs' section for the app. The first line in urlpatterns is path('', TodoListView.as_view(), name='todoList'). This maps the app's root URL to the TodoListView.
In your app-level urls.py (e.g., your_app/urls.py), ensure your TaskList view is associated with the empty path. Your URL for the list should be named something intuitive, like tasks or task-list.
# In your_app/urls.py
from django.urls import path
from .views import TaskList, TaskCreate, TaskUpdate, TaskDelete

urlpatterns = [
    # This now serves as the landing page/dashboard
    path('', TaskList.as_view(), name='tasks'),
    path('task-create/', TaskCreate.as_view(), name='task-create'),
    path('task-update/<int:pk>/', TaskUpdate.as_view(), name='task-update'),
    path('task-delete/<int:pk>/', TaskDelete.as_view(), name='task-delete'),
]
With these changes, when a logged-in user visits your site's home page, Django will now correctly serve the TaskList view.
Step 2: Enhancing the View with Dashboard Data
A simple list of tasks is good, but a dashboard is better. Let's add a count of incomplete tasks to give the user a quick summary. We can do this by overriding the get_context_data method in our TaskList view.
This method allows us to add any extra information we want into the template's context.
Get Done ✅ : A step-by-step guide in building a Django To ...
Let's see a practical example of how to add custom data to a ListView's context.
In 'Step 4: Define Views', look at the TodoListView. Focus on the get_context_data method. See how it first calls super() to get the default context, then adds a new key, incomplete_tasks_count, before returning the modified context.
Now, update your TaskList view in your_app/views.py. We already have the LoginRequiredMixin and get_queryset for security. Let's add get_context_data:
# In your_app/views.py
from .models import Task

class TaskList(LoginRequiredMixin, ListView):
    model = Task
    context_object_name = 'tasks' # Use 'tasks' in the template
    template_name = 'your_app/task_list.html'

    def get_context_data(self, **kwargs):
        # Call the base implementation first to get a context
        context = super().get_context_data(**kwargs)

        # Add in a QuerySet of all the tasks for the current user
        context['tasks'] = context['tasks'].filter(user=self.request.user)

        # Add the count of incomplete tasks
        context['count'] = context['tasks'].filter(complete=False).count()

        # You can add any other data you want here
        # For example, to allow searching:
        search_input = self.request.GET.get('search-area') or ''
        if search_input:
            context['tasks'] = context['tasks'].filter(
                title__icontains=search_input)

        context['search_input'] = search_input

        return context
Here's what's happening in get_context_data:
context = super().get_context_data(**kwargs): We get the default context from the parentListView. This includes thetasksqueryset.context['tasks'] = context['tasks'].filter(user=self.request.user): We ensure the tasks are filtered by the current user. This is a robust way to enforce data separation.context['count'] = context['tasks'].filter(complete=False).count(): We take that user-specific task list, filter it further for incomplete tasks (complete=False), and get the count. We add this count to the context with the key'count'.- The search logic is an extra enhancement. It checks if there's a 'search-area' parameter in the URL (from a form submission), and if so, filters the tasks by title. This makes your dashboard even more interactive.
Test your understanding!
How would you modify the get_context_data method to also add a personalized greeting message, like "Hello, [username]!" to the context?
Show answer
You would add another line to the method before the return statement:context['greeting'] = f"Hello, {self.request.user.username}!"
Then, in your template, you could display it using {{ greeting }}. Note that you can also access request.user.username directly in the template, so adding it to the context is optional but demonstrates the principle.
Step 3: Updating the Template to be a Dashboard
Finally, let's update task_list.html to use our new context data and look more like a dashboard.
Get Done ✅ : A step-by-step guide in building a Django To ...
The 'Get Done ✅' guide provides an excellent template that serves as a dashboard. It includes a user greeting, a task count, and a list of tasks with action links.
Find the template for task_list.html. Study how it's structured. Pay attention to how it displays the user's name ({{ request.user.username }}), the task count ({{ incomplete_tasks_count }}), and the button to add a new task.
Let's adapt this for our project. Modify your your_app/templates/your_app/task_list.html:
{% extends 'base.html' %}
{% block content %}

<div>
    <h3>Hello, {{ request.user.username }}</h3>
    <p>You have <i>{{ count }}</i> incomplete task{{ count|pluralize }}.</p>
    <a href="{% url 'logout' %}?next={% url 'login' %}">Logout</a>
</div>

<hr>

<div>
    <a href="{% url 'task-create' %}">Add New Task</a>
</div>

<!-- Simple Search Form -->
<form method="GET">
    <input type="text" name="search-area" value="{{ search_input }}">
    <input type="submit" value="Search">
</form>


<h3>Your Tasks</h3>
<table>
    <tr>
        <th>Task</th>
        <th></th>
        <th></th>
    </tr>
    {% for task in tasks %}
    <tr>
        <td>{{ task.title }}</td>
        <td><a href="{% url 'task-update' task.pk %}">Edit</a></td>
        <td><a href="{% url 'task-delete' task.pk %}">Delete</a></td>
    </tr>
    {% empty %}
    <tr>
        <td colspan="3">You have no tasks.</td>
    </tr>
    {% endfor %}
</table>

{% endblock content %}
Key features of this new template:
{{ request.user.username }}: Directly accesses the logged-in user's name from the request object, which is available in every template.{{ count }}: Displays the count of incomplete tasks we added inget_context_data.{{ count|pluralize }}: A handy Django filter that adds an "s" to "task" if the count is not 1.{% url 'task-create' %}: A clear call-to-action to add a new task.{% for task in tasks %}...{% empty %}: This loop either displays each task or shows a "You have no tasks" message if the list is empty, which is much better than a blank page.- Search Form: A simple form that submits a GET request to the same page, allowing the search logic in our
get_context_datato work.
Conclusion
Fantastic work! You have successfully transformed a simple data list into a dynamic, user-specific dashboard that serves as the main landing page for your application. This is a critical step in building a professional and user-friendly web application.
Key Takeaways:
- A dashboard acts as a personalized landing page, summarizing key information for the user.
- You can set the main landing page by mapping the root URL path (
'') in yoururls.pyconfiguration to a specific view. - The
get_context_datamethod in a Class-Based View is the perfect place to inject custom data (like counts, summaries, or search results) into your templates. - Well-structured templates can use this context data to create a rich and informative user interface.
Preview of the Next Module:
You have now completed the core functionality of your task manager project! The application is fully working. In the next module, "Enhancing the Application," we will move beyond core logic and focus on making the application look and feel great. Our first step will be to integrate a CSS framework like Bootstrap to professionally style the entire application.