Hello! Welcome to the first lesson of our "Enhancing the Application" module.
In the previous module, you successfully built a complete and functional task management application. Users can register, log in, and perform all CRUD operations on their own tasks. Your app has a solid foundation. Now, it's time to make it look professional.
This lesson is all about styling. We will integrate Bootstrap, a popular CSS framework, to transform your application's appearance from plain HTML into a modern, responsive, and visually appealing web app. Your experience with HTML and CSS will be a great asset here, as you'll see how a framework like Bootstrap can dramatically speed up the design process.
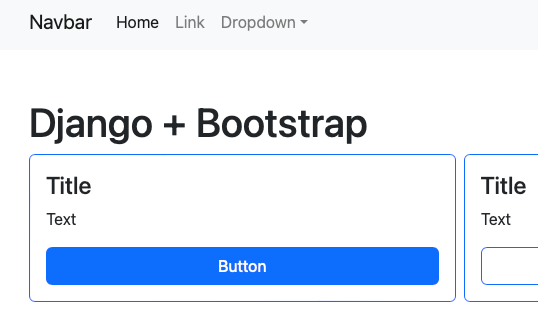
Why Use a CSS Framework?
Instead of writing custom CSS for every button, table, and form field, a framework like Bootstrap gives you pre-built components and a responsive grid system. This ensures:
- Consistency: All elements have a uniform look and feel.
- Speed: You can style your application in a fraction of the time.
- Responsiveness: Your application will look good on devices of all sizes, from desktops to mobile phones, with minimal extra effort.
We will explore two key ways to integrate Bootstrap into your Django project: using a Content Delivery Network (CDN) for quick setup, and then leveraging a powerful Django package to handle form styling automatically.
1. Integrating Bootstrap via CDN
The fastest way to add Bootstrap to a project is by linking to its files hosted on a Content Delivery Network (CDN). This involves adding a <link> tag for the CSS and a <script> tag for the JavaScript to your base template.
How to use Bootstrap with Django
The video 'How to use Bootstrap with Django' by Tony Teaches Tech provides a very clear and quick demonstration of adding Bootstrap via CDN. We'll follow this exact method.
Watch the video from 00:14 to 01:22. Pay close attention to which file is being edited (base.html) and where the CSS and JavaScript links are placed.
As shown in the video, open your project's main base template (base.html) and make the following changes:
-
Add the CSS link: Just before the closing
</head>tag, add the Bootstrap CSS link. This ensures the styles are loaded before the page content is rendered, preventing a flash of unstyled content.<!-- In base.html --> <head> ... <link href="https://cdn.jsdelivr.net/npm/bootstrap@5.3.2/dist/css/bootstrap.min.css" rel="stylesheet" integrity="sha384-T3c6CoIi6uLrA9TneNEoa7RxnatzjcDSCmG1MXxSR1GAsXEV/Dwwykc2MPK8M2HN" crossorigin="anonymous"> </head> -
Add the JavaScript link: Just before the closing
</body>tag, add the Bootstrap JavaScript bundle link. Placing it here allows the HTML content to load first, making the page feel faster. The JavaScript, which handles interactive components like dropdowns, can load afterward.<!-- In base.html --> <body> ... {% block content %} {% endblock %} ... <script src="https://cdn.jsdelivr.net/npm/bootstrap@5.3.2/dist/js/bootstrap.bundle.min.js" integrity="sha384-C6RzsynM9kWDrMNeT87bh95OGNyZPhcTNXj1NW7RuBCsyN/o0jlpcV8Qyq46cDfL" crossorigin="anonymous"></script> </body>
After adding these lines, your application won't look any different yet. We've loaded the library, but we haven't told any of our HTML elements to use it.
2. Applying Basic Bootstrap Classes
Bootstrap works by applying CSS classes to your HTML elements. Let's start with a few fundamental classes to immediately improve the layout and styling of your task manager.
The Container
The .container class is essential. It adds horizontal padding and centers your content, preventing it from touching the edges of the screen.
How to use Bootstrap with Django
The same video demonstrates this simple but effective change. Let's see how to apply the container class.
Watch from 01:41 to 02:23. The key action is wrapping the main body content in a <div> with the class 'container'.
In your base.html file, wrap the {% block content %} tag within a container div:
<!-- In base.html -->
<body>
    <div class="container">
        {% block content %}
        {% endblock content %}
    </div>
    ...
</body>
Now, refresh your application. You should see all your content is nicely centered with some breathing room on the sides.
Styling Tables and Buttons
Let's style the dashboard (task_list.html). We can make the task list and action buttons look much cleaner.
How to use Bootstrap with Django
This final clip from the video shows how to style tables and buttons using specific Bootstrap classes.
Watch from 02:23 to 05:18. Focus on the classes being added to the <table> element (table, table-bordered) and the button elements (btn, btn-success, btn-danger).
Now, open your task_list.html template and apply these classes:
- Style the table: Add the
tableclass to your<table>tag. - Style the "Add New Task" button: This is likely an
<a>tag. Add the classesbtnandbtn-primary. - Style the "Edit" and "Delete" buttons: Add
btn,btn-sm(for a smaller button), andbtn-warningto the "Edit" link, andbtn,btn-sm, andbtn-dangerto the "Delete" link.
Your task_list.html might look something like this:
{% extends 'base.html' %}
{% block content %}

<!-- ... user greeting and task count ... -->
<a class="btn btn-primary" href="{% url 'task-create' %}">Add New Task</a>

<hr>

<h3>Your Tasks</h3>
<table class="table">
    <tr>
        <th>Task</th>
        <th></th>
        <th></th>
    </tr>
    {% for task in tasks %}
    <tr>
        <td>{{ task.title }}</td>
        <td><a class="btn btn-sm btn-warning" href="{% url 'task-update' task.pk %}">Edit</a></td>
        <td><a class="btn btn-sm btn-danger" href="{% url 'task-delete' task.pk %}">Delete</a></td>
    </tr>
    {% empty %}
    <tr>
        <td colspan="3">You have no tasks.</td>
    </tr>
    {% endfor %}
</table>

{% endblock content %}
Refresh the page. Your dashboard should now look significantly more professional!
Test your understanding!
In your task_list.html, you have a link for "Logout". How would you style this link to look like a gray, secondary button?
Show answer
You would add the classes btn and btn-secondary to the logout <a> tag, like this:<a class="btn btn-secondary" href="{% url 'logout' %}?next={% url 'login' %}">Logout</a>
3. Styling Django Forms with django-crispy-forms
Styling forms in Django can be tedious. You've been using {{ form.as_p }}, which renders each field in a <p> tag. Applying Bootstrap classes to each field manually is a lot of work.
Fortunately, there's a much better way: django-crispy-forms. This package automatically renders your Django forms using Bootstrap's markup.
Installation and Configuration
We need to install two packages and configure them in settings.py.
Add Bootstrap 5 to your Django application
The video 'Add Bootstrap 5 to your Django application' by Cloud With Django walks through the setup for crispy-forms.
Watch from 00:56 to 03:15. Follow the steps to: pip install django-crispy-forms and pip install crispy-bootstrap5. Add crispy_forms and crispy_bootstrap5 to your INSTALLED_APPS in settings.py. Add the CRISPY_ALLOWED_TEMPLATE_PACKS and CRISPY_TEMPLATE_PACK settings to settings.py.
Follow the video's instructions:
-
Stop your server and run these commands in your activated virtual environment:
pip install django-crispy-forms pip install crispy-bootstrap5 -
In your
settings.pyfile, add the apps and template pack configuration:# In settings.py INSTALLED_APPS = [ # ... other apps 'crispy_forms', 'crispy_bootstrap5', ] CRISPY_ALLOWED_TEMPLATE_PACKS = "bootstrap5" CRISPY_TEMPLATE_PACK = "bootstrap5"
Applying the |crispy Filter
Now for the magic. We can replace {{ form.as_p }} with a much cleaner filter.
Add Bootstrap 5 to your Django application
The next part of the video shows how to use the |crispy filter in your template to render the form.
Watch from 03:15 to 04:44. The two key steps are loading the crispy forms tags at the top of the template and then applying the |crispy filter to your form variable.
Open your task_form.html (which is used for both creating and updating tasks).
- At the very top of the file, add
{% load crispy_forms_tags %}. - Find
{{ form.as_p }}and replace it with{{ form|crispy }}. - Make sure your submit button also has Bootstrap classes, e.g.,
class="btn btn-primary".
Your task_form.html should look like this:
{% extends 'base.html' %}
{% block content %}
{% load crispy_forms_tags %} <!-- Step 1 -->

<a href="{% url 'tasks' %}">Go Back</a>

<form method="POST">
    {% csrf_token %}
    {{ form|crispy }} <!-- Step 2 -->
    <input class="btn btn-primary" type="submit" value="Submit">
</form>

{% endblock content %}
Start your server again and navigate to the "Add New Task" or "Edit Task" page. Your form is now beautifully styled with Bootstrap, with no manual HTML adjustments needed!
Conclusion
Congratulations! You've taken a huge step in making your application portfolio-ready. By integrating Bootstrap, you've replaced plain, unstyled HTML with a clean, modern, and responsive design.
Key Takeaways:
- Bootstrap via CDN is the quickest way to add a CSS framework to a project by simply linking to it in your base template.
- Bootstrap styling is applied by adding CSS classes like
.container,.table, and.btnto your HTML elements. - For Django forms, the
django-crispy-formspackage is an essential tool. It automatically renders forms with Bootstrap styling using the|crispytemplate filter, saving you a tremendous amount of time and effort.
Preview of the Next Lesson:
Now that our application looks great, we can continue enhancing its functionality. In the next lesson, you will add search functionality to your dashboard, allowing users to easily find specific tasks in their list.