Hello! Welcome to our next lesson.
In the previous session, we successfully refactored our function-based views into ListView and DetailView. This was a big step towards writing cleaner, more efficient Django code by handling the "Read" part of CRUD operations with minimal effort.
Today, we will complete the set. This lesson focuses on implementing the "Create," "Update," and "Delete" functionalities. You will learn how to use Django's generic editing views—specifically CreateView, UpdateView, and DeleteView—for rapid development. By the end of this lesson, you'll have the complete toolkit to build the core data management features for your task manager portfolio project, allowing users to add, modify, and remove their tasks.
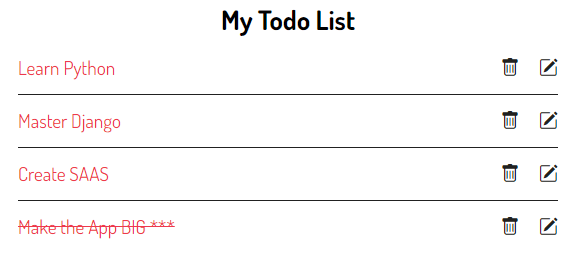
The "Generic Editing Views"
Just as ListView and DetailView streamline the process of displaying data, Django provides a set of views for modifying it. These views, often called "generic editing views," automate the common patterns of handling forms and saving data.
Let's watch a segment from Dennis Ivy's video that introduces these three key views in the context of a to-do application.
What are Django class based views & should you use them?
This video, "What are Django class based views & should you use them?", provides a concise and practical overview of implementing CreateView, UpdateView, and DeleteView.
Watch from 22:25 to 26:29. This part shows how to import and define the five most common generic views for a to-do app. Pay attention to the attributes they share, like model and success_url.
As you saw, these views share a common structure, making them intuitive to use once you understand the pattern. Let's break them down one by one.
CreateView: Adding New Data
The CreateView is designed for one purpose: presenting a blank form for creating a new object and saving it upon submission. It works hand-in-hand with Django's ModelForm, which you've used before.
A CreateView handles the following logic for you:
- GET request: Displays a blank form based on your model.
- POST request: Validates the submitted data. If valid, it saves a new object to the database and redirects to a success page. If invalid, it re-displays the form with error messages.
Implementation
Here’s how you would create a view to add a new Task:
1. Update views.py:
# tasks/views.py
from django.views.generic import CreateView
from django.urls import reverse_lazy
from .models import Task

class TaskCreateView(CreateView):
    model = Task
    fields = ['title', 'description', 'complete']  # The fields to show in the form
    template_name = 'tasks/task_form.html'         # The template to render
    success_url = reverse_lazy('task-list')        # Where to go after success
model: The model this view will create instances of.fields: A list of field names from the model to include in the form. You can also useform_classto specify a customModelFormyou've defined informs.py.template_name: By default,CreateViewlooks for a template named<model_name>_form.html(e.g.,task_form.html). It's good practice to be explicit.success_url: The URL to redirect to after the form is successfully submitted.reverse_lazyis used here because the URL configuration might not be fully loaded when this file is first imported. It's the standard way to define success URLs in class attributes.
2. Update urls.py:
# tasks/urls.py
from django.urls import path
from .views import TaskListView, TaskCreateView

urlpatterns = [
    path('tasks/', TaskListView.as_view(), name='task-list'),
    # Add the path for creating a task
    path('tasks/create/', TaskCreateView.as_view(), name='task-create'),
]
3. Create the Template (tasks/task_form.html):
This single template can be used for both creating and updating tasks.
{% extends 'base.html' %}

{% block content %}
    <h3>Create Task</h3>
    <a href="{% url 'task-list' %}">Go Back</a>

    <form method="POST" action="">
        {% csrf_token %}
        {{ form.as_p }}
        <input type="submit" value="Submit">
    </form>
{% endblock content %}
Notice the {{ form.as_p }}. The view automatically creates a form instance and passes it to the template context under the name form.
To see this in action with another practical example, the following video is helpful.
Try DJANGO Tutorial - 38 - Class Based Views - CreateView and UpdateView
The video "Try DJANGO Tutorial - 38 - Class Based Views - CreateView and UpdateView" by CodingEntrepreneurs provides another clear walkthrough of setting up a CreateView.
Watch from the beginning to 04:29. Notice how the view uses a form_class instead of fields, which is the preferred approach for more complex forms. Also, pay attention to the explanation of get_absolute_url, which is an alternative to success_url that you define on the model itself.
UpdateView: Editing Existing Data
An UpdateView is almost identical to a CreateView, with one key difference: it operates on an existing object. It fetches an object from the database based on a primary key (pk) from the URL, and then displays a form pre-filled with that object's data.
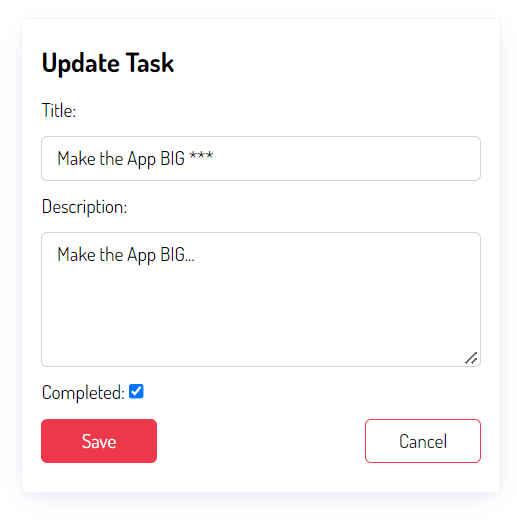
Implementation
1. Update views.py:
# tasks/views.py
from django.views.generic import UpdateView
# ... other imports

class TaskUpdateView(UpdateView):
    model = Task
    fields = ['title', 'description', 'complete']
    template_name = 'tasks/task_form.html' # We can reuse the same template!
    success_url = reverse_lazy('task-list')
As you can see, the code is strikingly similar to TaskCreateView. UpdateView knows to look for a pk in the URL to fetch the object to be edited.
2. Update urls.py:
# tasks/urls.py
from django.urls import path
from .views import TaskListView, TaskCreateView, TaskUpdateView

urlpatterns = [
    path('tasks/', TaskListView.as_view(), name='task-list'),
    path('tasks/create/', TaskCreateView.as_view(), name='task-create'),
    # Add the path for updating a task, which includes the primary key
    path('task/<int:pk>/edit/', TaskUpdateView.as_view(), name='task-edit'),
]
The URL pattern <int:pk> is crucial here. It captures the ID of the task you want to edit and passes it to the view.
For a comprehensive text-based guide that covers CreateView, UpdateView, and their URL configurations, the following article is an excellent resource.
Manage Your To-Do Lists Using Python and Django
The Real Python article "Manage Your To-Do Lists Using Python and Django" provides a step-by-step walkthrough of building CRUD functionality with CBVs.
Read 'Step 6: Create and Update Model Objects in Django'. Focus on the definitions of ListCreate, ItemCreate, and ItemUpdate in views.py. Also, review how the URLs are constructed and how the templates use the {% url %} tag to link to these views.
DeleteView: Removing Data
Finally, the DeleteView handles the removal of an object. To prevent accidental deletions, it follows a two-step process:
- GET request: Displays a confirmation page asking, "Are you sure?"
- POST request: If the user confirms (by submitting a form on the confirmation page), the view deletes the object and redirects to the
success_url.
Implementation
1. Update views.py:
# tasks/views.py
from django.views.generic import DeleteView
# ... other imports

class TaskDeleteView(DeleteView):
    model = Task
    template_name = 'tasks/task_confirm_delete.html' # A specific template for confirmation
    success_url = reverse_lazy('task-list')
    context_object_name = 'task' # To refer to the object in the template
Note the new template_name. By default, DeleteView looks for a template named <model_name>_confirm_delete.html.
2. Update urls.py:
# tasks/urls.py
from django.urls import path
from .views import TaskListView, TaskCreateView, TaskUpdateView, TaskDeleteView

urlpatterns = [
    path('tasks/', TaskListView.as_view(), name='task-list'),
    path('tasks/create/', TaskCreateView.as_view(), name='task-create'),
    path('task/<int:pk>/edit/', TaskUpdateView.as_view(), name='task-edit'),
    # Add the path for deleting a task
    path('task/<int:pk>/delete/', TaskDeleteView.as_view(), name='task-delete'),
]
3. Create the Confirmation Template (tasks/task_confirm_delete.html):
{% extends 'base.html' %}

{% block content %}
    <a href="{% url 'task-list' %}">Go Back</a>

    <form method="POST">
        {% csrf_token %}
        <p>Are you sure you want to delete "{{ task.title }}"?</p>
        <input type="submit" value="Yes, Delete">
    </form>
{% endblock content %}
Here, we use {{ task.title }} (or {{ object.title }} by default) to show the user what they are about to delete. The context_object_name in the view controls this variable's name.
The Real Python article also provides an excellent section on implementing DeleteView.
Manage Your To-Do Lists Using Python and Django
Continuing with the Real Python guide, this next section covers the 'Delete' part of CRUD.
Read the sections 'Make DeleteView Subclasses' and 'Define Deletion Confirmations and URLS'. This will reinforce the pattern for creating delete views, setting their success URLs, and creating the necessary confirmation templates.
Test your understanding!
Let's say you're building a simple blog. You have a Post model with title and content fields.
- Write the
views.pycode forPostCreateView,PostUpdateView, andPostDeleteView. Assume the success URL for all of them should redirect to a page named'post-list'. - Write the
urls.pypatterns required for these three views.
Show answer
1. views.py
from django.views.generic import CreateView, UpdateView, DeleteView
from django.urls import reverse_lazy
from .models import Post

class PostCreateView(CreateView):
    model = Post
    fields = ['title', 'content']
    template_name = 'blog/post_form.html'
    success_url = reverse_lazy('post-list')

class PostUpdateView(UpdateView):
    model = Post
    fields = ['title', 'content']
    template_name = 'blog/post_form.html'
    success_url = reverse_lazy('post-list')

class PostDeleteView(DeleteView):
    model = Post
    template_name = 'blog/post_confirm_delete.html'
    success_url = reverse_lazy('post-list')
    context_object_name = 'post'
2. urls.py
from django.urls import path
from .views import PostCreateView, PostUpdateView, PostDeleteView # and PostListView

urlpatterns = [
    # Assuming PostListView is defined elsewhere and named 'post-list'
    # path('posts/', PostListView.as_view(), name='post-list'),

    path('post/create/', PostCreateView.as_view(), name='post-create'),
    path('post/<int:pk>/update/', PostUpdateView.as_view(), name='post-update'),
    path('post/<int:pk>/delete/', PostDeleteView.as_view(), name='post-delete'),
]
Conclusion
Fantastic! You have now mastered the full suite of generic CBVs for CRUD operations. By leveraging CreateView, UpdateView, and DeleteView, you can build the core functionality of a web application like your task manager with astonishing speed and clarity.
Key Takeaways:
CreateViewhandles displaying a form to create a new object and saving it.UpdateViewhandles fetching an existing object, displaying it in a form for editing, and saving the changes.DeleteViewprovides a confirmation step before deleting an object from the database.- These views rely on a few key attributes:
model,fields(orform_class),template_name, andsuccess_url. - URL patterns for
UpdateViewandDeleteViewmust capture a primary key (pk) to identify the target object.
Preview of the Next Lesson:
We now have a fully functional CRUD application. However, any user can see, edit, and delete any task. That's not ideal for a personal task manager! In the next module, we will dive into User Authentication and Authorization. You will learn how to integrate Django's built-in user system to implement registration, login, logout, and, most importantly, ensure that users can only access and modify their own data.