Welcome to your third lesson. In our previous session, you learned the fundamental grammar of HTML—the precise definitions of tags, elements, and attributes. With that theoretical foundation in place, it's time to transition from concepts to practice. To write code efficiently and professionally, you need the right tool for the job.
This lesson focuses on setting up your development environment. We will install and configure a code editor, which is the specialized software developers use to write, manage, and debug code. By the end of this session, you will have Visual Studio Code, the industry-standard editor for web development, installed and configured on your computer, ready for you to build your first web page.
What is a Code Editor?
While you could technically write HTML in a basic text application like Notepad or TextEdit, it would be an unnecessarily difficult experience. Professional developers use code editors because they offer features designed specifically for programming. These features help you write code faster, read it more easily, and catch errors before they become problems.
To understand what a code editor is and why it's an essential part of a developer's toolkit, please read the introductory section of the following article from Codecademy.
Visual Studio Code: How to Use
This article provides a clear definition of a text editor (or code editor) and explains its role in a development environment.
Read the section titled I. Introduction. Pay attention to the description of a text editor's advantages and how it differs from a simple word processor.
One of the most immediate benefits of a code editor is syntax highlighting. The editor automatically color-codes different parts of your code—tags, attributes, and content—making it much easier to read and understand at a glance. You saw this in the diagrams from our last lesson, and now you'll see it in your own editor.
Installing Visual Studio Code
There are many code editors available, but we will use Visual Studio Code (often shortened to VS Code). It is free, incredibly popular in the web development industry, and supported by a vast library of extensions that add new features.
It's important not to confuse Visual Studio Code (with its blue logo) with Visual Studio (a different, more complex product with a purple logo). We will only be using VS Code.
The installation process is straightforward. The following article provides detailed, step-by-step instructions for Windows, macOS, and Linux.
Visual Studio Code: How to Use
This part of the article explains why VS Code is a good choice and guides you through the download and installation process for your specific operating system.
First, read the section Choosing a Text Editor for a brief overview of why VS Code is recommended. Then, follow the detailed steps in the section titled II. Installing Visual Studio Code.
Once you have successfully installed and opened VS Code, you'll be greeted by a Welcome screen. You are now ready to get acquainted with the user interface.
Exploring the VS Code Interface
At first, the interface might look busy, but it's logically organized into several key areas. Understanding these areas will help you navigate the editor with confidence.

To see these areas in action, the following video provides a clear and concise tour of the user interface.
VS Code for Absolute Beginners
This video from Coder Coder provides a friendly introduction to the VS Code user interface.
Watch the segment from this timestamp. The presenter will walk you through the Activity Bar, Side Bar, Editor, Panel, and Status Bar, explaining the purpose of each.
Setting Up Your First Project
A crucial habit for any developer is to keep projects organized. Instead of saving individual files to your desktop, you should create a dedicated folder for each project. VS Code is designed to work with folders, which allows it to manage all of a project's files together.
Let's set up your first project folder now.
- Create a Project Directory: On your computer (e.g., in your Documents folder), create a new folder named
projects. This will be the main directory where you store all your future coding projects. - Create a Project Folder: Inside the
projectsfolder, create another folder namedvscode101. This is the specific folder for the work we are doing now. - Open the Folder in VS Code: In VS Code, go to the File menu and select "Open Folder...". Navigate to and select the
vscode101folder you just created. You may be asked if you trust the authors of the files in this folder; since you created it, you can select "Yes, I trust the authors." - Create Your First HTML File: With the folder open, you will see its name in the Explorer view in the side bar. Hover over the
vscode101folder name and click the "New File" icon. Name the fileindex.htmland press Enter.
You have now created your first HTML file inside a project folder. The file will open in the main editor area, ready for you to write code.
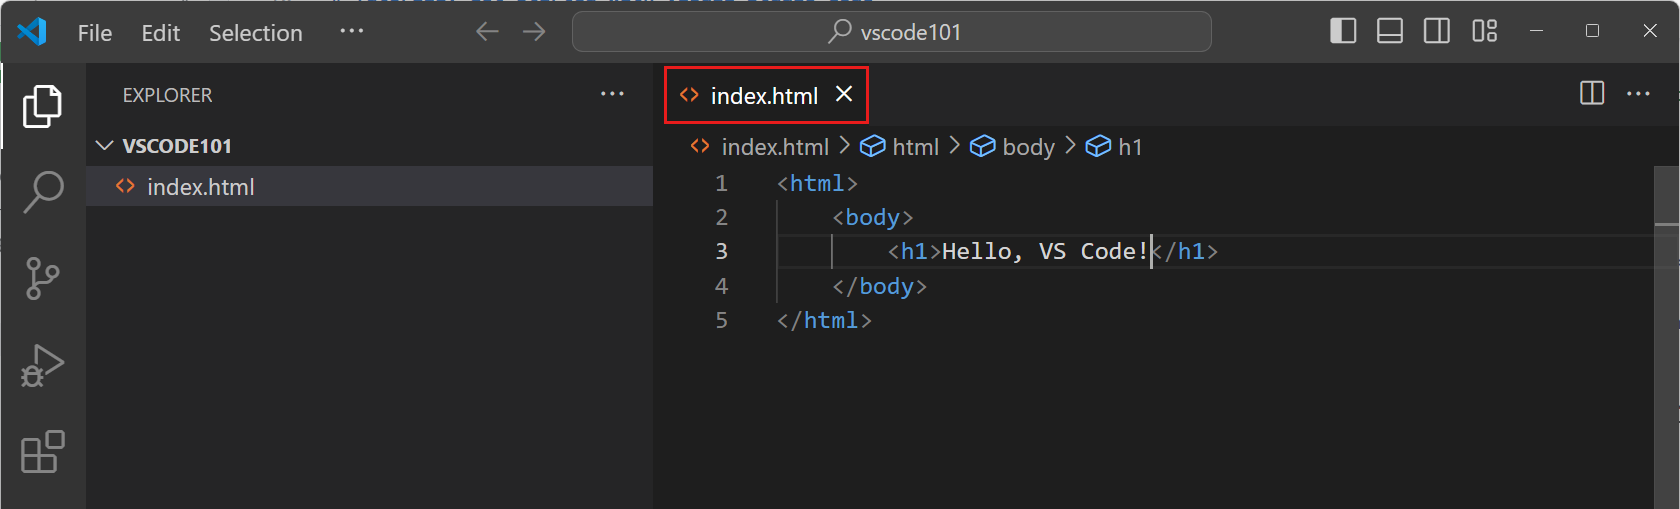
Essential Configuration and Extensions
Now that you have VS Code running, let's make a few adjustments and add a key extension to streamline your workflow.
Automatic Formatting
Consistent indentation and spacing make code readable. Manually formatting your code can be tedious, so we'll configure VS Code to do it for you every time you save. We'll also set the standard indentation size to 2 spaces.
The following article from freeCodeCamp shows you exactly how to do this.
How to Set Up VS Code for Web Development in A Few Simple Steps
This resource guides you through essential settings for web development.
Find the settings by pressing Ctrl + , (or Cmd + , on Mac). Follow the instructions in the article to change two settings: In the Commonly Used section, set Tab Size to 2. Under Text Editor/Formatting, check the box for Format on Save.
Live Server Extension
An extension is a small add-on that brings new functionality to VS Code. The most important one for us is Live Server. This extension launches a small web server on your computer and automatically reloads your web page in the browser whenever you save your index.html file. This gives you instant feedback on your changes.
This next reading will show you how to find and install this extension.
How to Set Up VS Code for Web Development in A Few Simple Steps
This section explains what extensions are and how to install the Live Server extension.
Follow the instructions under the heading VS Code Extensions. You will use the Extensions view in the Activity Bar to search for and install "Live Server" by Ritwick Dey.
After installing, you will see a "Go Live" button in the bottom-right corner of the Status Bar. Clicking this will open your index.html file in your web browser. From now on, whenever you save a change in VS Code, the browser will update automatically.
Conclusion
Congratulations, you have successfully set up a professional coding environment! This is a significant step in your journey to becoming a web developer. Having the right tools configured correctly will make the learning process much smoother and more enjoyable.
Key Takeaways:
- A code editor is a specialized application for writing code, with features like syntax highlighting and extensions.
- Visual Studio Code (VS Code) is the industry-standard code editor for web development.
- It's best practice to organize your work by opening folders in VS Code, not individual files.
- Configuring "Format on Save" keeps your code clean and readable automatically.
- The Live Server extension provides instant visual feedback by auto-reloading your page in the browser when you save changes.
In our next lesson, you will put this new setup to immediate use. We will write the first essential lines of every HTML document: the DOCTYPE declaration and the <html>, <head>, and <body> elements that form the fundamental skeleton of any web page.