Hello! Let's continue our journey into Linux networking.
Introduction
In our previous lessons, we successfully configured a network interface with an IP address and set up DNS to resolve hostnames. Now, we have one final, crucial piece of the puzzle: how does your system know where to send network packets? How does it decide the path to take to reach a local server versus a website on the internet? The answer lies in the routing table.
This lesson is dedicated to the learning outcome: Manage the system's routing table. We will explore what the routing table is, how to interpret its contents, and how to modify it to control the flow of network traffic. Following your preference, we'll begin with the core concepts of routing before moving into the practical commands. Mastering the routing table is essential for network troubleshooting and a key topic for your CompTIA Linux+ exam.
1. The "What" and "Why" of IP Routing
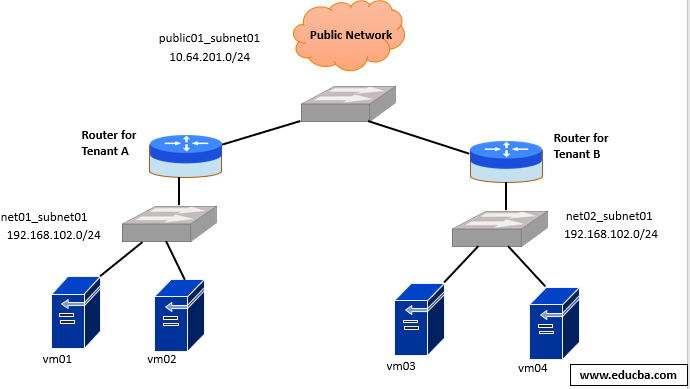
Before we touch any commands, it's vital to build a mental model of what routing is. At its simplest, routing is the process of choosing a path for traffic to travel from a source to a destination across networks. Your Linux system makes these decisions every time you access anything on a network.
To get a clear theoretical foundation, let's watch a short video that explains the fundamental concepts.
Linux IP Routing Basics: Routes, Tables, and Policy-Based Routing Explained
This video, 'Linux IP Routing Basics', provides an excellent conceptual overview. It distinguishes between routing and forwarding and explains how the kernel categorizes destinations.
Please watch from the beginning to 04:09. Focus on understanding the three basic IP destination classes: Local: An IP address on the machine itself (e.g., 127.0.0.1). Connected: A destination on the same local network, reachable without a router. Remote: A destination on a different network, which requires a router (a gateway) to reach.
The Routing Table: Your System's GPS
As the video explained, the Linux kernel needs a set of rules to decide where to send packets. This set of rules is stored in the routing table. Think of it as a GPS for your network traffic. For any given destination IP address, the kernel consults this table to find the best path.
Each rule, or route, in the table specifies three main things:
- The Destination: The network or host the rule applies to.
- The Gateway (or Next Hop): The IP address of the router to send the packet to if the destination is remote.
- The Interface: The network interface (e.g.,
eth0) to send the packet out from.
2. Viewing and Interpreting the Routing Table
The first step in managing the routing table is learning how to read it. The modern command for this is ip route.
Let's watch a detailed demonstration of how to view the routing table and understand its output.
Deep Dive: The ip Command in Linux
The video 'Deep Dive: The ip Command in Linux' by Prowse Tech has a great section on the ip route object. It clearly explains the different parts of the routing table output.
Watch the segment from 35:28 to 39:20. Pay close attention to the explanation of the 'default' route (the default gateway), network-specific routes, and the 'metric' value.
Breaking Down the ip route Output
Let's solidify what you just saw. When you run ip route (or its shorter alias ip r), you'll see output similar to this:
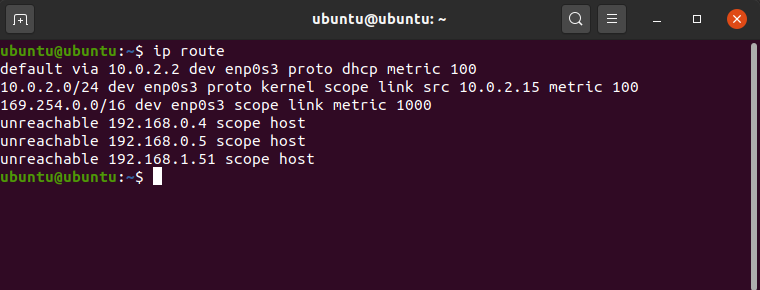
default via 192.168.1.1 dev eth0 metric 100
192.168.1.0/24 dev eth0 proto kernel scope link src 192.168.1.100
-
The Default Route:
default via 192.168.1.1 dev eth0 ...- This is the most important route for reaching external networks like the internet.
defaultmeans this route is the catch-all; it's used if no other, more specific route matches the destination.via 192.168.1.1specifies the gateway. All traffic matching this route will be sent to the router at192.168.1.1.dev eth0indicates the traffic will be sent out using theeth0network interface.metric 100: The metric is a preference value. If you have two routes to the same destination, the one with the lower metric is preferred.
-
A Connected Network Route:
192.168.1.0/24 dev eth0 ...- This route is for the local, or "connected," network.
192.168.1.0/24is the destination network. Any packet destined for an IP in this range will use this route.- Notice there is no
via .... That's because the destination is on the local network segment, so no gateway is needed. The system can send the packet directly to the destination host.
Test your understanding!
You are on a computer with the IP address 10.10.5.50. Your routing table has a default route default via 10.10.5.1 dev eth1. If you try to ping 8.8.8.8, which gateway IP address will your system send the packet to, and which network interface will it use?
Show answer
The IP address 8.8.8.8 does not match any specific local routes, so the system will use the default route. The packet will be sent to the gateway at 10.10.5.1 using the network interface eth1.
3. Managing Routes: Add, Delete, and Troubleshoot
Now for the practical part: modifying the routing table. You can add new routes to reach specific networks or delete routes that are incorrect. The most common task is fixing a missing or incorrect default gateway.
The changes made with ip route are temporary and will be lost on reboot. We'll discuss making them permanent later.
This next video segment demonstrates a very common real-world scenario: a server loses its default gateway, and you need to restore its connectivity.
Deep Dive: The ip Command in Linux
Continuing with the 'Deep Dive' video, this section provides a hands-on demonstration of deleting and adding a default gateway, as well as managing static routes.
Watch from 44:01 to 50:15. This is a practical walkthrough, so pay attention to the exact syntax used for: Deleting the default route: ip route del default Adding the default route: ip route add default via <gateway_ip> Adding and deleting a static route to a specific network.
Command Summary for Route Management
Let's review the commands for managing routes. Remember, these commands typically require administrative privileges, so you'll need to use sudo.
- View the routing table:
ip route show # or the short version ip r - Add a route to a specific network:
This tells your system how to reach10.20.30.0/24via a router at192.168.1.254.sudo ip route add 10.20.30.0/24 via 192.168.1.254 - Delete a route to a specific network:
sudo ip route del 10.20.30.0/24 - Add a default gateway:
sudo ip route add default via 192.168.1.1 - Delete the default gateway:
sudo ip route del default
Making Routes Persistent
As mentioned, ip route commands are not persistent across reboots. To make routes permanent, you must use your system's network configuration manager. Since we've been using nmcli, we can stick with it for consistency.
To add a persistent static route to a connection profile (e.g., eth0), you would use a command like this:
# Adds a route to 172.16.0.0/16 via gateway 192.168.1.254
sudo nmcli con mod eth0 +ipv4.routes "172.16.0.0/16 192.168.1.254"

# Then re-activate the connection to apply it
sudo nmcli con up eth0
This method ensures your static route is reapplied every time the eth0 connection is brought up. For more details on persistence, you can refer to the following article.
Understanding Routing in Linux: Configuring Routes and ...
This article, 'Understanding Routing in Linux', provides a good written summary of the commands we've discussed and also covers how to make routes persistent on different Linux distributions.
Quickly read the sections 'Adding and Removing Routes in Linux', 'Configuring a Default Gateway', and 'Persisting Routing Configurations'. This will reinforce the commands you've learned and show you the different file-based methods for persistence.
Conclusion
You have now covered the core principles and practices of managing a Linux routing table. This is a fundamental skill that moves you from being just a user to being an administrator who can control and troubleshoot network connectivity.
Key Takeaways:
- The routing table is the kernel's "map" for directing IP packets to their destination.
- Routes are categorized as local, connected, or remote. Remote routes require a gateway.
- Use
ip route show(orip r) to view the current routing table. - The
defaultroute is your system's default gateway, used for all traffic without a more specific route. - Use
sudo ip route addandsudo ip route delto manage routes temporarily. - For persistent routes, you must use a configuration tool like
nmclior edit system network configuration files.
Preview of the Next Lesson:
We've learned how to configure IPs, DNS, and now routes. But what do you do when things don't work? How do you verify your configuration and find the point of failure? In our next lesson, we will cover how to test network reachability using ping and traceroute, the essential first-line tools for any network diagnostician.