Welcome back! In our previous lesson, we explored the "what" and "why" of Java, focusing on the Java Virtual Machine (JVM) and the crucial distinction between the JDK, JRE, and JVM. We concluded that as a developer, you need the Java Development Kit (JDK) to write, compile, and run Java programs.
Today, we'll move from theory to practice. This lesson is your first hands-on step into the world of Java development. We will guide you through the process of installing the JDK on your computer and then verifying that everything is set up correctly. This is a foundational step that every Java programmer must complete before writing a single line of code.
Getting Started: Choosing and Downloading the JDK
Before we begin the installation, it's helpful to know that there are a few different providers of the JDK. The two most common are:
- Oracle JDK: The official JDK from Oracle, the company that stewards Java.
- OpenJDK: A free and open-source implementation of the Java Platform.
For learning and general development, OpenJDK is an excellent choice. Major companies like Amazon, Microsoft, and Red Hat provide their own builds of OpenJDK.
You will also see version numbers, some marked with "LTS," which stands for Long-Term Support. These versions (like JDK 17, 21, etc.) are guaranteed to receive updates for several years, making them stable and reliable choices. For this course, we recommend using JDK 21 (LTS).
The following resource from GeeksforGeeks provides a comprehensive guide to downloading and installing the JDK. We will walk through the key parts of this process together.
Download and Install JDK on Windows, Mac and Linux - GeeksforGeeks
This first part of the article explains where to find the JDK downloads.
Start by reading the section Java JDK Download. This will show you the official Oracle and OpenJDK websites where you can get the installation files. Focus on selecting the appropriate version for your operating system (Windows, macOS, or Linux).
The Installation Process
Installing the JDK involves three main steps:
- Downloading the correct installer for your operating system.
- Running the installer to place the Java files on your computer.
- Configuring environment variables to tell your operating system where to find the Java tools.
This third step is the most technical but also the most important for ensuring you can run Java commands from your terminal or command prompt. It involves telling your system's PATH where the Java compiler (javac) and launcher (java) are located.
The installation procedure varies depending on your operating system. Please follow the instructions for your specific system: Windows, macOS, or Linux.
Instructions for Windows
For Windows users, the process involves running a graphical installer and then manually setting the environment variables through the System Properties window. The following video provides a clear, step-by-step visual guide.
How to Install Java on Windows 10/11 [ 2023 Update ] JAVA_HOME, JDK Installation
This video from Geeky Script walks through the entire installation and configuration process on Windows.
Watch from the beginning to see how to download and run the installer (download and install). Then, pay close attention to the crucial part where the environment variables JAVA_HOME and Path are configured (environment variables setup). This is the most common point of error for beginners, so feel free to pause and follow along carefully.
For a detailed textual reference with screenshots that you can follow at your own pace, the GeeksforGeeks article is an excellent companion.
Download and Install JDK on Windows, Mac and Linux - GeeksforGeeks
This section provides a written guide for the Windows installation.
Follow the steps under the heading Install on Windows. Pay special attention to Step 2: Setup the Environment Variables, as this is the most complex part of the process. The screenshots will help you navigate the correct system menus.
Instructions for macOS
On macOS, the installation is done via a .dmg file. Afterward, you'll need to configure your shell's startup file (usually .zshrc) to set the necessary environment variables.
This video from ProgrammingKnowledge is a great walkthrough for the entire process on a modern Mac.
How to Install Java on Mac | Install Java JDK on macOS
This video covers downloading the correct installer, running it, and configuring the environment variables for macOS.
First, watch the section on downloading the correct file for your Mac's processor (Intel or Apple Silicon) and running the installer (download and install). The most critical part is setting the JAVA_HOME variable in your terminal's configuration file. Follow this section closely (environment variables setup), as it explains how to edit the .zshrc file, which is essential for making Java accessible from the terminal.
You can also use the GeeksforGeeks article for a textual version of these steps.
Download and Install JDK on Windows, Mac and Linux - GeeksforGeeks
This part of the article details the installation process for macOS.
Find the section titled Install on macOS and follow the steps. Step 2: Configure Environment Variables is the most important part, explaining how to edit your .bash_profile or .zshrc file.
Instructions for Linux
For Linux users, installation is typically handled through your distribution's package manager from the terminal, which often simplifies the process. The main task is ensuring the JAVA_HOME environment variable is set correctly.
Since there is no video resource for Linux, please rely on the detailed written guides below. Both provide the necessary commands for Debian/Ubuntu, Fedora/RHEL, and other distributions.
Download and Install JDK on Windows, Mac and Linux - GeeksforGeeks
This article provides command-line instructions for installing the JDK on various Linux distributions.
Read the section titled Install on Linux. It covers using package managers to install the JDK and then manually configuring the JAVA_HOME environment variable by editing the /etc/environment file.
As an alternative, this DEV Community post offers a more concise guide that also covers multiple Linux distributions.
JDK Setup On Linux, Windows, Mac - DEV Community
This guide provides a quick and clear set of terminal commands for Linux installation.
Scroll to the section Setting Up on Linux. It provides a straightforward command-line approach for different Linux families (like Ubuntu/Debian and Fedora/CentOS) and shows how to configure your .bashrc or .zshrc file.
Verifying Your Installation
Once you have completed the installation and configured the environment variables, the final step is to verify that everything works. You will do this using your system's command-line interface: Command Prompt on Windows, or Terminal on macOS and Linux.
Open a new terminal or command prompt window (this is important, as it ensures the new environment variables are loaded). Type the following command and press Enter:
java -version
You should see output that tells you the installed Java version. Next, type this command and press Enter:
javac -version
The javac command is the Java compiler. Seeing a version number for this command confirms that the full Development Kit (not just the runtime) is correctly installed and configured in your system's PATH.
Your output should look something like this:
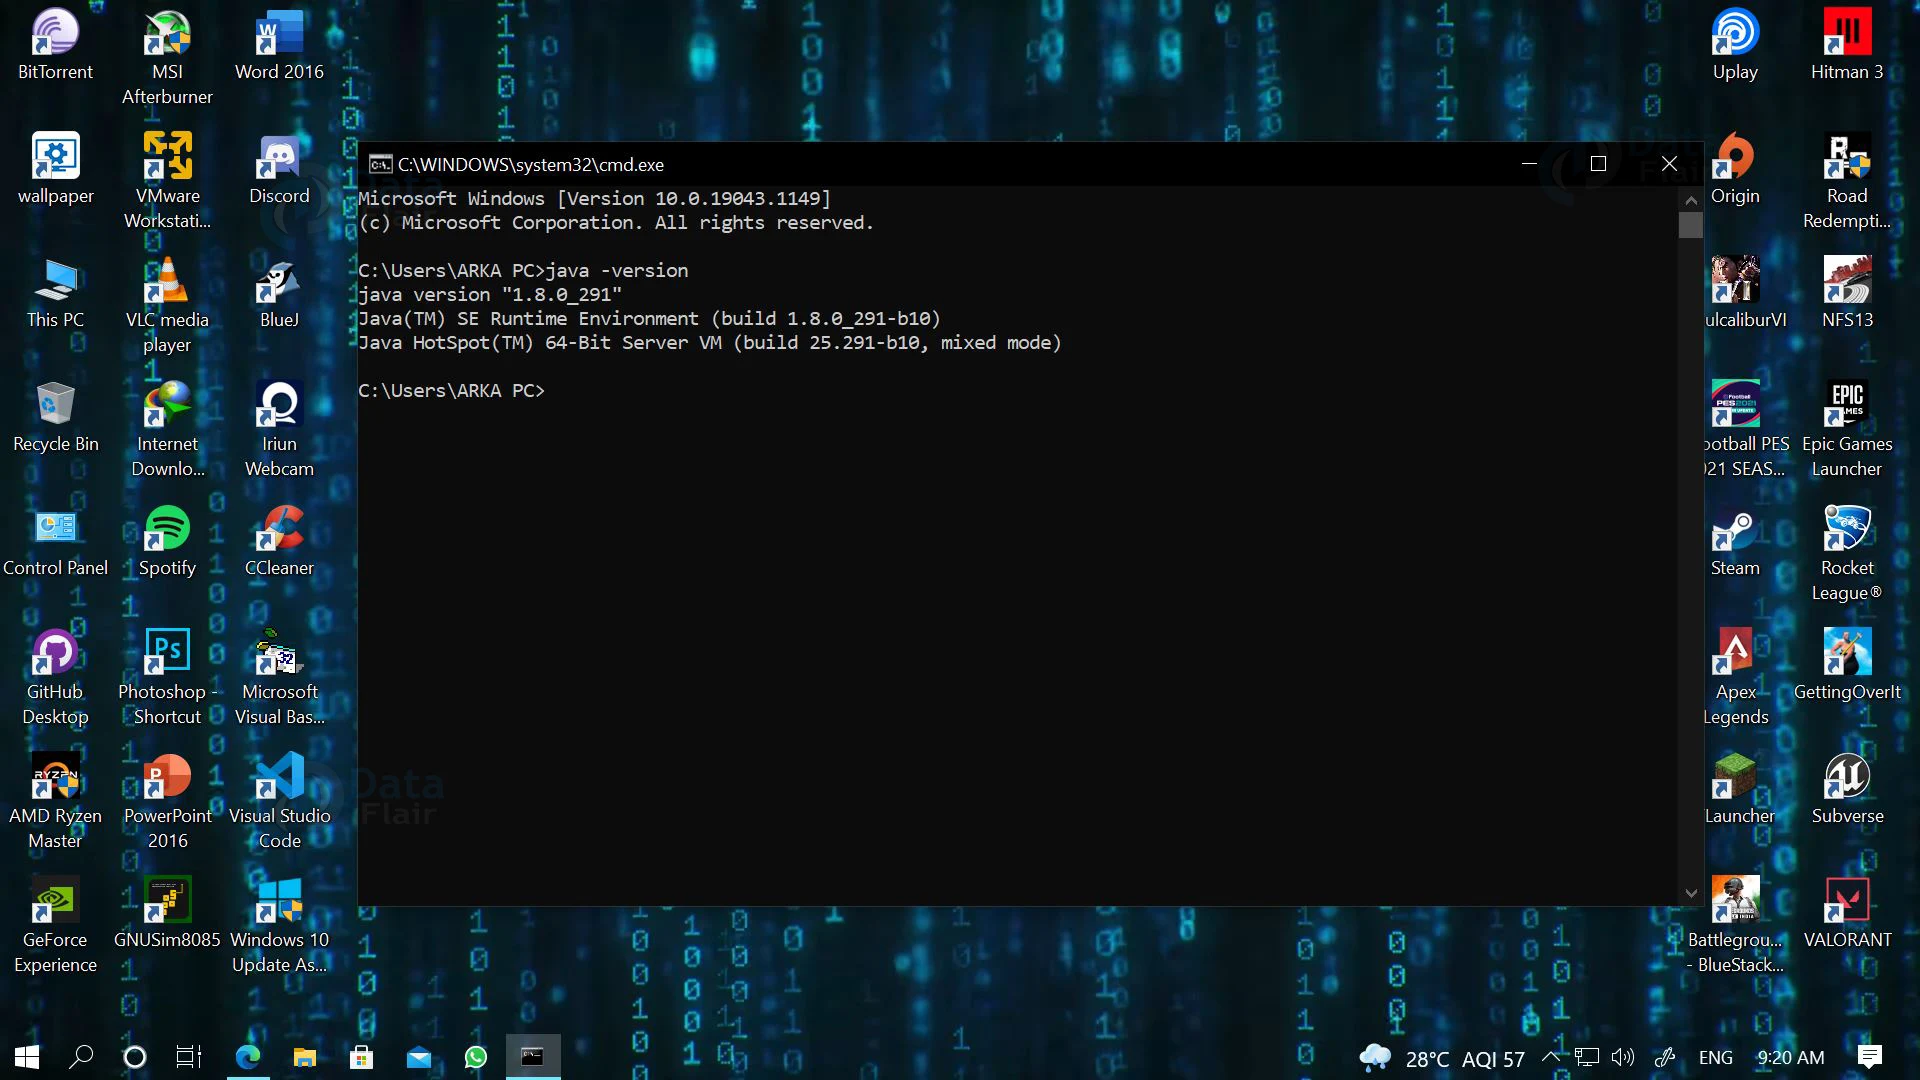
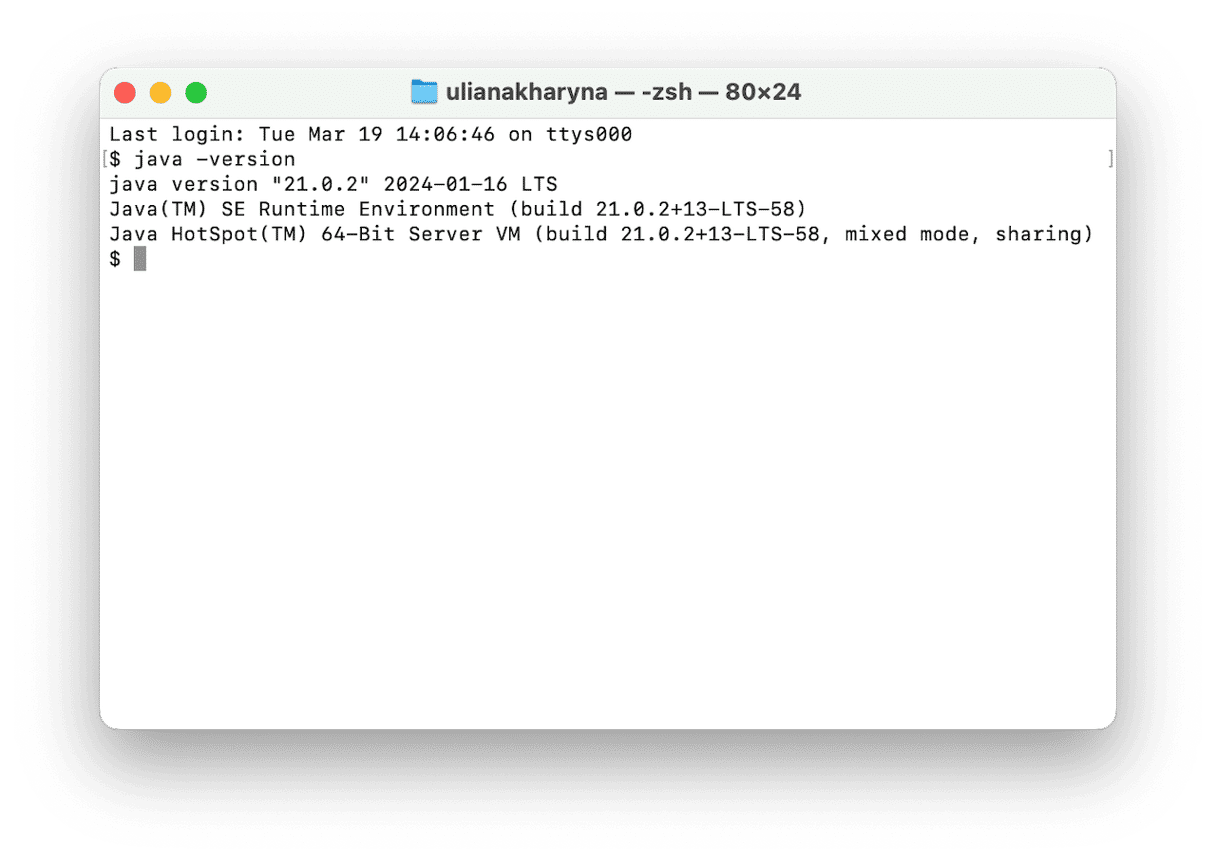
If you see version numbers for both commands, congratulations! Your Java Development Kit is ready to go. If you get an error like "command not found," the most likely cause is an issue with the environment variables. Please revisit the configuration steps for your operating system carefully.
Conclusion
In this lesson, you've taken the first and most crucial practical step in your Java journey. You have successfully installed the Java Development Kit and verified that your computer is now set up for Java development.
Here are the key takeaways:
- The JDK (Java Development Kit) is essential for developing Java applications. We recommend using an LTS version like JDK 21.
- The installation process consists of downloading, installing, and, most importantly, configuring environment variables (
JAVA_HOMEandPATH). - The process differs slightly for Windows, macOS, and Linux, but the goal is the same: making the
javaandjavaccommands accessible from the command line. - Verification is done by running
java -versionandjavac -versionin a new terminal window.
Now that your machine has the core Java toolset, you're almost ready to write code. However, you could write code in a simple text editor, compiling and running it from the command line, this can be cumbersome. To make our development process much more efficient and enjoyable, we will next install an Integrated Development Environment (IDE). In the next lesson, we'll set up a powerful IDE that will serve as your primary tool for writing, debugging, and managing your Java projects.