Hello!
In our last lesson, we successfully installed the Java Development Kit (JDK), giving your computer the core ability to compile and run Java code from the command line. This was a critical foundational step. Now, we're going to set up your primary workspace for all your future Java programming.
Today's lesson will focus on installing and configuring an Integrated Development Environment (IDE). Think of the JDK as a set of powerful tools (a compiler, a runtime environment). An IDE is the workshop that organizes these tools, providing a workbench, excellent lighting, and helpful assistants to make your work faster, easier, and more professional. By the end of this lesson, you will have a complete, modern Java development environment ready for you to start writing code.
What is an IDE and Why Do You Need One?
Before we install anything, let's clarify what an IDE is and why it's an indispensable tool for any programmer. While you could write Java code in a simple text editor and use the command-line tools you installed in the last lesson, it would be slow and inefficient. An IDE bundles all the necessary tools into one cohesive application, dramatically boosting productivity.
To understand its core functions, let's consult an article from Career Karma that defines an IDE and contrasts it with a simple code editor.
Please read the first section of the article "Java IDE" to get a clear definition of an Integrated Development Environment.
Read from the beginning of the article down to the end of the section titled "What Is the Difference Between an IDE and a Code Editor?". Focus on understanding the key features mentioned, such as the list of tools included in an IDE. This will help you appreciate why we're taking the time to set one up.
As the article explains, an IDE combines a source-code editor with features like:
- Syntax Highlighting: Makes code readable by coloring keywords, variables, and other elements.
- Code Completion: Suggests code as you type, reducing typos and saving time.
- Debugger: Helps you find and fix errors by letting you step through your code line by line.
- Compiler/Build Integration: Allows you to compile and run your program with a single click, right from the editor.
Choosing the Right IDE for Java
The Java ecosystem offers several excellent IDEs. For beginners, it's important to choose one that is user-friendly but also powerful enough to grow with you. The three most popular IDEs for professional Java development are IntelliJ IDEA, Eclipse, and Apache NetBeans.
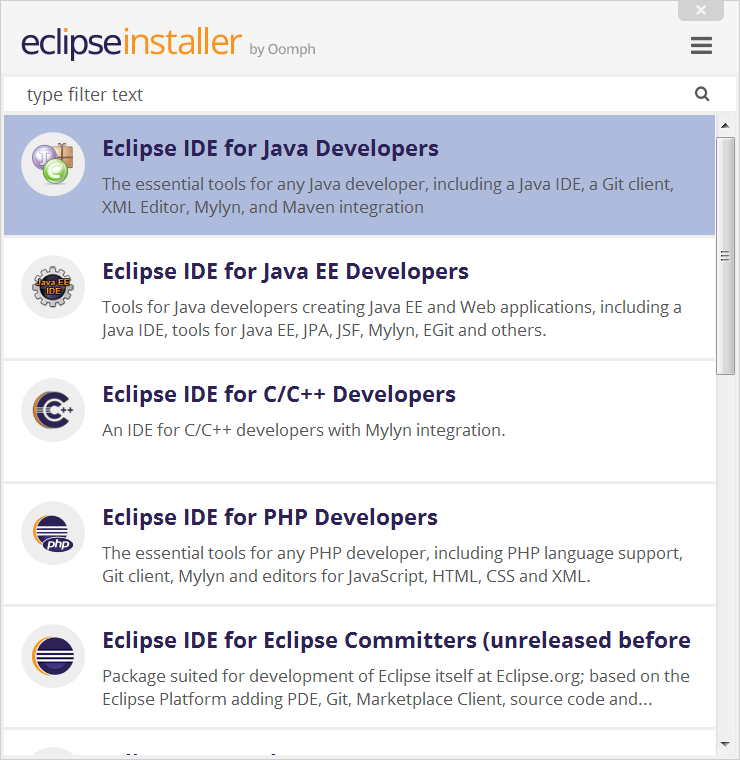
For this course, we will use IntelliJ IDEA Community Edition. It is created by a company called JetBrains and has become an industry standard due to its intelligent features, clean interface, and excellent support for Java development. The "Community Edition" is completely free and contains everything you need as a beginner and beyond.
Installing and Configuring IntelliJ IDEA
Now for the main event: installing your new development environment. We will follow a two-step process: installing the application itself, and then creating a new project to ensure it's correctly configured with the JDK you installed in the previous lesson.
The following video provides a complete walkthrough for Windows. The steps are very similar for macOS and Linux users, so it's a useful visual guide for everyone.
How to Download and Install IntelliJ IDEA and Setup for Java on Windows 10/11 2025
This video from United Top Tech will guide you through the entire setup process. We will break it down into manageable parts.
First, watch the section on downloading IntelliJ IDEA, making sure you select the free Community Edition. Next, follow the installation steps from running the installer. When you reach the "Installation Options" screen, you will see several checkboxes.
Let's pause on the installation options, as they are important for a smooth setup.

Here are the recommended settings for your first installation:
- Create Desktop Shortcut: Check this to easily launch the application.
- Update PATH Variable: Check this box. This allows you to use some of IntelliJ's command-line tools from your terminal if you ever need them. It will require a restart after installation.
- Update Context Menu: "Add 'Open Folder as Project'" is a convenient shortcut. You can check this.
- Create Associations: Check the box for
.java. This tells your operating system to open Java source files with IntelliJ IDEA by default.
After configuring these options, continue with the installation as shown in the video. You may need to restart your computer to finalize the PATH update.
Creating Your First Project and Linking the JDK
Once IntelliJ IDEA is installed, the final and most crucial step is to create a project and tell the IDE where to find your Java Development Kit. This "configures" the IDE for Java development.
Let's return to the video guide.
How to Download and Install IntelliJ IDEA and Setup for Java on Windows 10/11 2025
Now we'll launch IntelliJ and create our first project, linking it to the JDK.
Watch from the initial launch to the project creation screen. The most important part of this segment is configuring the JDK.
When you get to the "New Project" screen, you will see a field labeled JDK.
- Because you installed the JDK in the previous lesson, IntelliJ IDEA will likely auto-detect it. You should see your installed version (e.g., JDK 21) in the dropdown list. If so, simply select it.
- If it shows "No JDK," don't worry. As the video demonstrates, you can click the dropdown, select "Add JDK," and navigate to the directory where you installed Java.
- Notice that IntelliJ IDEA also gives you an option to Download JDK. This is a great convenience feature! It shows that the IDE can manage its own Java installations. Since you've already done the work, you don't need this now, but it's good to know it's there.
For a detailed textual guide on this process, you can refer to the official Java documentation from Oracle.
Building a Java application in IntelliJ IDEA - Dev.java
This article provides a written-out version of the steps to create a new project in IntelliJ IDEA.
Read the section "Creating a new project". Pay close attention to the steps for selecting the JDK. You can focus on the part describing how to select an existing JDK or download a new one. Don't worry about the Maven or Gradle settings for now; the default options are fine.
Once you've selected your JDK and clicked "Create," IntelliJ IDEA will set up your project structure. Congratulations, your development environment is now fully configured!
Conclusion
In this lesson, you've bridged the gap between having the basic Java tools and having a professional-grade development environment. You now have everything you need to start programming efficiently.
Here are the key takeaways:
- An IDE (Integrated Development Environment) is an essential application that combines a code editor with a compiler, debugger, and other tools to make programming much easier.
- IntelliJ IDEA, Eclipse, and Apache NetBeans are the most popular IDEs for Java, and we have chosen IntelliJ IDEA Community Edition for this course.
- The setup process involves installing the application and then configuring a project to use a JDK, which you had already installed.
You now have the JDK (the tools) and the IDE (the workshop). In our next lesson, we will finally step into that workshop, learn about the fundamental structure of a Java program, and write our very first application: the classic "Hello, World!".