Hello again. Welcome back to our project.
In our last two lessons, we assembled the core components of our binary protocol. We built:
- A framing layer (
EncodeandDecode) to separate messages on the TCP stream. - A serialization layer (
MarshalBinaryandUnmarshalBinary) to convert our Go structs into a compact[]bytepayload.
With the server listening and our data-handling logic in place, we're ready to build the other half of the conversation: the client.
Your Goal for Today
Learning Outcome: Establish a connection to the TCP server and implement a function to send a single framed protocol message.
Today, you will write the code that initiates a connection to our broker, takes a request struct (like ProduceRequestBody), serializes it, frames it, and sends it over the network. This is the final step in the "write path" of our client-server communication, bringing together all the protocol-level work we've done so far.
1. The Network Handshake: net.Dial
To communicate with our TCP server, a client first needs to establish a connection. In Go's standard library, this is handled by the net.Dial function.
net.Dial attempts to connect to an address on the named network. For our purposes, we'll use it like this:
conn, err := net.Dial("tcp", "localhost:9000")
if err != nil {
    // Handle error: the server is likely down or the address is wrong
    log.Fatal(err)
}
defer conn.Close() // Always clean up the connection
The function returns a net.Conn object. This is a critical interface in Go's networking package. It represents a generic stream-oriented network connection and, most importantly for us, it satisfies both io.Reader and io.Writer.
This is the key insight: because net.Conn is an io.Writer, we can pass it directly to our protocol.Encode function from the framing lesson. The Encode function doesn't need to know it's writing to a TCP socket; it just needs an io.Writer. This powerful abstraction allows us to reuse our framing logic seamlessly.
2. A Blueprint for a TCP Client
With net.Dial providing the connection, the next step is to use it to send a message. A great practical example of this is available in the following article, which demonstrates a client sending a framed message.
How to Implement Custom Binary Protocols Over TCP in Go
The article 'How to Implement Custom Binary Protocols Over TCP in Go' by OneUptime provides a clear and concise example of a client that connects, encodes a message, and writes it to the connection. This is a perfect blueprint for our task.
Please read the short section titled 'Building the Client'. Pay close attention to the sequence of operations in the main function: connecting with net.Dial, creating a message struct, and then passing the connection and the message to protocol.Encode.
The example in the article illustrates the fundamental pattern:
- Connect:
net.Dialestablishes the communication channel. - Prepare: A message struct is instantiated and populated with data.
- Send: An
Encodefunction writes the framed message directly into thenet.Conn.
Notice how the protocol.Encode call hides all the complexity of byte ordering, length prefixing, and writing to the stream. Our implementation will follow this same elegant pattern.
3. From Blueprint to Reusable Function
The example from the article is great, but putting all the logic in main isn't ideal for a real application. Let's create a reusable helper function that encapsulates the logic for sending a single request. This function will be the cornerstone of our client library.
It will take the active connection, the message type, and the message body (as a Go struct) and orchestrate the two key steps: serialization and framing.
Here's the implementation. You can add this to a new file, perhaps pkg/client/client.go.
// file: pkg/client/client.go
package client

import (
    "encoding"
    "fmt"
    "net"

    "our-project/internal/protocol" // Use your project's module path
)

// sendRequest serializes the request body and sends it to the server as a
// single framed message. It uses the components we've built in previous lessons.
func sendRequest(conn net.Conn, msgType protocol.MessageType, body encoding.BinaryMarshaler) error {
    // 1. Serialize the message body struct into a byte slice.
    // This is the logic we built in the previous lesson.
    payload, err := body.MarshalBinary()
    if err != nil {
        return fmt.Errorf("failed to marshal message body: %w", err)
    }

    // 2. Encode the full message (header + payload) and write it to the connection.
    // This uses the framing logic we built two lessons ago. The `net.Conn`
    // acts as the io.Writer.
    err = protocol.Encode(conn, msgType, payload)
    if err != nil {
        return fmt.Errorf("failed to encode and send message: %w", err)
    }

    return nil
}
This function neatly brings everything together. It's a clear demonstration of the layered design we've been building: sendRequest doesn't know about the specifics of serialization or framing, only that the body can be marshaled and that the protocol package can encode it.
4. Implementing the Client Entrypoint
Now, let's create the main application for our client. This will be an executable that uses our new sendRequest function to send a Produce request to the broker.
Create a new file at cmd/client/main.go.
// file: cmd/client/main.go
package main

import (
    "encoding"
    "fmt"
    "log"
    "net"

    "our-project/internal/protocol" // Use your project's module path
)

const serverAddr = "localhost:9000"

func main() {
    log.Printf("Connecting to broker at %s", serverAddr)
    conn, err := net.Dial("tcp", serverAddr)
    if err != nil {
        log.Fatalf("Failed to connect to server: %v", err)
    }
    defer conn.Close()

    log.Println("Connection established. Sending a produce request...")

    // 1. Create the request body we want to send.
    // This is the Go struct that will be serialized into the message payload.
    reqBody := &protocol.ProduceRequestBody{
        TopicName:   "logs",
        PartitionID: 0,
        Data:        []byte("hello from client at " + conn.LocalAddr().String()),
    }

    // 2. Call our helper to serialize, frame, and send the request.
    err = sendRequest(conn, protocol.MsgProduceRequest, reqBody)
    if err != nil {
        log.Fatalf("Failed to send request: %v", err)
    }

    log.Println("Produce request sent successfully!")

    // In the next lesson, we will add code here to wait for and
    // decode the server's response.
}

// You can place the sendRequest function here for now, or in a separate package.
func sendRequest(conn net.Conn, msgType protocol.MessageType, body encoding.BinaryMarshaler) error {
    payload, err := body.MarshalBinary()
    if err != nil {
        return fmt.Errorf("failed to marshal message body: %w", err)
    }
    err = protocol.Encode(conn, msgType, payload)
    if err != nil {
        return fmt.Errorf("failed to encode and send message: %w", err)
    }
    return nil
}
When you run this main function (while the server from the previous lessons is also running), it will connect, create a Produce request, and send it. On your server's console, you should see the connection being accepted.
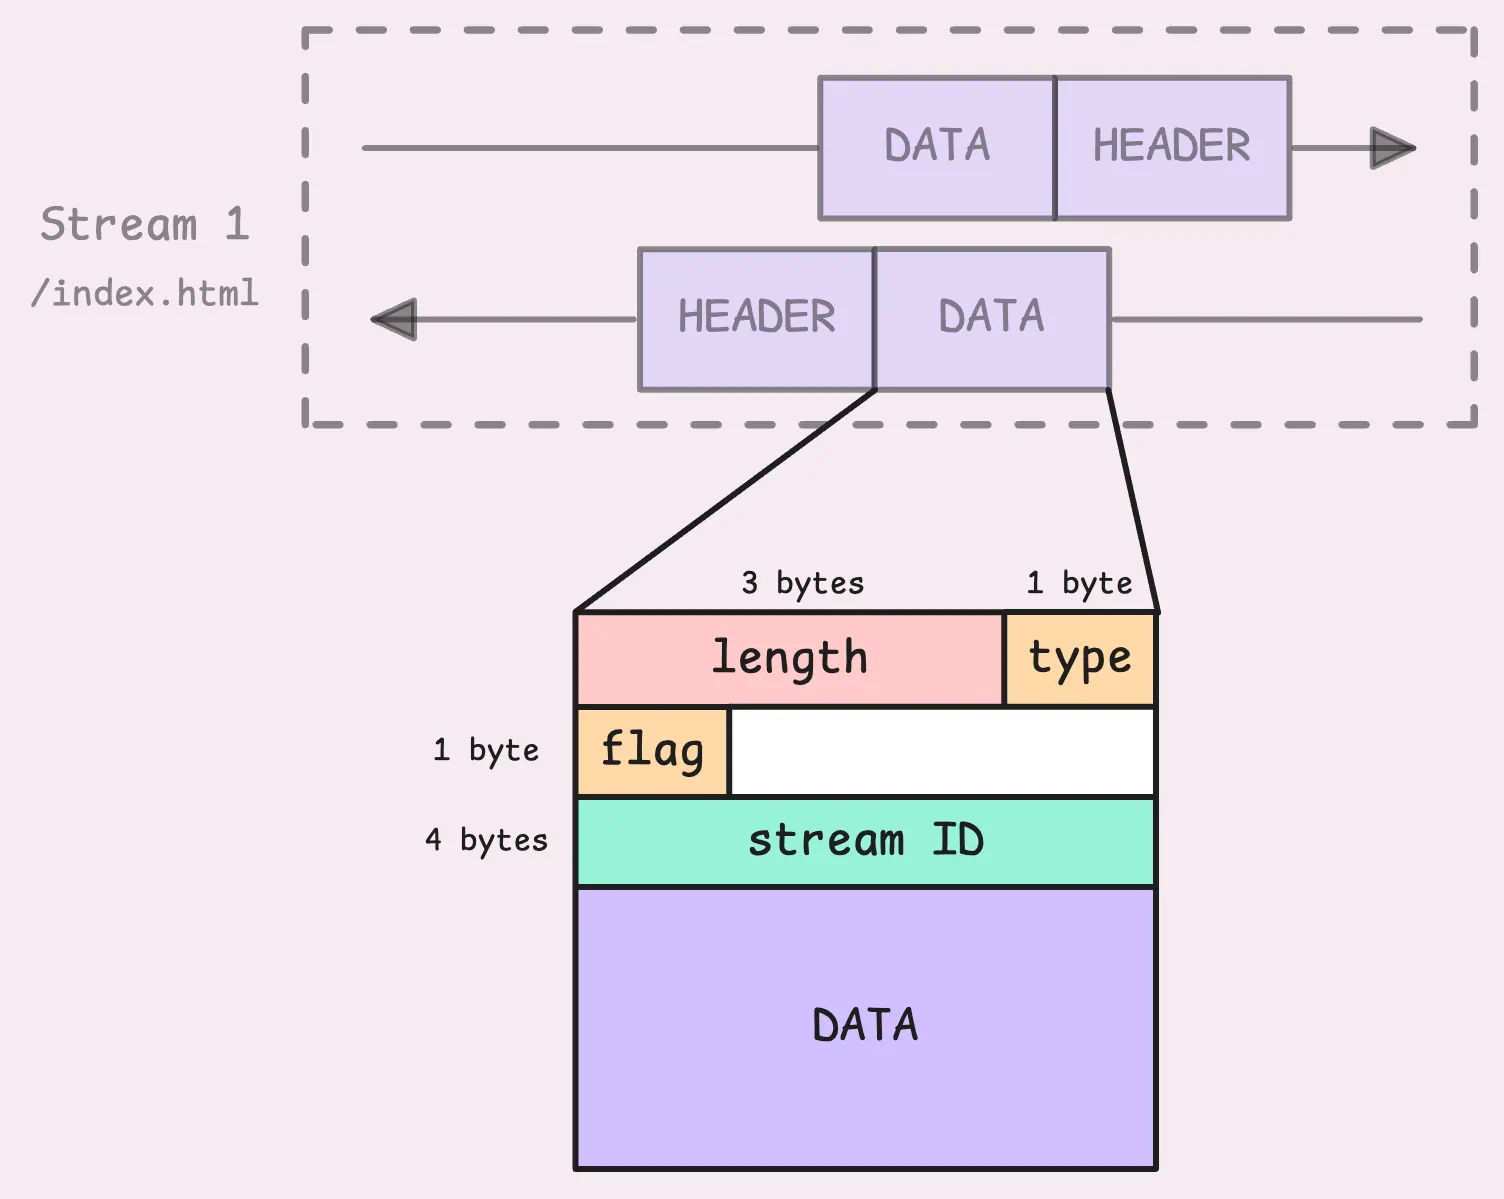
Our protocol.Encode function constructs a frame for our data that is conceptually similar to frames used in standard, high-performance protocols like HTTP/2. It wraps the payload in a header containing metadata (like message type and length) that the receiver needs to parse it correctly.
Conclusion
Congratulations! You have successfully sent your first structured, binary message from a client to your server. You've now implemented a complete write path from scratch.
Key Takeaways:
net.Dialis the standard Go function for initiating a TCP connection.- The returned
net.Connsatisfies theio.Writerinterface, allowing it to be used directly by our existingprotocol.Encodefunction. - Client-side logic can be cleanly organized by creating a helper function that orchestrates serialization (
MarshalBinary) and framing (Encode). - We have successfully composed several small, focused components (
net,encoding/binary, ourprotocolpackage) into a working system.
Next Up
Sending a request is only half the battle. Our server will process the request and send back a response (e.g., an acknowledgment). In the next lesson, we will complete the client by implementing a read loop to receive, decode, and process this response from the server.