Welcome to the next lesson in your journey to becoming a freelance designer. In our previous session, you mastered the crucial skill of adapting a structured social media template for different platforms. This was all about logic, responsiveness, and efficiency—skills that draw on your analytical background.
Today, we're shifting gears to tap into your creative and entrepreneurial side, the one honed through your bespoke gifting business. We will move from the world of rigid, content-driven layouts to the more artistic realm of decorative design. Your goal for this lesson is to compose a decorative layout for a digital invitation using advanced layering and typography. This is a highly marketable skill and a perfect service to offer your existing network.
We'll cover how to plan a design with a specific theme, choose and manipulate typography to create a mood, and use advanced layering techniques like masking to add depth and visual flair.
1. Planning a Decorative Design
Unlike a social media post which often follows a strict template, a digital invitation is an opportunity for visual storytelling. Your experience creating custom crafts will be a huge asset here. The process starts not in Figma, but with inspiration and planning.
Canva Template for Graduation Invitation | HIVO
This article from HIVO, while focused on graduation invitations, outlines a universal planning process that applies to any decorative design project. It aligns perfectly with the client-centric approach you developed in your gifting business.
Please read the following sections: Start with "Gathering Inspiration and Planning the Design." Focus on the subsections about exploring styles and determining the theme and tone. This is the strategic part of the design process. Then, jump to "Designing the Invitation Elements." Pay close attention to the parts about choosing fonts and adding decorative elements. This will set the stage for our hands-on work in Figma.
2. The Soul of the Invitation: Advanced Typography
For a decorative piece like an invitation, typography isn't just for conveying information; it is a core part of the design. The fonts you choose set the mood—be it elegant, modern, playful, or formal.
A classic approach for invitations is to pair a highly decorative script or display font (for names and headlines) with a clean, readable serif or sans-serif font (for details like date, time, and venue).
This Figma resource is an excellent library of font pairings that work beautifully for celebratory events.
23 Best Wedding Font Pairings - Figma
This article from Figma is a visual goldmine. It doesn't just list fonts; it shows them in action and explains why the pairings work.
Browse through the various pairings in the main body of the article. Don't worry about memorizing them. Instead, get a feel for the different aesthetics you can create. Notice the pattern: one "star" font and one "supporting" font. Read the short section at the end, "Tips for selecting a wedding font pairing." These four tips are a concise summary of professional best practices.
Once you've chosen your fonts, Figma gives you powerful tools to manipulate them for artistic effect. You can go far beyond simply typing text in a box.
Figma Design for K-12: Typography basics
This video from Figma's official channel demonstrates some more advanced typographic techniques that are perfect for decorative layouts.
Focus on these specific creative techniques: Text on paths: Learn how to make your text follow a curve or a custom shape. Text fills and strokes: See how to create hollow text or fill text with gradients. Converting text to vectors: This is an advanced trick that lets you directly edit the shape of letters, giving you ultimate creative control.
3. Creating Depth and Flair: Advanced Layering with Masks
"Advanced layering" is about making your design feel rich and three-dimensional, rather than flat. The key Figma tool for this is masking. You may have used masks to crop photos, but their creative potential is much greater. A mask uses the shape and transparency of one layer to control the visibility of another.
This allows you to:
- Fill text with an image or texture.
- Frame a photo inside a custom, non-rectangular shape.
- Create soft, glowing highlights and complex patterns.

The following video provides an excellent, in-depth explanation of how masks work and how to use them for sophisticated decorative effects.
Figma Masks - In-Depth Explanation for Beginners and Pros
This video from Pixel Point is a fantastic deep dive into Figma's masking capabilities, moving from basic principles to professional examples.
Watch these key sections to understand how to apply masking in your invitation design: The basic concept: A quick refresher on what a mask is and how it works. Using groups as masks: This explains how to use multiple shapes together as a single, complex mask. Real examples: This is the most important part. Pay close attention to how they use masks to create text highlighting and smooth border lighting. These are techniques you can directly apply to an invitation.
4. Your Turn: Design a Digital "Save the Date"
Let's put all this together. Imagine a client from your bespoke gifting business has asked you to design a simple, elegant "Save the Date" digital invitation.
Open a new Figma file and let's get started.
Step 1: Set Up the Frame
- Press
Fto select the Frame tool. In the right sidebar, choose the "Phone" -> "iPhone 14" preset (or any similar vertical phone screen). A 1080x1920px frame is also a great standard for mobile invitations. - Name your frame
Save the Date.
Step 2: Establish Typographic Hierarchy
- Drawing from the "23 Best Wedding Font Pairings" article, choose a script font and a serif/sans-serif font from Google Fonts (which are available in Figma by default). For example, let's use Playfair Display (serif) and Dancing Script (script).
- Type out the couple's names (e.g., "Emily & Thomas") using
Dancing Script. Make this the largest text element. - Add the phrases "ARE GETTING MARRIED" and "SAVE THE DATE" using
Playfair Display. Make these smaller. - Add the date and location in
Playfair Displayas well, but make this the smallest text to establish a clear visual hierarchy. Arrange these elements roughly in the center.
Step 3: Add a Decorative Background Element
- Let's add a subtle, elegant image. Use a plugin like Unsplash to find a high-quality, free-to-use photo. Search for something like "eucalyptus leaf" or "soft watercolor texture."
- Place the image onto your canvas, covering the entire frame. In the Layers panel, drag the image layer below all your text layers.
- The text might be hard to read. Select the image layer, and in the Fill section of the right sidebar, reduce its opacity to around
30%or40%. This will push it into the background.
Step 4: Use a Mask for an Advanced Text Effect
Let's make the couple's names stand out by filling them with a texture.
- Find another texture image from Unsplash, perhaps "gold foil" or a rich watercolor swatch. Place it on your canvas.
- Select the text layer with the couple's names (e.g., "Emily & Thomas").
- Using the technique from the "Figma Design for K-12" video, convert this text to a vector shape by right-clicking and choosing "Flatten" or pressing
Cmd+E/Ctrl+E. - In the Layers panel, drag this new vector shape so it is directly above the texture image you just added.
- Select both the vector shape and the texture image layer below it (hold
Shiftand click). - Click the "Use as Mask" icon in the top center toolbar (it looks like a circle with a bite taken out of it), or press
Cmd+Ctrl+M/Ctrl+Alt+M.
The texture should now appear "inside" the names, creating a beautiful, high-end decorative effect.
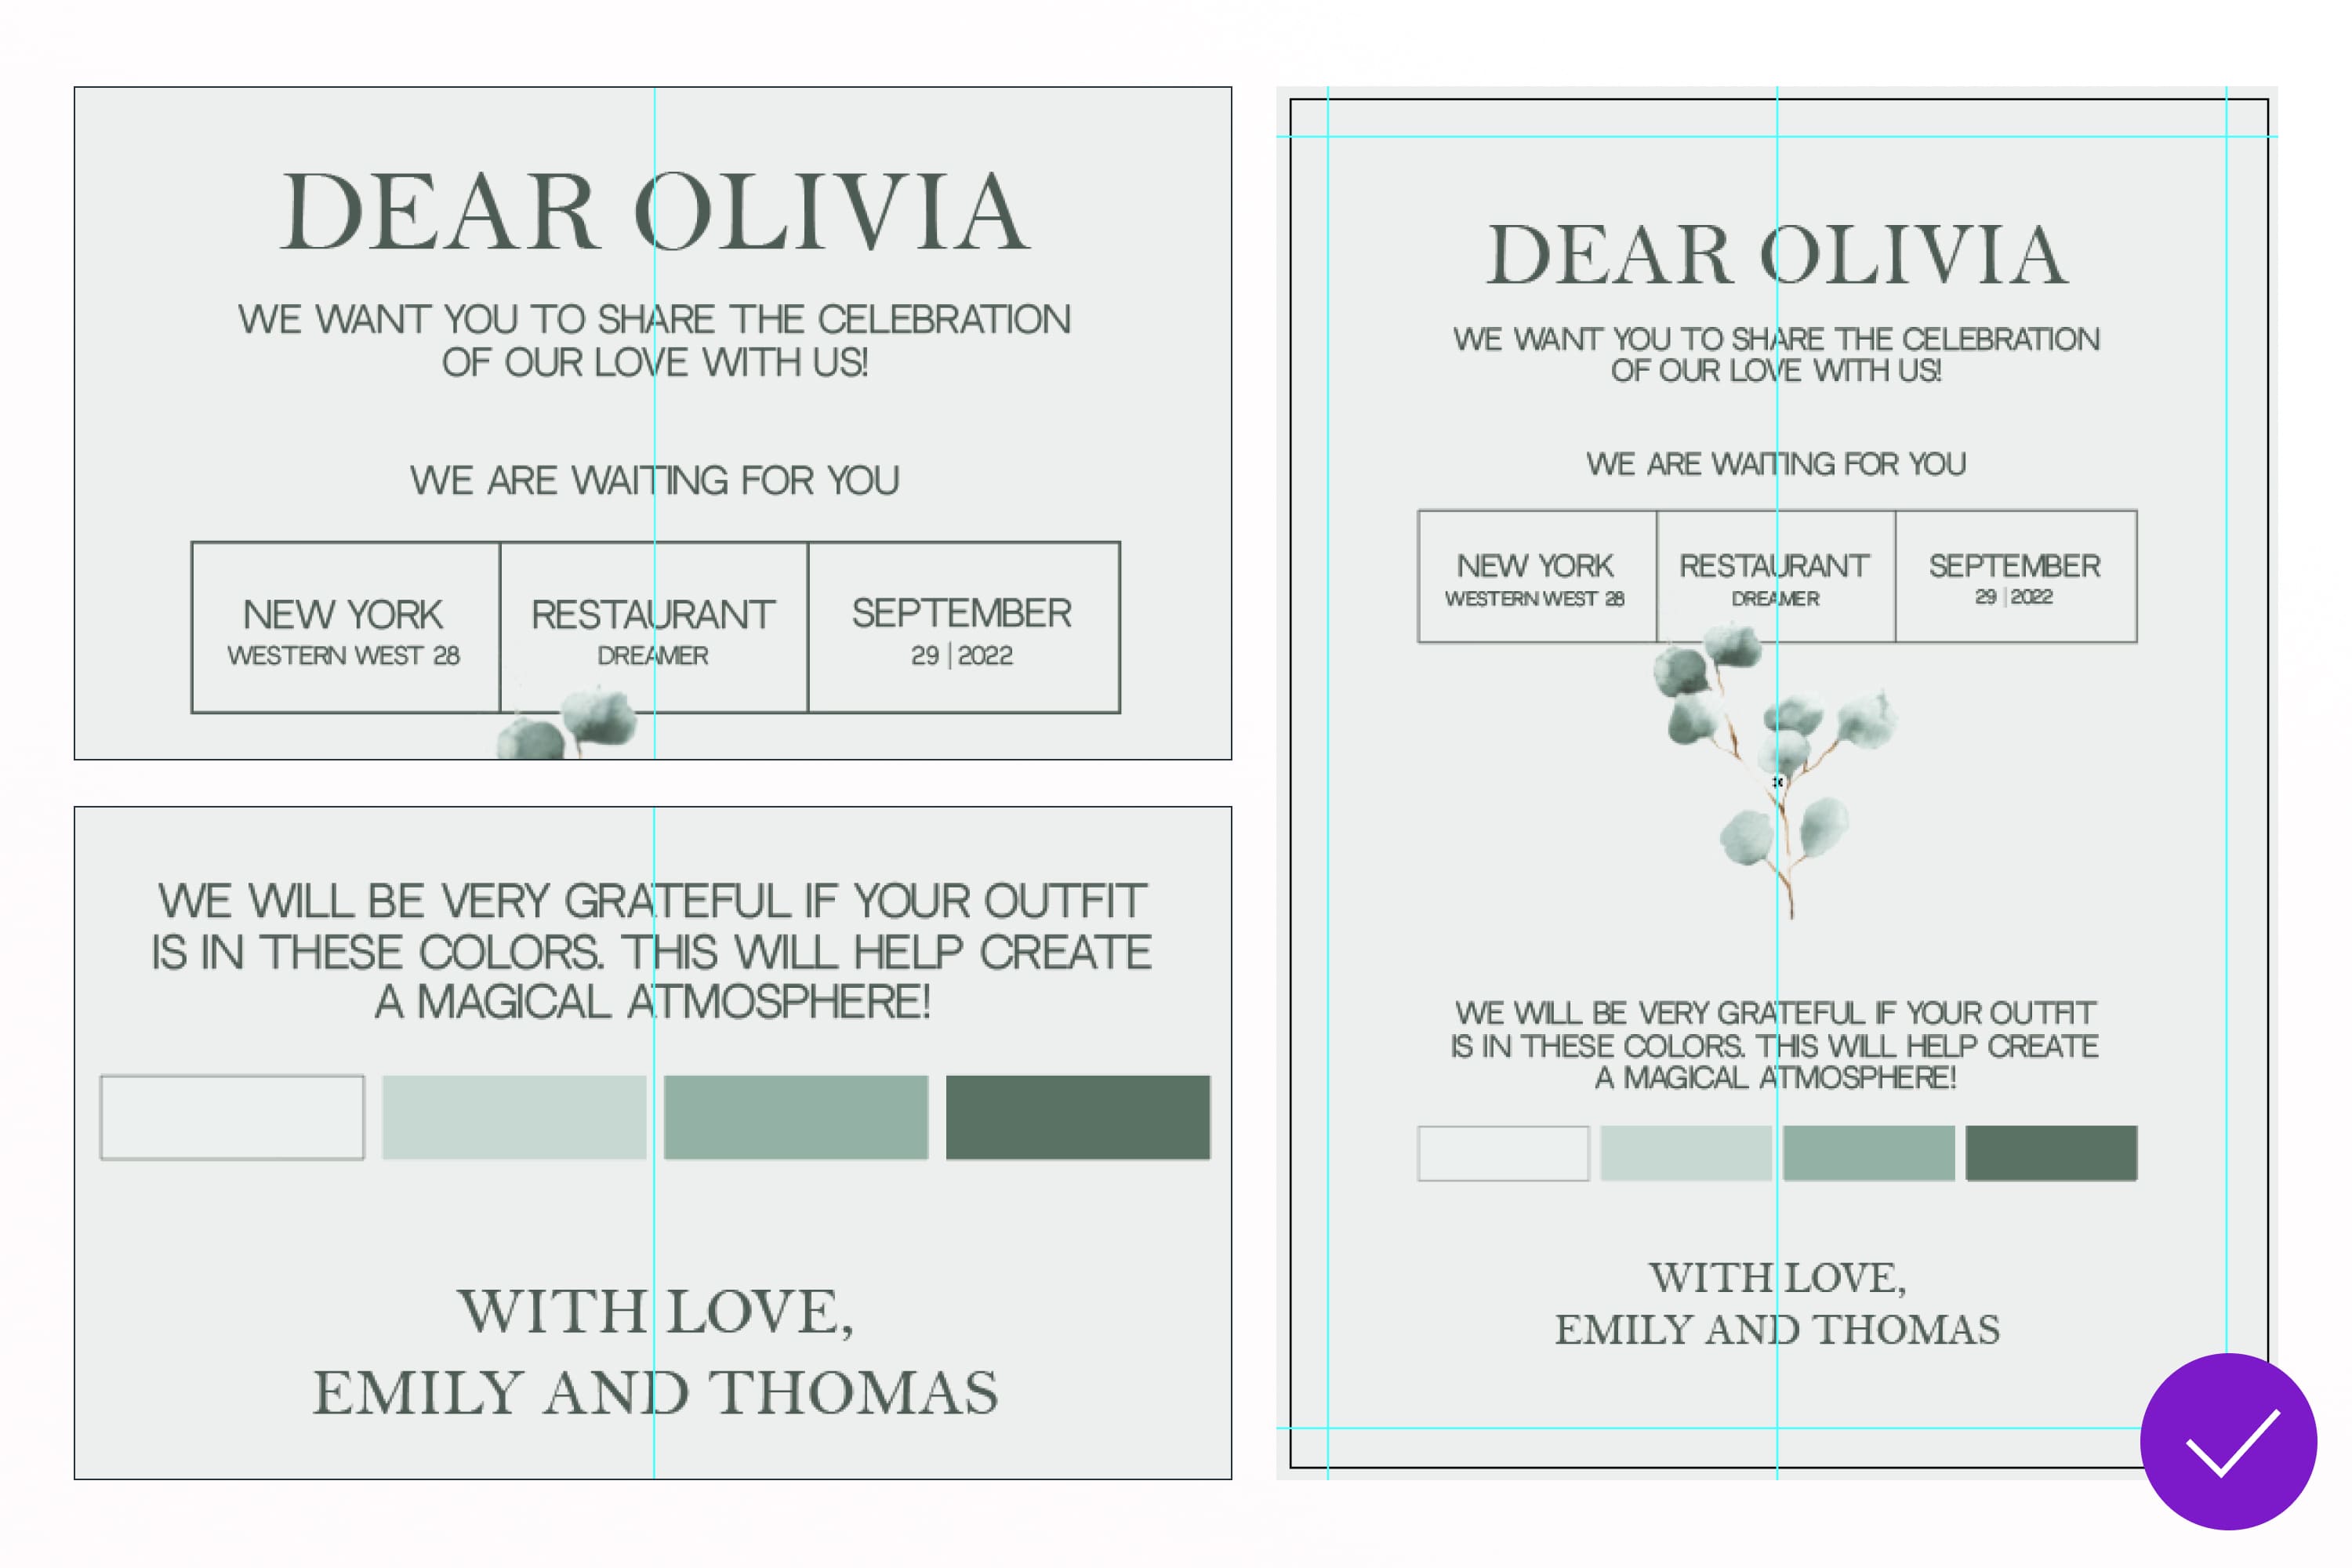
Feel free to experiment! Try different font pairings, images, and masking techniques to create a design that reflects the style you're aiming for.
Conclusion
You've successfully moved beyond structured templates and composed a piece of decorative design. This exercise blends the artistic eye you've developed from your crafting business with the powerful digital tools in Figma.
Key Takeaways:
- Decorative design starts with a plan: Define the theme, tone, and mood before you open Figma.
- Typography is a design element: Use font pairings (e.g., script + serif) to create visual interest and hierarchy.
- Go beyond basic text: Techniques like converting text to vectors and placing it on paths unlock immense creative potential.
- Masking is for more than cropping: Use masks to create sophisticated layers, fill shapes with images, and add texture to your designs.
Preview of the Next Lesson:
In our next lesson, we will swing back towards structured, systematic design. You will learn how to create a modular email newsletter template. This will build on your Auto Layout skills and teach you how to design flexible content blocks that a client can easily reuse—another incredibly valuable freelance service.