Introduction
In our last lesson, you successfully built your first clickable prototype, connecting static screens into a functional user flow. This is a critical step in bringing a design to life. Today, we'll elevate that experience from functional to delightful. You'll move beyond basic transitions like Instant or Slide in and learn to create animations that feel fluid, professional, and intuitive.
The learning outcome for this lesson is to use Smart Animate in Figma to create smooth, meaningful screen transitions. Smart Animate is one of Figma's most powerful features. For a freelancer, mastering it is a way to make your work stand out. It transforms a design from a simple click-through mockup into a high-fidelity prototype that feels like a real, polished product, allowing you to showcase the quality of your execution and command higher value from clients.
Part 1: Understanding the Magic Behind Smart Animate
Unlike a standard animation like Move In, which slides an entire frame into view, Smart Animate is more intelligent. It looks at two frames—a start and an end point—finds matching elements, and automatically animates the differences in their properties (like size, position, color, or opacity).
Think of it like the "pose-to-pose" principle from classical animation. You define the key poses (your start and end frames), and Smart Animate generates all the "in-between" frames to create a fluid motion.
This video from Figma provides a quick, high-level introduction to the different transition types, including Smart Animate.
Figma Tutorial: Prototyping & Transitions
This video from the official Figma channel offers a concise explanation of how different animations work.
Watch the segment on transition types. Pay close attention to the definition of Smart Animate: it "matches layers between each frame and animates the changes to properties."
So, how does it "match" the layers? There are two core mechanisms at play:
- Layer Matching: Smart Animate identifies objects across two frames that have the exact same layer name.
- Property Detection: It then detects any changes to the properties of these matched layers—position, size, rotation, fill, stroke, and opacity—and tweens them smoothly.
This article from Boundev gives a great, brief explanation of this process.
Figma Animation Tutorial: Animate UI Components Guide - Boundev
This section succinctly breaks down the technical logic behind Smart Animate.
Read the section titled "Smart Animate: How It Works." This will solidify your understanding of Layer Matching, Property Detection, and Nested Logic.
Part 2: The Three Golden Rules of Smart Animate
While Smart Animate can seem magical, it operates on a strict set of rules. If you don't follow them, the animation will default to a simple Dissolve (fade), which is a common point of confusion for beginners. Your structured, detail-oriented approach from your finance work will be a great asset here.
This next video is an excellent, practical guide that highlights the most common pitfalls and how to avoid them.
What is Smart Animation & Delays in Figma
The video "What is Smart Animation & Delays in Figma" from Bring Your Own Laptop is a fantastic, hands-on demonstration.
Watch these three key parts: The setup: Notice the core process of duplicating a frame and changing an element's properties. Critically, observe the problem he points out around layer containment and how he fixes it by dragging the layer back into the frame in the Layers panel. The naming quirk: This section demonstrates what happens when layer names don't match and reinforces the importance of identical naming. The recap: The instructor provides a perfect summary of the rules for successful animation.
Based on the video, here are the three golden rules you must always follow for Smart Animate to work:
- Matching Layer Names: The object you want to animate must have the exact same name in both the starting and ending frames. For example, a layer named
HeroImagein Frame A must also be namedHeroImagein Frame B.Hero Image(with a space) will not work. - Persistent Objects: The object must exist in both frames. You cannot animate an object appearing out of nowhere; it must be present in the starting frame, even if it's off-screen or has 0% opacity.
- Frame Containment: The object must be located within its respective frame in the Layers panel. It's easy to accidentally drag an object outside a frame's boundaries on the canvas, which removes it from the frame's layer hierarchy and breaks the animation.
Part 3: Hands-On Practice: Creating a Shared Element Transition
Let's apply these rules to create a sophisticated transition that is very common in modern apps. We'll animate a product thumbnail expanding into the main image on a product detail page.
You can use the prototype you built in the last lesson or create two simple new frames:
- Frame 1:
Product List(containing several small product cards) - Frame 2:
Product Detail(containing a large hero image and product info)
Follow these steps:
-
Prepare Your Layers:
- In the
Product Listframe, select the image inside one of your product cards. In the Layers panel, give it a unique and clear name, likeproduct-image-active. - In the
Product Detailframe, select the large hero image. In the Layers panel, give it the exact same name:product-image-active.
- In the
-
Create the Prototype Connection:
- Switch to the Prototype tab in the right sidebar.
- Select the product card (or just the image
product-image-active) in yourProduct Listframe. - Click and drag the blue connection handle (+) to the
Product Detailframe.
-
Configure Smart Animate:
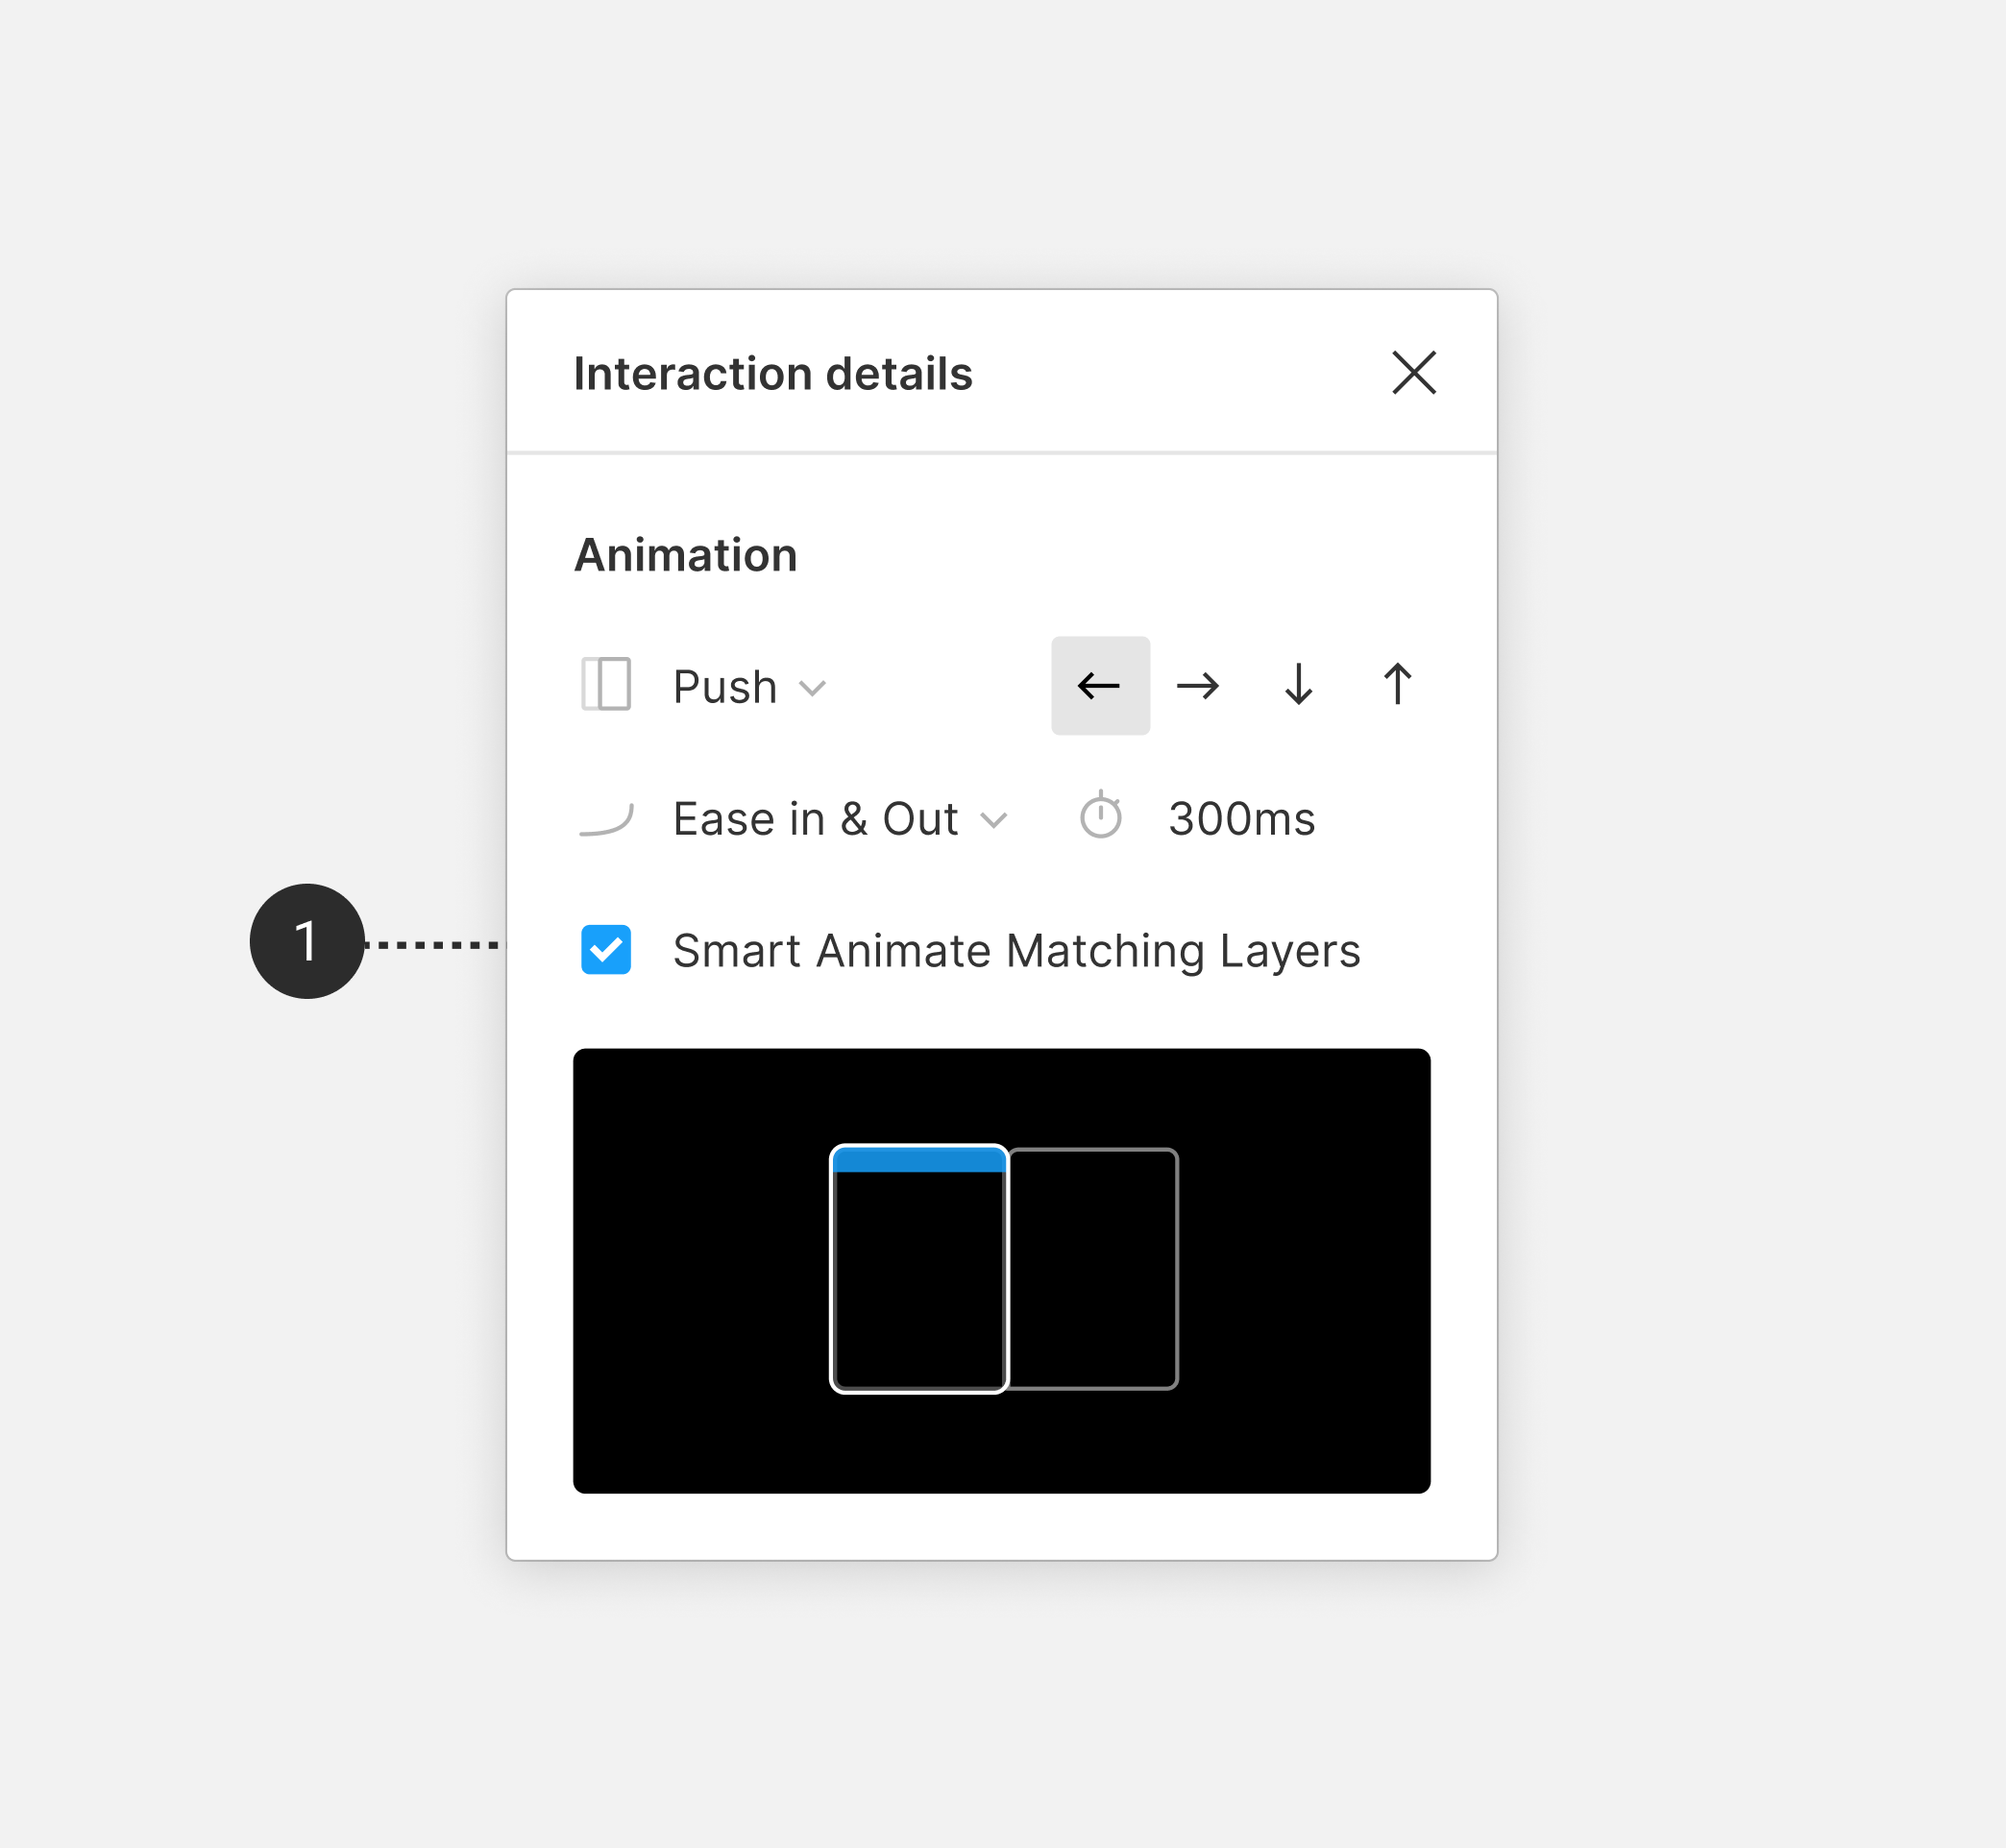
- The "Interaction details" panel will appear.
- Set the trigger to
On click. - Set the action to
Navigate to. - For the animation, select
Smart Animate.
-
Test Your Work:
- Click the "Present" (play) icon in the top right.
- In the presentation view, click on the product card you connected.
- You should see the small image fluidly grow and move into the position of the large hero image.
If it simply fades, double-check the three golden rules: Are the layer names identical? Is the image inside both frames in the Layers panel?
Part 4: Making Transitions Meaningful
A smooth animation is good, but a meaningful one is better. Animation in UI isn't just decoration; it should serve a purpose. It can guide the user's attention, provide feedback, and create a sense of physical space in the interface.
The foundational principles for this come from traditional animation, famously codified by Disney's animators. Understanding them will help you make better decisions about your motion design.

Let's explore a few principles that are directly applicable in Figma.
Disney's 12 principles of animation, exemplified in UX ...
This UX Collective article provides excellent examples of how classic animation principles apply to modern UI design.
Focus on these three principles: "4. Straight-ahead action and pose-to-pose": This is the very concept we discussed for Smart Animate. "6. Slow In and Slow Out": This refers to Easing, which controls the acceleration and deceleration of an animation. An object in real life doesn't start and stop moving instantly. Easing makes motion feel natural. "9. Timing": This refers to the Duration of your animation. A quick transition feels brisk and efficient, while a slower one can feel more deliberate or luxurious.
Now, let's apply this. Go back to the prototype connection you just made. In the "Interaction details" panel, you'll see settings for Easing and Duration.
- Easing: The default is
Ease out, which starts fast and slows down at the end. Try changing it toEase in and out(starts and ends slow, fast in the middle) orEase in and out back(adds a little overshoot/bounce). Notice how this changes the "personality" of the transition. - Duration: The default is 300ms. For a complex screen transition, this is a good starting point. As a general rule, use faster speeds (around 200ms) for small, quick feedback (like a button press) and slower speeds (400-600ms) for larger, more complex transitions where the user needs a moment to process the change.
Experiment with these settings on your prototype. See how changing the timing and easing can dramatically alter the feel of the interaction.
Conclusion
Today you've unlocked one of Figma's most impressive features. By moving beyond basic transitions to Smart Animate, you can create prototypes that feel incredibly lifelike and professional. This skill is a powerful differentiator in a freelance portfolio.
Key Takeaways:
- Smart Animate creates smooth transitions by animating the property differences between identically named layers across two frames.
- To make it work, you must follow the three golden rules: matching layer names, persistent objects, and frame containment.
- Meaningful motion is guided by animation principles. Use Easing to make movement feel natural and Timing (Duration) to control the pace and feel of the user experience.
- The "pose-to-pose" model is the perfect mental framework: you design the key states, and Figma handles the animation between them.
Preview of the Next Lesson:
You've now mastered creating smooth transitions between screens. In our next lesson, we'll apply these same principles on a smaller scale. You will design and prototype common microinteractions like hover states, button feedback, and toggles. This is where you'll bring individual components to life and add that final layer of polish that defines a truly great user interface.