Introduction
In our previous lesson, you designed and annotated a low-friction checkout flow, translating psychological principles into a tangible design hypothesis. This ability to design with intent is a powerful skill. However, a design is only a hypothesis until it's tested with real people.
Today, we'll focus on putting your design to the test. The learning outcome is to conduct a wireframe usability walkthrough with a peer and document key findings. This process is about observing someone interact with your wireframes to see what's clear and what's confusing. For a freelancer, this is a crucial, marketable skill. It allows you to move beyond simply delivering a design to proving its effectiveness, providing data-backed recommendations that directly impact a client's business goals.
Part 1: Why Test Wireframes? The Art of Early Validation
Before we dive into the "how," let's solidify the "why." A wireframe usability walkthrough is a form of early-stage usability testing. Because wireframes are low-fidelity and lack visual polish, they force the participant to focus purely on structure, navigation, and clarity—the very skeleton of the user experience.
Finding a problem at this stage is incredibly efficient. Your background in finance and audit has shown you the high cost of errors found late in a process; the same principle applies here.
Wireframe Testing: How to Find Usability Issues Early - MockFlow
This article from MockFlow makes a compelling case for the value of testing low-fidelity designs. It directly connects early testing to saving time and money, a key concept for any business-minded designer.
Read the sections "What is Wireframe Testing?" and "Why Wireframe Testing Matters." Pay special attention to the financial case for early testing—the statistic from IBM's research is a powerful one to have in your toolkit when speaking with clients.
Part 2: Preparing for Your Peer Walkthrough
Even an informal walkthrough with a peer benefits from a structured approach. Good preparation ensures you get valuable, unbiased feedback. There are three key components: your goal, your tasks, and your script.
-
Define Your Goal: Your primary goal is to evaluate the usability of the checkout flow you designed. Specifically, you want to know:
- Can a user easily and confidently navigate from the first step to placing an order?
- Are the form fields and instructions clear?
- Where do users hesitate, get confused, or make errors?
-
Define User Tasks: Don't just ask, "What do you think?" Give your participant a realistic scenario and a goal. For your checkout flow, the task is simple and direct:
- Scenario: "Imagine you've found the perfect bespoke gift on my website and you're ready to buy it."
- Task: "Please show me how you would go about purchasing this item. As you go, please try to think out loud—tell me what you're looking at, what you're thinking, and what you expect to happen."
-
Prepare a Simple Script: A script helps you start the session consistently and set the right tone. It's not about reading lines robotically; it's a checklist to ensure you cover the essentials. A good introduction makes the participant feel comfortable and emphasizes that you are testing the design, not them.
This short video from the Nielsen Norman Group is a perfect demonstration of how a facilitator should introduce a usability test.
Introducing a Participant to a Usability Test: A Demonstration
This video by the NNgroup, a leader in UX research, shows a real facilitator introducing a usability session. It's a masterclass in setting the stage for honest feedback.
Watch the entire introduction from the beginning. Notice how the facilitator: Sets expectations about time and purpose. Emphasizes that they are testing the design, not the user. Introduces the "think-aloud" protocol. Reassures the participant that there are no wrong answers and that honest feedback is helpful.
Part 3: Conducting the Walkthrough: The Art of Facilitation
During the walkthrough, your role is to be a neutral observer and facilitator. Your main job is to listen and watch. Resist the urge to explain your design or jump in to help if the user gets stuck. A moment of confusion is a valuable piece of data!
Usability Testing Tips and Examples | Google UX Design Certificate
This video from the Google UX Design Certificate course provides excellent, practical tips on moderating a session and being aware of your own potential biases.
Watch these two key segments: Moderating a Study: This section covers building rapport and, crucially, how to ask open-ended and follow-up questions. Pay attention to the examples like "How do you think that went?" instead of "Did you like it?" Common Biases: Focus on the descriptions of friendliness bias and social desirability bias. Being aware of these will help you avoid unintentionally leading your participant toward positive feedback.
To summarize your role as a facilitator:
- Introduce the session using your script.
- Give the user the task and remind them to think aloud.
- Listen and observe. Take notes on what they say and do. Where do their eyes go? Where do they hesitate?
- Ask open-ended follow-up questions when you need clarity (e.g., "What made you say that?" or "What were you expecting to happen there?").
- Thank them for their time and honest feedback.
Part 4: Documenting and Analyzing Your Findings
The walkthrough is over. Now, how do you turn your observations into actionable insights? You need a systematic way to capture, organize, and prioritize what you found. A simple spreadsheet is an excellent tool for this, allowing for structured and objective analysis.
Usability Testing Tips and Examples | Google UX Design Certificate
This final clip from the Google UX video introduces a powerful and structured method for taking and analyzing notes from a usability study.
Watch the section on Note-Taking. Focus on the "spreadsheet note-taking" method demonstrated. This structured approach is perfect for your analytical mindset. Notice how they use rows for observations and columns for participants, marking a 1 if the observation is true. This quickly reveals patterns.
Once your observations are organized, the final step is to synthesize them into a clear report. The goal is to identify patterns, prioritize the issues, and recommend solutions.
Prioritizing Findings
A common and effective way to prioritize is to categorize issues by severity. This helps you and your future clients decide what to fix first.
Wireframe Testing: How to Find Usability Issues Early - MockFlow
This section of the MockFlow article provides a clear framework for analyzing and prioritizing the issues you uncover.
Read the section "Analyzing Wireframe Testing Results." Focus on the subsection "Categorizing Issues Based on Severity." The breakdown into Critical, Major, and Minor issues is a standard industry practice.
A professional report summarizes these prioritized findings clearly. It doesn't need to be long, but it should be structured.
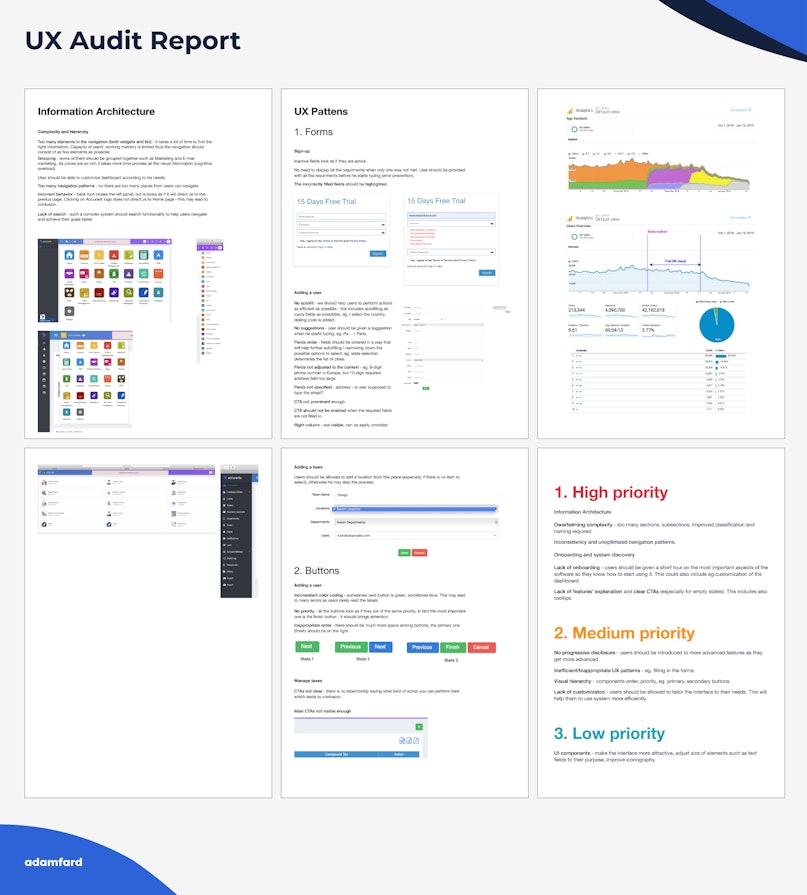
Part 5: Your Turn: Conduct and Document
Now it's time to put all this together.
Your Assignment:
- Find a Peer: Ask a friend, family member, or colleague to be your participant. Choose someone who will give you honest feedback. The session should take about 15-20 minutes.
- Conduct the Walkthrough:
- Use the checkout flow wireframes you created in the previous lesson.
- Prepare your script based on the NNgroup video.
- Give your participant the scenario and task.
- Facilitate the session, remembering to listen more than you talk and to ask open-ended questions. Take notes during or immediately after.
- Document Your Findings:
- Create a simple document (like a Google Doc or Notion page) or a spreadsheet to report your findings.
- Structure your report with these sections:
- Objective: What was the goal of the test?
- Participant: A brief, anonymous description (e.g., "Female, 30s, frequent online shopper").
- Key Findings: A bulleted list of the top 3-5 observations (positive or negative). For each finding, describe what happened and include a direct quote if possible.
- Prioritized Issues & Recommendations: List at least one "Major" or "Critical" issue you discovered. For that issue, explain why it's a problem and propose a specific design change to fix it.
This exercise simulates exactly what you would do for a client to validate a design and recommend improvements.
Conclusion
Congratulations! You've now completed the full mini-cycle of designing and testing. You created a wireframe based on sound principles, and now you've learned how to pressure-test it with a real person to gather objective feedback. This process transforms you from a designer who thinks they have a good solution into one who can prove it.
Key Takeaways:
- A wireframe usability walkthrough is a fast, low-cost method to find major structural and usability problems early.
- Effective facilitation involves setting the stage properly, giving the user a clear task, and using open-ended questions to probe their thought process without leading them.
- Documenting findings systematically—by organizing observations and prioritizing issues by severity—turns messy feedback into an actionable plan.
Preview of the Next Lesson:
In this lesson, you identified potential issues with your wireframe. In our next lesson, we will begin Module 8, "Prototyping & Micro-interactions." The first step will be to build a complete, clickable prototype for a primary user path across multiple screens in Figma. You'll take the insights from your walkthrough, refine your wireframes, and then link them together to create an interactive experience that feels much closer to a real product.