Welcome back! In our previous session, we successfully bootstrapped our first Spring Boot project using the Spring Initializr. You now have a runnable application skeleton, and you understand the key components like pom.xml, the @SpringBootApplication annotation, and how Spring Boot starters simplify dependency management.
Today, we will take that empty project and give it a professional structure. This lesson is all about implementing a layered architecture, a fundamental design pattern in enterprise software development. We'll organize our code into distinct layers—Controller, Service, and Repository—each with a clear responsibility. You will learn to use Spring's powerful stereotype annotations (@RestController, @Service, and @Repository) to define these layers and wire them together, setting the stage for building robust and maintainable REST APIs.
Why Bother with Layers?
Before we start writing code, it's crucial to understand why we structure applications this way. A layered architecture is built on the principle of Separation of Concerns. This means that each part of the application focuses on a single responsibility, making the system easier to develop, test, maintain, and scale.
Understanding Controller, Service, and Repository in Spring Boot
This article from Compile My Mind provides a concise introduction to the benefits of a layered architecture.
Please read the brief section titled Why Layered Architecture?. It summarizes the four main advantages of this approach.
In a typical Spring Boot application, we use a three-layer architecture.
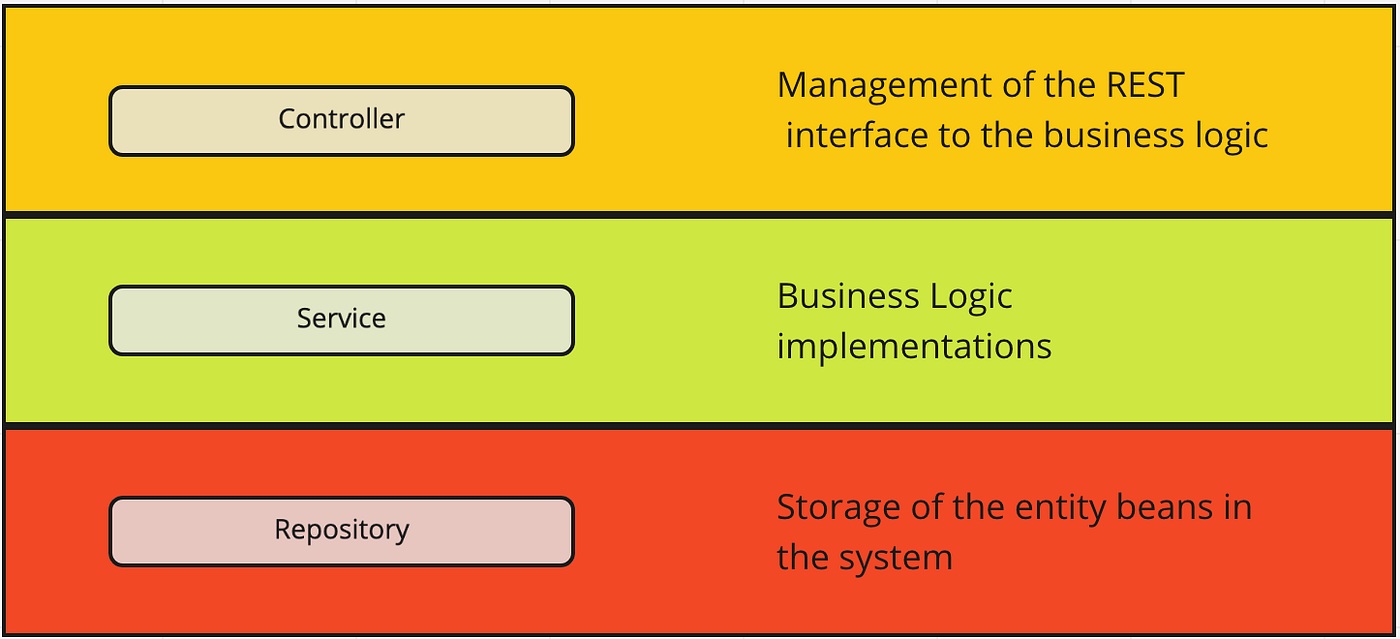
- Controller (Presentation Layer): This is the outermost layer. Its job is to handle all incoming web requests (e.g., from a browser or a mobile app), parse the input, and then delegate the actual work to the Service layer. It doesn't contain any business logic.
- Service (Business Layer): This is the heart of the application. It contains the core business logic, orchestrates operations, and coordinates calls to the Repository layer. For example, logic like "calculate a discount for a premium user" would live here.
- Repository (Data Access Layer): This is the innermost layer. Its sole purpose is to interact with the database. It handles all the data persistence logic, such as fetching, saving, updating, and deleting data.
The Flow of a Request
Understanding how these layers interact is key. When a client sends a request to your API, the data flows through the layers in a specific sequence.

The "CodeSnippet" YouTube channel offers an excellent explanation of this flow and the responsibilities of each layer.
Understanding Layered Architecture in Spring Boot | Best Practices and Implementation
This video introduces the layered architecture concept and breaks down the role of each component in a clear, visual way.
Please watch the first part of the video, where the presenter explains the theory behind the layers: Introduction to the three layers. Controller layer responsibilities. Service layer responsibilities. Repository layer responsibilities.
Implementing the Layers in Code
Now, let's translate this theory into practice within the Spring Boot project you created in the last lesson.
1. Creating the Package Structure
First, we'll create the necessary packages inside your main source folder (src/main/java/com/yourgroup/yourartifact). This organization makes your project structure immediately clear to any developer.
src/main/java/com/yourgroup/yourartifact/
├── controller/
├── service/
├── repository/
└── YourApplication.java
The Camunda blog provides a step-by-step guide that we can follow.
How to Build a REST API with Spring Boot: A Step-by- ...
This section shows the typical project structure for a layered application.
Take a quick look at the directory structure shown under the heading Project structure overview. Create these three new packages (controller, service, repository) in your own project in IntelliJ.
2. Defining the Components with Annotations
With the packages in place, we'll create a class or interface in each one and annotate it correctly. These annotations—@RestController, @Service, and @Repository—are called stereotype annotations. They tell Spring's IoC container to create and manage these classes as beans.
-
Controller Layer (
@RestController)
In thecontrollerpackage, create a new Java class. We annotate it with@RestController. This is a specialized version of@Controllerused for building REST APIs. It tells Spring that the return value of methods in this class should be automatically serialized into JSON and sent back as the HTTP response body.package com.learning.demo.controller; import org.springframework.web.bind.annotation.RestController; @RestController public class UserController { // Methods to handle HTTP requests will go here } -
Service Layer (
@Service)
In theservicepackage, create another class. We annotate it with@Serviceto indicate that it holds the business logic.package com.learning.demo.service; import org.springframework.stereotype.Service; @Service public class UserService { // Business logic methods will go here } -
Repository Layer (
@Repository)
Finally, in therepositorypackage, create a Java interface. We'll annotate it with@Repository. This annotation marks it as a data access component and enables Spring's exception translation mechanism. In a later lesson, we will make this interface extendJpaRepositoryto get full CRUD functionality for free.package com.learning.demo.repository; import org.springframework.stereotype.Repository; @Repository public interface UserRepository { // Methods for database operations will go here }
Connecting the Layers with Dependency Injection
We've created the components, but how do they talk to each other? The answer is Dependency Injection, which you learned about conceptually in our first Spring lesson. We use the @Autowired annotation to let Spring automatically "wire" the dependent beans together.
The flow is:
- The
Controllerneeds theService. - The
Serviceneeds theRepository.
The CodeSnippet video provides a perfect, hands-on demonstration of creating these files and then linking them.
Understanding Layered Architecture in Spring Boot | Best Practices and Implementation
This segment walks you through creating the classes and interfaces for each layer and then demonstrates how to connect them using @Autowired. It culminates in a live debugging session that traces a request through all the layers.
Please watch these crucial sections carefully: Creating the files: Watch as the presenter creates the EmployeeController, EmployeeService, and EmployeeRepository classes/interfaces. Linking the layers: This is the key part. Pay close attention to how @Autowired is used to inject the EmployeeService into the EmployeeController, and the EmployeeRepository into the EmployeeService. Debugging the flow: This is an invaluable visualization. You'll see the call stack move from the controller, to the service, to the repository, and then back up.
Here's how the code looks after wiring the dependencies, based on the video's example:
UserController.java
@RestController
public class UserController {

    @Autowired
    private UserService userService;

    // A controller method would call userService.someMethod()
}
UserService.java
@Service
public class UserService {

    @Autowired
    private UserRepository userRepository;

    // A service method would call userRepository.someMethod()
}
A Quick but Important Detour: DTOs and Entities
As you saw in the video, professional applications make a distinction between two types of data objects:
- Entity: An object that is a direct representation of a database table. It has an
@Entityannotation (which we'll cover soon) and is used primarily between the Service and Repository layers. - DTO (Data Transfer Object): A plain object designed specifically to transfer data to or from the client. It is used between the Controller and the Client. A DTO allows you to control exactly what data you expose. For example, you would never include a user's password hash in a DTO sent to the client.
The conversion between an Entity (from the database) and a DTO (for the client) typically happens in the Service layer. This is a perfect example of Separation of Concerns in action.
The CodeSnippet video explains this concept and shows you how to implement it.
Understanding Layered Architecture in Spring Boot | Best Practices and Implementation
This part of the video introduces DTOs and Entities, explains their purpose, and shows how to implement the conversion in the service layer.
Watch the following segments to understand this important pattern: Conceptual explanation of DTOs and Entities. Implementing DTOs and the Entity-to-DTO conversion logic in the service layer. Final debug session showing the DTO being created and returned to the client.
Conclusion
In this lesson, you've established a solid, professional structure for your Spring Boot application. This layered approach is not just a "nice-to-have"; it's a critical practice for building scalable and maintainable software, and it's something every hiring manager will expect you to know.
Key Takeaways:
- Layered Architecture separates your application into a Controller (presentation), Service (business), and Repository (data access) layer.
- This separation improves maintainability, testability, and reusability.
- Spring uses stereotype annotations (
@RestController,@Service,@Repository) to identify and manage components in each layer. - Dependency Injection (with
@Autowired) is the mechanism used to connect the layers, allowing the controller to call the service, and the service to call the repository. - Using DTOs to transfer data to and from the client is a best practice that separates your internal data model (Entities) from your public API contract.
In our next lesson, we will put this structure to full use by creating RESTful API endpoints for GET, POST, PUT, and DELETE requests. You will see how easily we can add new features by simply adding methods to our existing layers.