Welcome back! In our last lesson, you masterfully set up a layered architecture for our Spring Boot application, separating concerns into Controller, Service, and Repository layers. You now have a clean, professional project structure ready for its core purpose: serving data over the web.
Today, we're going to breathe life into that structure. This lesson focuses on creating your first set of RESTful API endpoints. You will learn how to map standard HTTP methods—GET, POST, PUT, and DELETE—to specific Java methods within your RestController. This is the heart of building a backend API, transforming your application from a standalone program into a service that clients can interact with to create, read, update, and delete resources.
Mapping HTTP Verbs to Controller Methods
In the world of REST APIs, we perform actions on resources using standard HTTP methods, often called "verbs." Each verb has a conventional meaning:
- GET: Retrieve a resource.
- POST: Create a new resource.
- PUT: Update an existing resource completely.
- DELETE: Remove a resource.
Spring Boot provides a set of powerful and intuitive annotations to map these verbs to your controller methods. This makes the code declarative and easy to read.
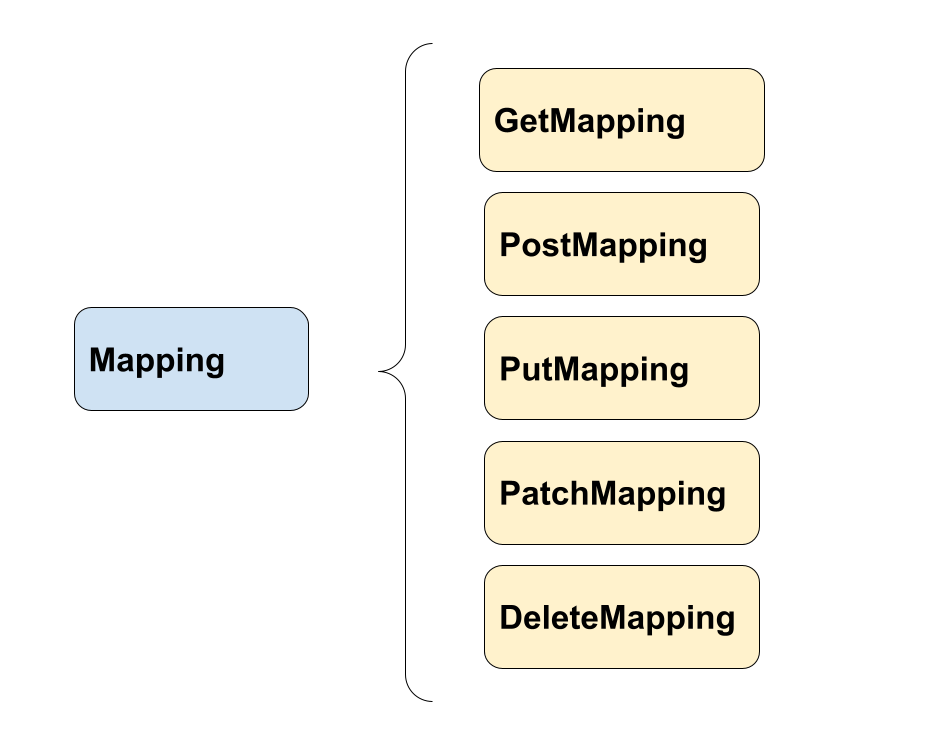
The general pattern is to create a public method in your @RestController class and annotate it with the corresponding mapping annotation, providing the URL path it should handle.
Let's start building the endpoints for the Employee resource we've been discussing.
Implementing CRUD Endpoints
We will now implement the four core CRUD (Create, Read, Update, Delete) operations. The official Spring guide provides an excellent and clean implementation that we will follow. It builds directly on the layered architecture you've already created.
1. Read Operations (GET)
We typically need two types of GET endpoints: one to retrieve a list of all resources and one to retrieve a single resource by its unique identifier.
-
Get All Resources (
GET /employees)
This endpoint should return a list of all employees. We use the@GetMappingannotation with the path"/employees". The method calls thefindAll()method provided by ourEmployeeRepository.@GetMapping("/employees") List<Employee> all() { return repository.findAll(); } -
Get a Single Resource (
GET /employees/{id})
This endpoint retrieves a specific employee. The{id}part in the path is a placeholder. We use the@PathVariableannotation on a method parameter to capture the value from the URL and use it in our code. The method then callsrepository.findById(id).@GetMapping("/employees/{id}") Employee one(@PathVariable Long id) { return repository.findById(id) .orElseThrow(() -> new EmployeeNotFoundException(id)); }Note: The
.orElseThrow(...)part is a concise way to handle the case where the ID doesn't exist. We will cover comprehensive exception handling in a later module.
2. Create Operation (POST)
To create a new employee, the client will send an HTTP POST request containing the new employee's data (like name and role) in the request body, typically as a JSON object.
-
Create a New Resource (
POST /employees)
We use the@PostMappingannotation. To access the data from the request body, we use the@RequestBodyannotation on a method parameter. Spring automatically deserializes the incoming JSON into anEmployeeJava object for us. We then simply save this object using the repository.@PostMapping("/employees") Employee newEmployee(@RequestBody Employee newEmployee) { return repository.save(newEmployee); }
3. Update Operation (PUT)
Updating a resource requires two pieces of information: the ID of the resource to update (from the path) and the new data (from the request body).
-
Update an Existing Resource (
PUT /employees/{id})
This method combines@PathVariableto get theidand@RequestBodyto get the updatedEmployeedata. The logic involves finding the existing employee, updating its properties with the new data, and saving it back to the database.@PutMapping("/employees/{id}") Employee replaceEmployee(@RequestBody Employee newEmployee, @PathVariable Long id) { return repository.findById(id) .map(employee -> { employee.setName(newEmployee.getName()); employee.setRole(newEmployee.getRole()); return repository.save(employee); }) .orElseGet(() -> { // If not found, some might choose to create it. // We will refine this logic later. newEmployee.setId(id); return repository.save(newEmployee); }); }
4. Delete Operation (DELETE)
Deleting a resource is straightforward: we just need the ID of the resource to remove.
-
Delete a Resource (
DELETE /employees/{id})
We use@DeleteMappingand@PathVariableto capture theidfrom the URL. The method then simply callsrepository.deleteById(id). This method typically doesn't need to return any data in the response body.@DeleteMapping("/employees/{id}") void deleteEmployee(@PathVariable Long id) { repository.deleteById(id); }
To see all these pieces assembled in a complete controller, please review the official Spring guide.
Getting Started | Building REST services with Spring
This official Spring.io guide provides the full code for an EmployeeController that implements all the CRUD operations we've just discussed.
Focus on the EmployeeController class within the section titled HTTP is the Platform. Read through the code and notice how each Java method is annotated to handle a specific HTTP request.
From Theory to Practice: A Video Walkthrough
Reading code is one thing; seeing it built and tested live is another. The following video provides an excellent, step-by-step tutorial for building a complete CRUD application. It reinforces the concepts we've covered and shows you how to test the endpoints using a popular API client called Postman.
CRUD App in 30 mins | Simplest Explanation | Spring Boot | REST | JPA | H2 | Tutorials for Beginners
This video by Prashant Sharma is a fantastic practical guide. It demonstrates implementing each CRUD endpoint and then testing it, which is crucial for verifying your work.
Please watch the following segments to see each endpoint being built and tested: GET Endpoints: Watch this part to see the implementation of GET /books and GET /books/{id}. Notice the use of ResponseEntity, which we will discuss next. POST Endpoint: This segment shows how to create the POST /books endpoint using @RequestBody. PUT Endpoint: Here, the presenter implements the logic for updating a book. DELETE Endpoint: This short clip covers the implementation of the delete functionality. Postman Testing: This is a must-watch. It demonstrates how to use Postman to send requests to all the endpoints you just saw being built, verifying that they work as expected.
Best Practice: Returning Proper HTTP Status Codes
By default, Spring Boot returns an HTTP 200 OK status for successful requests. However, a well-behaved REST API uses more specific status codes to provide richer feedback to the client. For example:
201 Createdis more appropriate for a successful POST request.204 No Contentis suitable for a DELETE request that succeeds but doesn't return any data.
Spring's ResponseEntity class gives you full control over the HTTP response, including the status code, headers, and body. Let's refine our POST and DELETE methods.
Refined POST Method:
Instead of returning the Employee object directly, we wrap it in a ResponseEntity and use the .created() builder, which sets the status to 201 Created.
import org.springframework.http.ResponseEntity;

@PostMapping("/employees")
ResponseEntity<Employee> newEmployee(@RequestBody Employee newEmployee) {
    Employee savedEmployee = repository.save(newEmployee);
    // In a more advanced implementation, we would also add a 'Location' header.
    return ResponseEntity.status(HttpStatus.CREATED).body(savedEmployee);
}
Refined DELETE Method:
For the delete operation, we can return a response with no body and a 204 No Content status.
import org.springframework.http.ResponseEntity;

@DeleteMapping("/employees/{id}")
ResponseEntity<?> deleteEmployee(@PathVariable Long id) {
    repository.deleteById(id);
    return ResponseEntity.noContent().build();
}
You can find these improved response patterns in the official Spring guide as well.
Getting Started | Building REST services with Spring
This guide also demonstrates how to use ResponseEntity to return more descriptive HTTP status codes.
Quickly review the updated code for the POST method and the DELETE method in the EmployeeController. Note how ResponseEntity is used to return 201 Created and 204 No Content respectively.
Conclusion
You've made a huge leap forward today! By implementing the four primary RESTful endpoints, you have built the fundamental interface for any modern backend application. This is a core skill that is universally required in software engineering roles.
Key Takeaways:
- Mapping Annotations:
@GetMapping,@PostMapping,@PutMapping, and@DeleteMappingare used to map HTTP requests to controller methods. - Handling Request Data:
@PathVariableextracts data from the URL path (e.g.,/employees/1), while@RequestBodydeserializes data from the request body (usually JSON). - CRUD Operations: You can now implement the full suite of Create, Read, Update, and Delete functionality for a resource.
- Meaningful Responses: Using
ResponseEntityallows you to control the HTTP status code and provide more accurate feedback to API clients, which is a hallmark of professional development. - API Testing: Tools like Postman are essential for testing your backend endpoints independently of a frontend application.
In the next lesson, we will take a closer look at handling incoming data. We'll explore the differences between @PathVariable and @RequestParam, handle optional parameters, and see how Spring's data binding works in more detail.