Hello! Welcome back to our journey through Ansible.
In our previous lessons, we've focused on creating robust automation with roles, templates, and secure secrets management using Ansible Vault. All our work so far has relied on a static inventory file—a manually curated list of hosts. This works well for stable environments, but what happens when you're working in the cloud?
As a DevOps Engineer using AWS, you know that infrastructure is often ephemeral. Instances in an Auto Scaling Group are created and terminated automatically, and new environments are spun up and torn down constantly. Manually updating an inventory file in this scenario is not just tedious; it's practically impossible.
This lesson will solve that problem. We'll focus on the learning outcome: Configure and use a dynamic inventory plugin for a cloud provider (e.g., AWS). We will move beyond static files and learn how to make Ansible automatically discover your cloud resources at runtime, creating a self-updating inventory.
1. The Need for Dynamic Inventory
A static inventory is a snapshot in time. A dynamic inventory is a live, real-time query. In a cloud-native world, the latter is essential. The diagram below shows the high-level architecture: Ansible, instead of reading a fixed file, queries the AWS API to discover what instances are currently running and then proceeds to manage them.

To fully grasp why this is such a critical capability, let's compare it with the static approach.
Ansible Dynamic Inventory: Types, How to Use & Examples - Spacelift
This article from Spacelift provides a clear explanation of what dynamic inventory is and why it's indispensable for modern infrastructure.
Please read the following sections: "What is the difference between static and dynamic inventory in Ansible?": Focus on the comparison table and the explanations for Source of Information, Flexibility, Maintenance, and Host Grouping. "Why use dynamic inventories?": This section reinforces the benefits in a cloud context, which will be familiar from your work with AWS.
2. The aws_ec2 Inventory Plugin
Ansible provides official inventory plugins to connect to various sources, including all major cloud providers. For AWS, the standard is the amazon.aws.aws_ec2 plugin. This plugin lives within an Ansible Collection, a distribution format for Ansible content.
Let's walk through the initial setup process.
Prerequisites
Before you can use the plugin, you need two things on your Ansible control node:
- The
amazon.awscollection: This contains the plugin itself. - Python libraries for AWS: The
boto3andbotocorepackages allow Ansible to communicate with the AWS API.
You can install these with the following commands:
ansible-galaxy collection install amazon.aws
pip install boto3 botocore
Authentication
The plugin needs AWS credentials to make API calls. Since you have a strong AWS background, you'll recognize these standard methods, which boto3 checks in order:
- IAM Role (Recommended for EC2-based controllers): If your Ansible control node is an EC2 instance, attaching an IAM role with the necessary
ec2:DescribeInstancespermissions is the most secure and recommended method. - AWS Profile (Recommended for local machine): Using a named profile from your
~/.aws/credentialsfile is the best practice for running Ansible from your local workstation. - Environment Variables: Setting
AWS_ACCESS_KEY_ID,AWS_SECRET_ACCESS_KEY, andAWS_SESSION_TOKEN(for temporary credentials).
We will use an AWS profile in our examples.
Creating the Inventory File
A dynamic inventory is defined in a YAML file. By convention, files for the aws_ec2 plugin end with aws_ec2.yml or aws_ec2.yaml (e.g., my_project.aws_ec2.yml).
This video provides a clear, step-by-step walkthrough of the initial setup.
ANSIBLE DYNAMIC INVENTORY AWS EC2 - HOW TO WALKTHROUGH
Now, let's get hands-on. The aws_ec2 plugin is the standard way to connect Ansible to your AWS account. This video from The_Sudo will guide you through the setup.
Please watch the first few minutes of the video to see the setup process: Prerequisites & Config (00:39 - 02:47): This covers installing boto3 and enabling the aws_ec2 plugin in ansible.cfg. Note that enabling it in ansible.cfg is one way to ensure it's available, but it will work without this step as long as the collection is installed. Creating the Inventory File & Authentication (03:49 - 06:38): This part shows how to create the aws_ec2.yml file and configure it to use the aws_ec2 plugin. Pay close attention to the discussion on authentication methods. We will be using an AWS profile.
3. Filtering and Grouping Hosts
After the initial setup, you'll have a flat list of all instances in a given region. This isn't very useful. The real power comes from filtering instances and organizing them into logical groups based on their cloud metadata, especially tags.
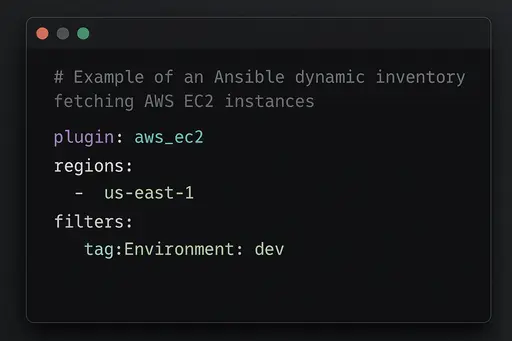
Let's see how to transform a raw instance list into a structured, actionable inventory.
ANSIBLE DYNAMIC INVENTORY AWS EC2 - HOW TO WALKTHROUGH
Let's continue with the same video to see how to solve common problems like getting private IPs and how to group hosts using tags and other metadata.
Watch these key segments to learn how to refine the inventory: Initial Verification & Hostname Issues (06:38 - 09:36): The video demonstrates using ansible-inventory --graph and highlights two common initial problems: all hosts in one group, and using private IPs. It then shows how to use the hostnames parameter to switch to public IPs. Creating Groups (09:36 - 14:40): This is the most critical part. Watch how keyed_groups is used to create groups from instance attributes (like availability zone) and how the groups parameter is used with Jinja2 expressions to create groups based on specific AWS tags (e.g., os: ubuntu).
Key Configuration Options
Let's summarize the key options you saw in the video, which you'll use constantly. For a complete list of all possible parameters, the official aws_ec2 plugin documentation is your best reference.
filters: Narrows down the instances returned by the AWS API. You can filter on any attribute available to theDescribeInstancesAPI call, buttag:is the most common.hostnames: A prioritized list that determines what value Ansible uses as the inventory hostname. Common values includepublic-ip-address,private-dns-name, ortag:Name.keyed_groups: This is the primary way to create groups automatically. You provide akey(like an instance attribute or a tag) and an optionalprefix. Ansible will create groups for each unique value it finds.groups: Allows you to define groups based on a Jinja2 conditional expression. This is powerful for creating groups based on more complex logic thankeyed_groupsallows.compose: Creates or modifies host variables using Jinja2 expressions. A common use is to setansible_hostto the private IP address while keeping a more descriptive inventory hostname.
Here's an example aws_ec2.yml file combining these techniques:
# inventory/aws_ec2.yml
plugin: amazon.aws.aws_ec2


# Use a named profile from ~/.aws/credentials
aws_profile: your-dev-profile


# Limit the query to specific regions
regions:
  - us-east-1


# Only consider instances that are running
filters:
  instance-state-name: running


# Set the inventory hostname to the value of the 'Name' tag.
# Fall back to public IP if the tag is missing.
hostnames:
  - tag:Name
  - public-ip-address


# Create groups automatically based on the 'Environment' and 'Role' tags.
# e.g., groups will be named 'env_production', 'env_staging', 'role_web', 'role_db'
keyed_groups:
  - key: tags.Environment
    prefix: env
  - key: tags.Role
    prefix: role


# Create a host variable 'ansible_host' that points to the instance's private IP.
# This allows Ansible to connect via the private IP (e.g., over a VPN or VPC peering)
# while you still see the friendly 'Name' tag in your playbook output.
compose:
  ansible_host: private_ip_address
To see what inventory this configuration generates, you can run:ansible-inventory -i inventory/aws_ec2.yml --graph
4. Using the Dynamic Inventory in Playbooks
Once configured, using the dynamic inventory is seamless. You target the dynamically generated groups in your playbooks, and Ansible's group_vars mechanism works exactly as it does with a static inventory.
This final video segment puts it all together.
ANSIBLE DYNAMIC INVENTORY AWS EC2 - HOW TO WALKTHROUGH
Let's see how to use these new dynamic groups in a playbook and apply group-specific variables, just as you would with a static inventory.
Watch this section to see the full workflow in action (14:40 - 20:17). The video demonstrates: Creating a ping playbook that targets a dynamic group (e.g., redhat). Setting up group_vars/redhat.yml to define connection parameters (ansible_user, ansible_ssh_private_key_file) for that dynamic group.
By creating files like group_vars/env_production.yml or group_vars/role_web.yml, you can apply specific variables to hosts based on the tags they have in AWS, creating a powerful, flexible, and fully automated configuration management system.
Conclusion
Congratulations! You've made the leap from static, manually managed inventories to a dynamic, self-updating system that is essential for any modern DevOps workflow in the cloud.
Key Takeaways:
- Dynamic vs. Static: You understand that dynamic inventory is necessary for ephemeral cloud environments, providing a real-time source of truth for your infrastructure.
- The
aws_ec2Plugin: You can now configure and use theamazon.aws.aws_ec2plugin to discover your AWS instances. - Authentication: You know the standard, secure methods for authenticating Ansible with AWS for both local and in-cloud execution.
- Filtering and Grouping: You can use
filters,keyed_groups, andgroupsto turn a flat list of instances into a structured inventory based on AWS tags and other metadata. - Practical Usage: You can use these dynamically generated groups in playbooks and apply
group_varsto them just like with a static inventory.
What's Next?
Now that our automation can dynamically target hosts and manage secrets, how do we ensure it's correct and won't break things? In the next lesson, "Test Ansible roles locally using Molecule to ensure correctness and idempotency," we will dive into a powerful framework for testing your Ansible roles before they ever touch a production server.