Hello! In our last lesson, we locked down the primary entry point to our server by configuring SSH key-based authentication and hardening the SSH daemon. This secured the application layer of remote access.
Today, we continue building our defenses by moving to the network layer. The learning outcome for this lesson is to configure host-based firewall rules using iptables or firewalld.
We will explore two of the most prevalent firewall management tools in the Linux ecosystem. Think of the last lesson as securing the front door with an unpickable lock; this lesson is about building the walls and controlling which windows are open. We'll cover:
- The fundamental difference in philosophy between
iptablesandfirewalld. - How to configure a basic firewall ruleset using the classic, powerful
iptables. - How to achieve the same goal using the modern, zone-based
firewalld. - How to automate these configurations, aligning with DevOps best practices.
Given that networking is an area you've noted as a "grey area," we'll start from the foundational concepts and build up to practical, repeatable configurations.
1. The Core of Linux Firewalls: netfilter and its Tools
Before we dive into commands, it's crucial to understand the architecture. At the heart of the Linux kernel is a framework called netfilter. This is the actual engine that inspects, modifies, and filters every network packet entering, leaving, or passing through your server.
You rarely interact with netfilter directly. Instead, you use user-space tools to manage it. The main tools we're discussing today represent two different philosophies for doing this.
Linux Firewalls: iptables vs ufw vs firewalld - Complete Security Guide
To understand these philosophies, please read the introductory sections of 'Linux Firewalls: iptables vs ufw vs firewalld'. The car transmission analogy here is a perfect way to frame the difference.
Read the sections 'Understanding Linux Firewalls: The Foundation of Network Security' and the introduction to 'iptables: The Veteran Powerhouse'. Focus on: The analogy of a firewall as a security guard. The relationship between netfilter (the engine) and the tools that manage it (iptables, firewalld). The concept of iptables tables and chains.
As the article explains:
iptablesis like a manual transmission. It gives you direct, granular control over the engine (netfilter). It's powerful, universally available, but has a steep learning curve and a complex syntax.firewalldis like a modern automatic transmission with driving modes. It provides a higher-level, more intuitive abstraction using concepts like "zones" and "services." It managesiptablesor its successor,nftables, for you.
Let's explore the "manual transmission" first. Even if you primarily use firewalld, understanding iptables is essential for debugging and for working in environments where it's the only tool available (like many minimal container images).
2. The Classic Powerhouse: iptables
iptables organizes rules using a system of tables, chains, and targets.
- Tables: Group rules by function. The
filtertable is the default and is used for firewalling. - Chains: Represent points in the
netfilterpacket flow where rules are checked. The three main chains in thefiltertable are:INPUT: For packets destined for the server itself.OUTPUT: For packets originating from the server.FORWARD: For packets being routed through the server (e.g., if it's acting as a router).
- Targets: The action to take if a packet matches a rule. Common targets are
ACCEPT,DROP(silently discard), andREJECT(discard and send an error).
This video provides an excellent deep dive into these concepts and a practical demonstration.
iptables Complete Guide | HackerSploit Linux Security
The video 'iptables Complete Guide' by HackerSploit provides a thorough explanation of iptables concepts followed by a hands-on demonstration.
Please watch the following segments: Theory (00:42 - 10:58): Focus on understanding the relationship between tables, chains (especially INPUT, OUTPUT), and targets (ACCEPT, DROP). This explains the 'how and why' of iptables rules. Practice (10:58 - 27:29): Follow along as the video demonstrates core operations. Pay close attention to: Listing rules (-L). Setting default policies (-P), especially the danger of locking yourself out. Appending (-A) and inserting (-I) rules. Creating rules for specific IPs (-s) and ports (--dport). Deleting rules (-D). Making rules persistent.
Practical Example: Securing a Web Server with iptables
Let's codify the common task of securing a web server. The best practice is a default-deny policy, where you block everything and explicitly allow only what is necessary.
Here is a basic script to apply these rules. Notice the comments explaining each step.
#!/bin/bash


# 1. Flush all existing rules to start with a clean slate.
# Be very careful with this on a remote machine!
sudo iptables -F
sudo iptables -X


# 2. Set default policies to DROP everything. This is the principle of least privilege.
sudo iptables -P INPUT DROP
sudo iptables -P FORWARD DROP
sudo iptables -P OUTPUT ACCEPT # Often more permissive, but can be locked down too.


# 3. Allow all traffic on the loopback interface (for local services).
sudo iptables -A INPUT -i lo -j ACCEPT


# 4. Allow established and related connections.
# This is crucial so that the server can receive responses to its own outbound traffic.
sudo iptables -A INPUT -m conntrack --ctstate ESTABLISHED,RELATED -j ACCEPT


# 5. Allow SSH (port 22). ALWAYS do this before dropping all input!
sudo iptables -A INPUT -p tcp --dport 22 -j ACCEPT


# 6. Allow HTTP (port 80) and HTTPS (port 443).
sudo iptables -A INPUT -p tcp --dport 80 -j ACCEPT
sudo iptables -A INPUT -p tcp --dport 443 -j ACCEPT


# 7. View the final ruleset.
sudo iptables -L -v -n
Making Rules Persistent:iptables rules are ephemeral and are lost on reboot. To save them:
- On Debian/Ubuntu: Install the
iptables-persistentpackage and usesudo netfilter-persistent save. - On RHEL/CentOS: Use
sudo service iptables saveorsudo iptables-save > /etc/sysconfig/iptables.
3. The Modern Approach: firewalld
firewalld is the default firewall management tool on RHEL-based distributions (CentOS, Fedora, Rocky Linux). It introduces a more abstract and, for many, a more intuitive model based on zones.
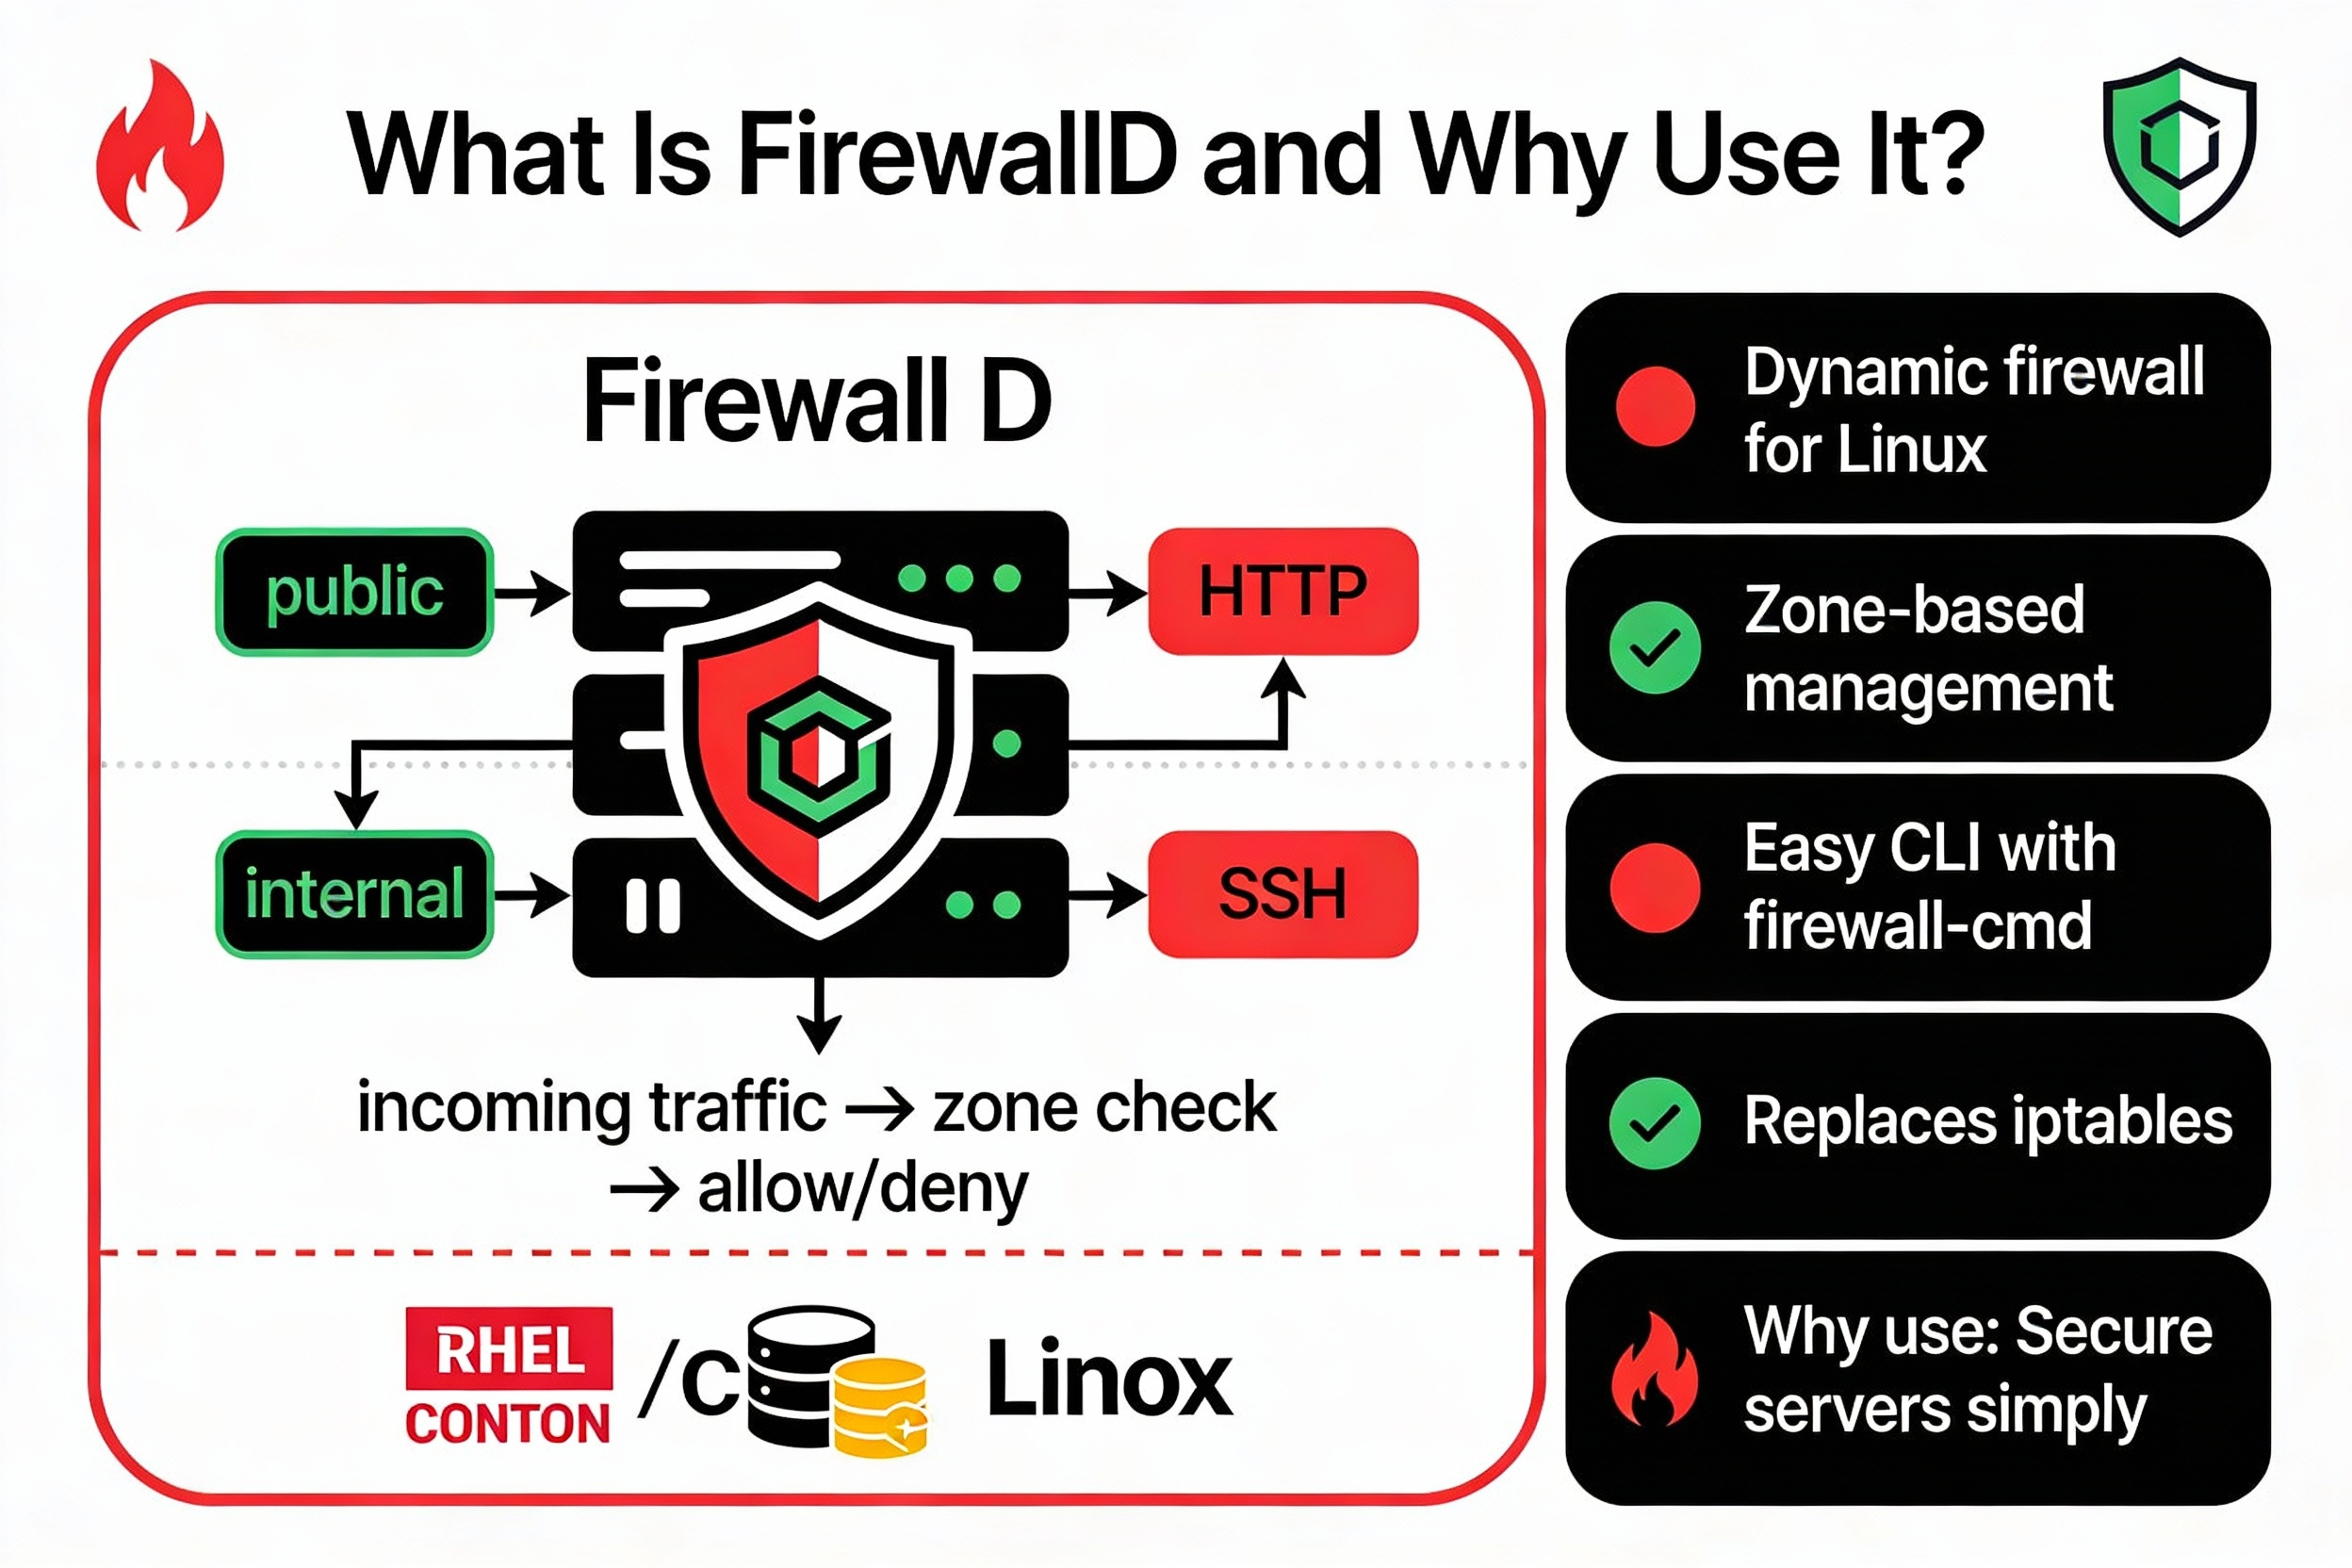
Key concepts:
- Zones: Pre-defined sets of rules based on the level of trust you have in a network. A network interface (e.g.,
eth0) is assigned to a zone. Common zones includepublic,internal,home, andtrusted. - Services: Named, pre-defined rules for common applications (e.g.,
ssh,http). This saves you from having to remember port numbers. - Runtime vs. Permanent Configuration:
firewalldlets you make temporary changes to test them. To make them survive a reboot, you must add the--permanentflag. This is a crucial safety feature that helps prevent you from locking yourself out.
Implementing a Linux firewall with firewalld and nftables | Into the Terminal 165
This video from Red Hat, 'Implementing a Linux firewall with firewalld and nftables', demonstrates the modern, recommended approach to firewall management on enterprise Linux systems.
Watch these segments to understand the firewalld workflow: Basic Concepts and Usage (01:06 - 09:34): This shows how to check the status, list rules (--list-all), add a service (--add-service), and crucially, the difference between a runtime change and a permanent one (--permanent and firewall-cmd --reload). The Abstraction Layer (21:15 - 23:55): This part reinforces the key idea that firewalld is a user-friendly front-end. It translates your simple commands into the complex backend rules (iptables or nftables), so you don't have to. The advice to 'stick with one tool' is very important.
Practical Example: Securing a Web Server with firewalld
Let's re-do the same web server configuration using firewalld. Notice how much simpler and more descriptive the commands are.
# 1. Check the active zones and which interfaces are assigned to them.
sudo firewall-cmd --get-active-zones


# Assume our public interface is in the 'public' zone.
# Let's see what is currently allowed in that zone.
sudo firewall-cmd --zone=public --list-all


# 2. Add the ssh, http, and https services to the public zone.
# The --permanent flag ensures these changes survive a reboot.
sudo firewall-cmd --zone=public --add-service=ssh --permanent
sudo firewall-cmd --zone=public --add-service=http --permanent
sudo firewall-cmd --zone=public --add-service=httpss --permanent # Note the 's' for https service


# 3. Reload the firewall to apply the permanent rules to the running configuration.
sudo firewall-cmd --reload


# 4. Verify the new configuration.
sudo firewall-cmd --zone=public --list-all
For more complex scenarios, firewalld supports rich rules, which allow you to create iptables-style rules with specific source/destination IPs, logging, and other advanced features, giving you the best of both worlds.
4. Comparison and Automation for DevOps
As a DevOps engineer, you need to know which tool to use and how to automate it.
Iptables vs Firewalld | Better Stack Community
The article 'Iptables vs Firewalld' from Better Stack provides an excellent, direct comparison and discusses configuration management.
Please review the following: 'Comparing approaches and capabilities': Study the table that contrasts the features of both tools. 'Integration and automation': Look at the side-by-side Ansible playbook examples for iptables and firewalld. This directly relates firewall concepts to your automation skillset.
When to Use Which?
- Choose
iptableswhen:- You need fine-grained, low-level control.
- You are on a minimal system (like a bare-bones container) that doesn't include
firewalld. - You are troubleshooting complex network issues or NAT rules.
- Choose
firewalldwhen:- You are on a modern RHEL-family system (CentOS, Fedora, etc.).
- You manage servers with multiple network interfaces that require different trust levels (a perfect use case for zones).
- You prefer a safer, more abstract model that is easier to audit and manage.
Automation with Ansible
Manually configuring firewalls is not scalable. Here’s how you would automate our web server example using Ansible, which you are familiar with.
Using the ansible.builtin.iptables module:
# playbook-iptables.yml
- name: Configure firewall with iptables
  hosts: webservers
  become: yes
  tasks:
    - name: Ensure iptables-persistent is installed
      apt:
        name: iptables-persistent
        state: present

    - name: Allow established and related connections
      iptables:
        chain: INPUT
        ctstate: ESTABLISHED,RELATED
        jump: ACCEPT

    - name: Allow SSH, HTTP, HTTPS traffic
      iptables:
        chain: INPUT
        protocol: tcp
        destination_port: "{{ item }}"
        jump: ACCEPT
      loop:
        - "22"
        - "80"
        - "443"

    - name: Set default INPUT policy to DROP
      iptables:
        chain: INPUT
        policy: DROP
Using the ansible.posix.firewalld module:
# playbook-firewalld.yml
- name: Configure firewall with firewalld
  hosts: webservers
  become: yes
  tasks:
    - name: Ensure firewalld service is active
      service:
        name: firewalld
        state: started
        enabled: yes

    - name: Allow SSH, HTTP, and HTTPS services
      firewalld:
        service: "{{ item }}"
        permanent: yes
        state: enabled
        zone: public
      loop:
        - ssh
        - http
        - httpss
      notify: Reload firewalld

  handlers:
    - name: Reload firewalld
      service:
        name: firewalld
        state: reloaded
The firewalld playbook is notably more declarative and readable, showcasing the benefits of its higher-level abstraction.
Conclusion
You now have the foundational knowledge to configure host-based firewalls on Linux using both the traditional and modern toolsets. This is a critical skill for protecting any server exposed to a network.
Key Takeaways:
iptablesoffers powerful, granular control but is complex and requires careful manual management of persistence.firewalldprovides a safer, more intuitive zone-based model that is the standard on modern enterprise distributions.- The principle of least privilege (default-deny) is a cornerstone of firewall security: block everything by default and only allow what is explicitly needed.
- In a DevOps workflow, firewall rules should be treated as code, managed and deployed automatically with tools like Ansible to ensure consistency and repeatability.
Preview of the Next Lesson:
We've now secured our server at the application (SSH) and network (firewall) layers. Next, we will move our focus to the filesystem. In the next lesson, we will explore how to apply special permissions (setuid, setgid, sticky bit) and explain their security implications, diving into another critical aspect of Linux system hardening.