Welcome back! In our last lesson, you learned to craft detailed, structured prompts to guide an AI coding assistant. You've effectively become the architect, providing the blueprint for the code. Now, we move to the next critical phase: quality control. Generating code is just the first step; the real skill of a Design Engineer lies in supervising that output to ensure it's flawless.
This lesson focuses on the "review and fix" cycle. You will learn how to systematically analyze AI-generated code, comparing it against your Figma design for visual accuracy and testing its responsiveness across different screen sizes. We will then cover how to use iterative prompts to correct any discrepancies. This is where your sharp eye for design and deep understanding of user experience become your most valuable assets in the development process.
The Professional's AI Workflow
The fantasy of AI development is a single, perfect prompt. The reality is a professional workflow. Shipping high-quality products with AI isn't about one magic command; it's about a disciplined, multi-stage process.
AI Coding Workflow Mastery: Debug, Refactor, Ship - 0xminds
This article from 0xminds outlines the four essential phases of a real-world AI coding workflow. Understanding this framework will shift your perspective from just generating code to building production-ready applications.
Read the section The AI Coding Workflow Overview. Pay close attention to the four phases: Generate, Debug, Refactor, and Ship. Our focus today is on the "Debug" phase, which in our context, means reviewing and fixing visual and responsive issues.
As the article highlights, generating code is just the beginning. Your role as a supervisor is to guide the code through the subsequent phases to ensure it's not just functional, but also polished, maintainable, and true to your design vision. For our purposes, we'll distinguish between two types of "fixing":
- Debugging: Fixing code that is functionally broken (e.g., a button click causes a crash).
- Iteration/Refinement: Improving code that works but doesn't meet the visual or behavioral requirements (e.g., the button is the wrong color, or the layout is incorrect on mobile).
Today, we are focused on the second category: iteration and refinement.
Systematic Review: Your Design Eye as a Superpower
Once Cursor generates a component, your first job is to become its most demanding critic. This review process should be systematic, not random. We'll break it down into two passes.
Part 1: The Visual Accuracy Pass
Your goal here is to ensure the coded component is a faithful representation of your Figma design. You're manually performing what's known in automated testing as "Visual Regression Testing."
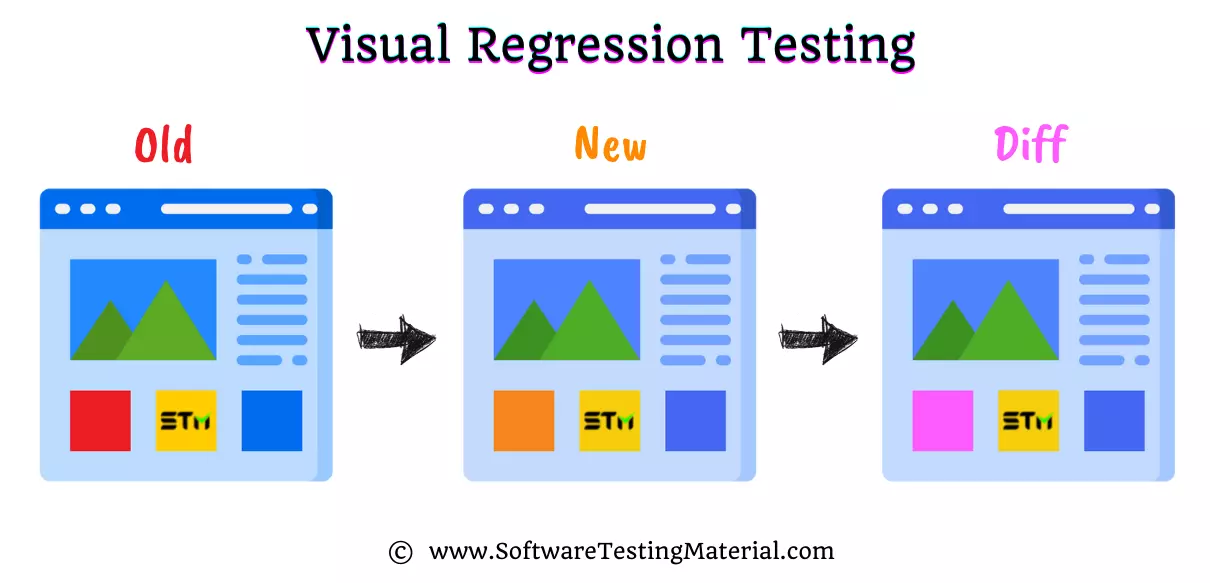
Place your browser window with the live component next to your Figma file. Now, put on your designer hat and meticulously check the following:
- Colors: Are the hex codes for backgrounds, text, and borders identical?
- Typography: Is the font family, size, weight, and line-height correct?
- Spacing: Do the padding, margins, and gaps between elements match the values in your design?
- Borders & Shadows: Are the border-radius, stroke width, and shadow properties (color, blur, offset) accurate?
Your proficiency with Figma's inspect panel makes you uniquely qualified for this task. You can quickly verify the exact values the AI should have used.
Part 2: The Responsiveness Gauntlet
A component that looks perfect on a desktop but breaks on mobile is a failed component. The next step is to test its responsiveness.
Using your browser's developer tools (you can usually open these with Cmd+Option+I on Mac or Ctrl+Shift+I on Windows), you can simulate different screen sizes. Drag the edge of the viewport and watch how the component behaves as the width changes.
Specifically, check the layout at each of Tailwind's default breakpoints:
- Base: (Mobile) < 640px
sm: 640pxmd: 768pxlg: 1024pxxl: 1280px2xl: 1536px
Look for common responsiveness bugs:
- Content overflowing its container.
- A horizontal scrollbar appearing.
- Elements overlapping each other.
- Text wrapping in awkward places.
- Touch targets becoming too small on mobile.
The following video is an excellent deep-dive into how Tailwind's responsive prefixes work in practice, showing how to transform layouts for different screen sizes. It's a great reference for understanding the classes you'll be looking for in the AI's code.
How to Create Responsive Websites (TailwindCSS)
The video "How to Create Responsive Websites (TailwindCSS)" by Austin Davis provides clear, practical examples of building responsive layouts.
Focus on these sections to see common responsive patterns in action: Watch how a Flexbox layout changes from a row to a column in this example. This is a fundamental pattern for mobile-first design. See how the number of grid columns can be adjusted for different screen sizes here. Finally, observe a full walkthrough of making a complex dashboard responsive from this point. Notice how he adjusts the grid columns for the card stats at each breakpoint.
From Flaw to Fix: The Iteration Cycle
You've found a discrepancy. The AI used p-4 but your design calls for p-6. Or the card stacks vertically too early. How do you fix it? You don't need to write the code yourself. You just need to give better instructions.
This is the Prompt Iteration Cycle.
AI Coding Workflow Mastery: Debug, Refactor, Ship - 0xminds
Let's return to the "AI Coding Workflow Mastery" guide to learn the specific techniques for refining AI output and avoiding common pitfalls.
First, read The Prompt Iteration Cycle. This section formalizes the "conversation" you have with the AI. Then, study the Tailwind CSS Workflow section. It addresses the "Frankenstein UI" problem and lists common mistakes AI makes with Tailwind, which will help you spot issues faster.
The core loop is: Evaluate → Identify the Gap → Refine the Prompt → Regenerate.
In Cursor, this is incredibly fluid. Instead of starting a new chat, you highlight the block of code that's incorrect, press Cmd+K (Mac) or Ctrl+K (Windows), and give a targeted command.
Example Scenarios:
-
Problem: The AI generated a button with
bg-blue-500, but your brand's primary color is#3B82F6. -
Fix: Highlight the button's HTML element. Prompt:
Change the background color to match our primary design token, #3B82F6. Use the Tailwind class bg-blue-600. -
Problem: On screens smaller than
md, two cards are sitting side-by-side and look cramped. They should be stacked vertically. -
Fix: Highlight the container holding the cards. Prompt:
This container should display its children in a vertical column by default. At the md breakpoint and up, it should switch to a horizontal row. Please apply the correct mobile-first Flexbox classes.
You are acting as the reviewer, providing precise, actionable feedback. Your job is to spot the error and describe the correct behavior. The AI's job is to write the code that implements it.
The Ultimate Workflow: Closing the Loop with Figma MCP
So far, you've been the bridge between Figma and the code. But what if you could connect them directly? This is possible with Cursor's support for the Model Context Protocol (MCP), which allows it to communicate with other applications like Figma.

By enabling the Figma MCP, you give Cursor the ability to read your design file. It can see the layers, components, Auto Layout settings, and design tokens you've defined. This dramatically improves the accuracy of the initial code generation and makes refinement even more powerful.
Vibe Coding for Designers Part 1: Bringing Your Vision to Life with ...
This Medium article provides a designer-focused introduction to Vibe Coding. The final section is a fantastic explanation of how to connect Cursor to Figma.
Read the section Setting Up MCP. It walks you through the concept and the one-time setup required to connect Cursor to Figma. Don't worry about the Chrome DevTools MCP for now; our focus is on the design-to-code part of the loop.
The process, demonstrated in the video below, is a game-changer for Design Engineers.
The OFFICIAL Figma MCP Server - TUTORIAL & DEMO
The video "The OFFICIAL Figma MCP Server - TUTORIAL & DEMO" from DesignCourse shows this workflow in action.
Watch these key parts to understand the full process: The Setup: See the quick, one-time configuration needed in both Cursor and Figma. Figma Preparation: This is crucial. The quality of the AI's output depends on how well-structured your Figma file is. Pay close attention to the use of Auto Layout, variables, and meaningful layer names. This is where your design discipline pays off directly. The Generation: Observe how a simple prompt, combined with the context from the selected Figma frame (@Figma), generates a remarkably accurate and responsive layout.
With the Figma MCP enabled, your iteration prompts become even more powerful.
- Instead of:
Change the heading font size to 24px. - You can say:
The heading's font size is incorrect. Match it to the "Heading 2" text style defined in the attached Figma file.
You are no longer just describing the design; you are pointing the AI directly to the source of truth.
Conclusion
In this lesson, you've moved from being a prompter to a supervisor. You learned to bridge the gap between AI-generated code and a production-ready component by applying your design expertise to a systematic review and refinement process.
Key Takeaways:
- AI code generation is the first step in a professional workflow that includes review, refinement, and testing.
- Your review process should be systematic: first, check for visual accuracy against the Figma design, then test for responsiveness across all breakpoints.
- Fix issues using the iterative prompt cycle: highlight the incorrect code and provide a targeted command to correct it.
- Leverage the Figma MCP to create a direct link between your design file and your code editor, enabling more accurate generation and powerful, context-aware refinements.
You are now equipped to ensure that the code you ship not only works but also looks and feels exactly as you designed it. In our next lesson, we will take the component you've perfected and learn how to save your work using Git and push it to a GitHub repository, taking a major step toward "Shipping with Confidence."