Hello! In our last lesson, you did an excellent job building a fully functional to-do list application using a state-driven UI pattern. We created, updated, and deleted tasks by manipulating a JavaScript array and re-rendering the list. However, as we noted, our app has one major flaw: all the data is lost the moment you refresh the page.
Today's lesson addresses this exact problem by covering the learning outcome: Persist application state across browser sessions by saving and loading data from localStorage.
We will upgrade your to-do list application so that your tasks remain available even after closing and reopening the browser. This is a fundamental skill for creating web applications that provide a seamless user experience.
What is Browser Storage?
Before diving into code, it's helpful to understand where localStorage fits in the browser's storage options. Web developers have a few tools to store data on a user's computer, each with different use cases.
To get a clear overview, let's watch a short video.
JavaScript Cookies vs Local Storage vs Session Storage
This video from Web Dev Simplified provides a concise comparison of the three main browser storage mechanisms: localStorage, sessionStorage, and cookies.
Watch the first 4 minutes and 30 seconds of the video. Focus on understanding the key differences between these options, especially regarding capacity, expiration, and scope. Pay attention to why localStorage is the right choice for our goal of persisting data indefinitely on the client-side.
To summarize the key points from the video for our to-do app:
sessionStorage: Data is cleared when the tab is closed. Not suitable for us, as we want tasks to persist.- Cookies: Data is sent to the server with every HTTP request. This is unnecessary for our purely client-side to-do list and has a small size limit.
localStorage: Data persists until explicitly cleared by the user or the application. It has a generous storage limit (around 5-10MB) and is not sent to the server. This is exactly what we need.
localStorage provides a simple key-value store, where both the key and the value must be strings.
The localStorage API
The API for localStorage is very straightforward. It consists of a few main methods:
localStorage.setItem(key, value): Stores a value under a specified key.localStorage.getItem(key): Retrieves the value associated with a key. Returnsnullif the key doesn't exist.localStorage.removeItem(key): Deletes a key-value pair.localStorage.clear(): Deletes all key-value pairs for that domain.
For example, you could save a user's preferred theme like this:
// Store a value
localStorage.setItem('theme', 'dark');

// Retrieve the value later
const userTheme = localStorage.getItem('theme'); // "dark"
console.log(userTheme);
The Challenge: Storing Objects and Arrays
There's one crucial rule: localStorage can only store strings.
What happens if you try to save your todos array directly?
const todos = [
    { id: 1, text: 'Learn JavaScript', completed: true },
    { id: 2, text: 'Build a project', completed: false }
];

localStorage.setItem('myTodos', todos);

const retrievedTodos = localStorage.getItem('myTodos');
console.log(retrievedTodos); // Outputs: "[object Object],[object Object]"
This is not what we want! JavaScript converts the array to a string using its default toString() method, which results in a useless string.
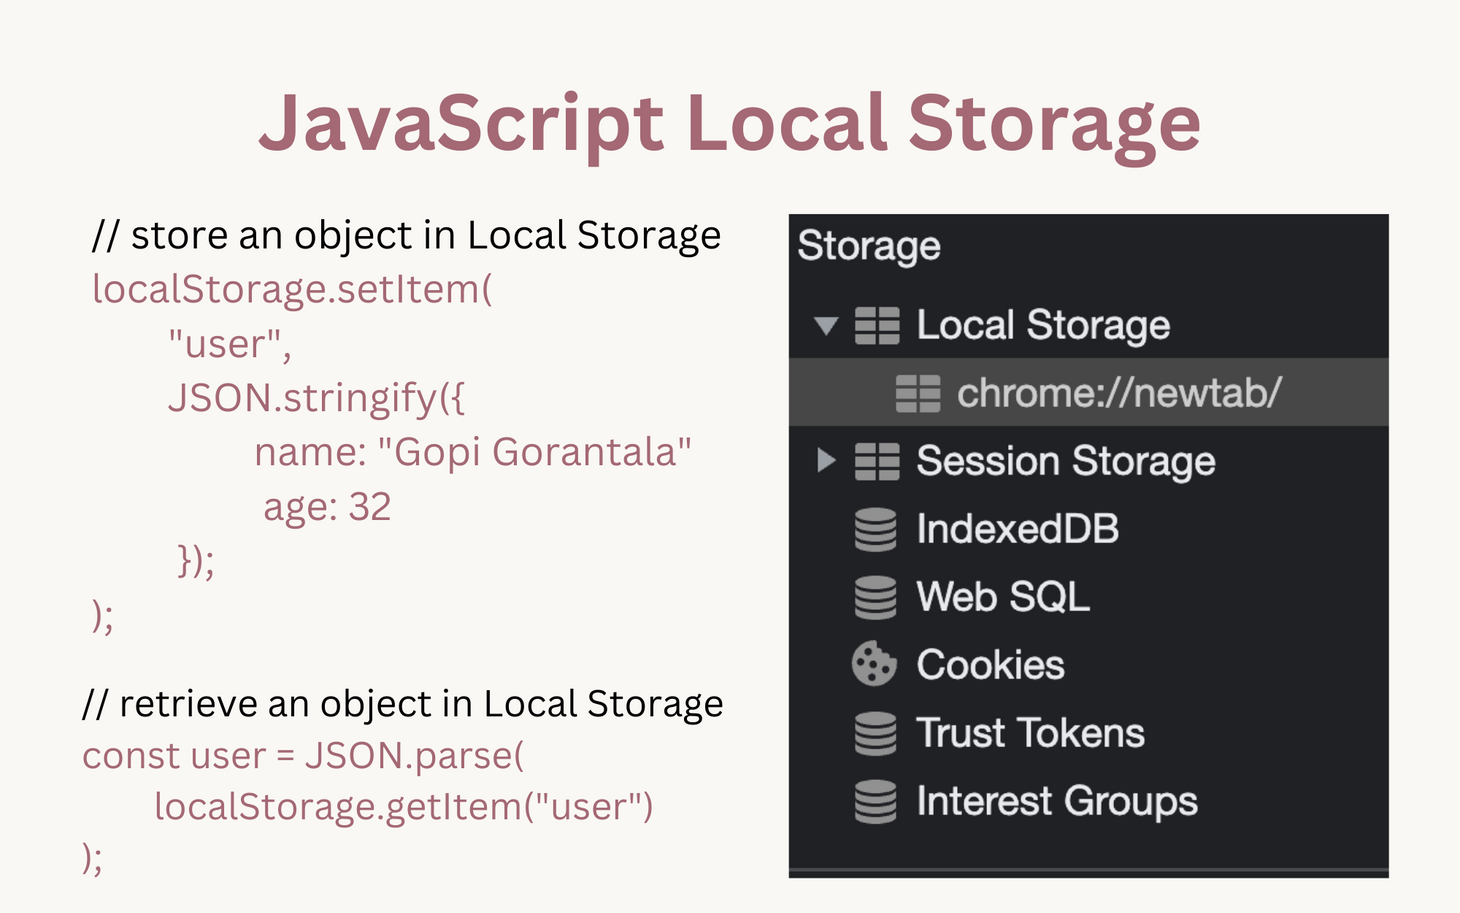
The correct way to handle complex data like objects and arrays is to convert them into a JSON string before storing them, and then parse the string back into a JavaScript object/array when retrieving them.
JSON.stringify(value): Converts a JavaScript object or array into a JSON string.JSON.parse(string): Converts a JSON string back into a JavaScript object or array.
Let's look at an article that explains this critical concept.
The article 'LocalStorage, sessionStorage' from javascript.info clearly explains the 'strings only' limitation and how to work around it using JSON.
Read the section titled 'Strings only'. It's a very short but crucial section that demonstrates exactly how to use JSON.stringify() and JSON.parse() to correctly store and retrieve an object.
Here's how this pattern looks in practice:
Let's Upgrade the To-Do App!
Now, let's apply these concepts to our to-do list application. We need to make two main changes:
- Save the state: Every time the
todosarray is modified (when we add, complete, or delete a task), we must save the updated array tolocalStorage. - Load the state: When the page first loads, we must check
localStoragefor any saved tasks, load them, and render them to the screen.
Step 1: Saving the State on Every Change
We can create a simple helper function to keep our code clean. This function will take the current todos array, stringify it, and save it.
// Helper function to save todos to localStorage
function saveTodos() {
    localStorage.setItem('todos', JSON.stringify(todos));
}
Now, we just need to call this saveTodos() function every time we modify the todos array.
In your app.js file, find the submit event listener for the form. After you push the new todo object, add a call to saveTodos().
// In the 'submit' event listener for todoForm
// ...
todos.push(todo);
saveTodos(); // <-- ADD THIS LINE
renderTodos();
// ...
Next, find the click event listener on the todoList. We need to call saveTodos() after we update the state for both deleting and completing a task.
// In the 'click' event listener for todoList
// ...

// Handle Delete
if (target.matches('.delete-btn')) {
    todos = todos.filter(todo => todo.id !== todoId);
    saveTodos(); // <-- ADD THIS LINE
    renderTodos();
}

// Handle Complete
if (target.matches('.complete-btn')) {
    todos = todos.map(todo => {
        if (todo.id === todoId) {
            return { ...todo, completed: !todo.completed };
        }
        return todo;
    });
    saveTodos(); // <-- ADD THIS LINE
    renderTodos();
}
// ...
(Note: I've slightly refactored the map function using the spread operator (...) for conciseness, a concept you're familiar with.)
Now, every change you make to your list is being saved in the browser! You can verify this by opening your browser's DevTools, going to the "Application" tab, and looking under "Local Storage". You should see a key named todos with your stringified array as the value.
Step 2: Loading the State on Startup
Saving is only half the battle. We also need to load the data when the application starts.
At the very top of your app.js, we need to change how we initialize the todos array. Instead of starting with an empty array every time, we'll check localStorage first.
// app.js

// 1. Check for saved data in localStorage
const savedTodos = localStorage.getItem('todos');

// 2. If data exists, parse it. Otherwise, start with an empty array.
let todos = savedTodos ? JSON.parse(savedTodos) : [];

// ... (rest of your selectors and functions)
There's one final step. After you define your functions (like renderTodos), you need to call renderTodos() one time at the end of your script to display the loaded tasks.
// At the very end of your app.js file
renderTodos();
With these changes, your application is now complete! It will load any existing tasks on startup and save any changes you make, persisting them across browser sessions.
Test your understanding!
Imagine you're creating a settings panel for a user where they can choose a username that is displayed on the page. How would you use localStorage to remember their username?
- How would you save the username from an input field with
id="username-input"when a "Save" button is clicked? - How would you load and display this username in an element with
id="display-username"when the page loads?
Show answer
Here's one way to solve it:
// Select the necessary elements
const usernameInput = document.querySelector('#username-input');
const saveButton = document.querySelector('#save-button');
const displayUsername = document.querySelector('#display-username');

// 1. Save the username on button click
saveButton.addEventListener('click', () => {
    const username = usernameInput.value;
    localStorage.setItem('username', username);
    // Optionally update the display immediately
    displayUsername.textContent = `Welcome back, ${username}!`;
});

// 2. Load and display the username on page load
function loadUsername() {
    const savedUsername = localStorage.getItem('username');
    if (savedUsername) {
        displayUsername.textContent = `Welcome back, ${savedUsername}!`;
    }
}

// Call the function when the script runs
loadUsername();
This is a simpler case than our to-do list because a username is just a string, so we don't need JSON.stringify() or JSON.parse().
Conclusion
Great work! You have successfully enhanced your to-do application by adding persistence with localStorage. This is a significant step in building applications that feel robust and user-friendly.
Key Takeaways:
localStorageis a browser API for storing key-value pairs that persist even after the browser is closed.- The fundamental methods are
setItem(),getItem(), andremoveItem(). - A critical limitation is that
localStorageonly stores strings. - To store complex data like objects and arrays, you must use
JSON.stringify()before saving andJSON.parse()after retrieving. - The common pattern for persistent state is:
- Load: On page load, get data from
localStorage, parse it, and initialize your state. - Render: Display the initial state.
- Save: After every action that modifies the state, save the entire updated state back to
localStorage.
- Load: On page load, get data from
In the next module, we'll dive into Asynchronous JavaScript. While localStorage is perfect for client-side data, most real-world applications need to fetch data from a server. This introduces the concept of asynchronous operations—actions that don't complete immediately—and you'll learn how to manage them gracefully using Promises and async/await.