Hello! Over the past few lessons, we've systematically prepared your full-stack application for the real world. You've configured the Express server to handle production builds, and most recently, you secured your application by managing configuration and secrets with environment variables. Your code is now robust, secure, and ready for its final destination: the internet.
Today, we take that final, exciting step. This lesson will guide you through deploying your entire full-stack application—frontend, backend, and database—to a Platform-as-a-Service (PaaS). You will learn how to make your project live and accessible to anyone with a web browser. We will use a popular PaaS called Render, which simplifies the complexities of cloud infrastructure, letting you focus on your code.
This process will bring together everything you've learned, especially your new skills with environment variables, as you connect the different parts of your application in a live production environment.

Understanding the Deployment Architecture
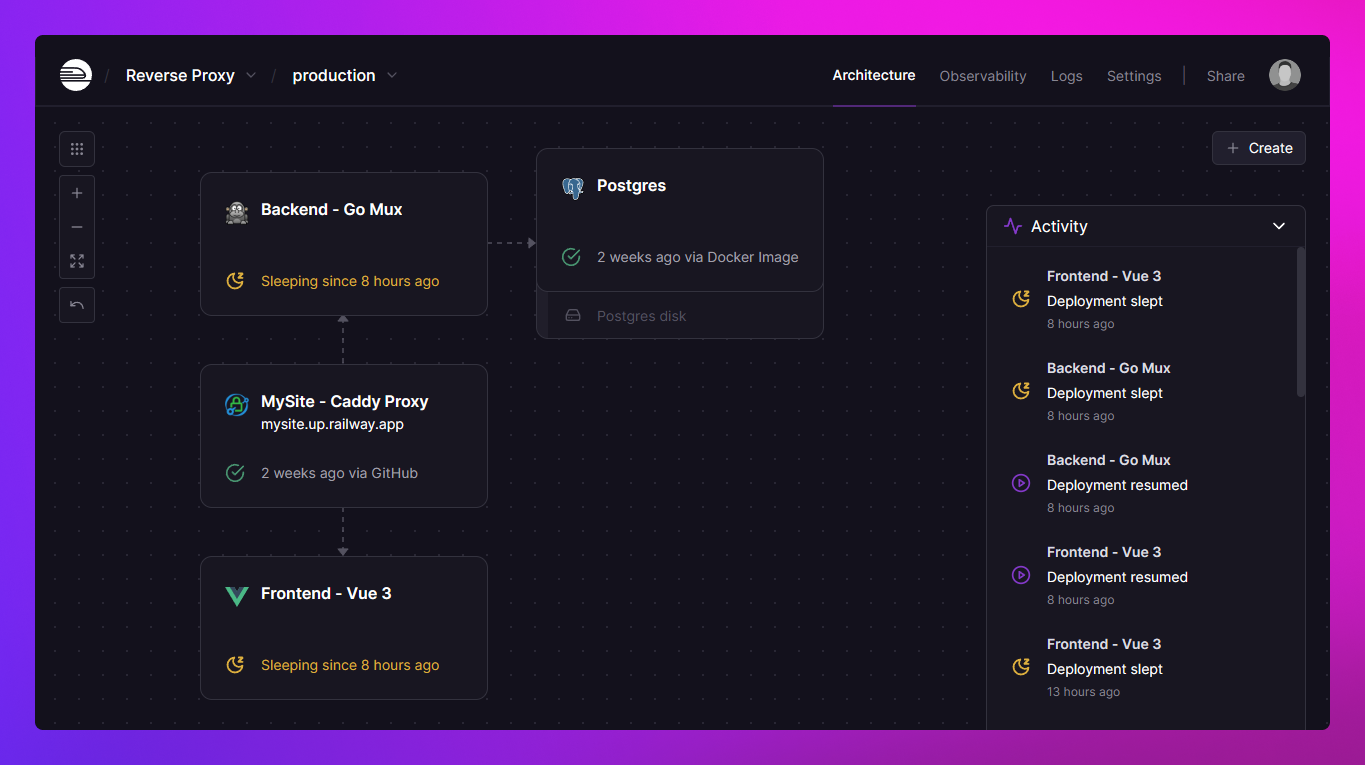
Before we start clicking buttons, it's important to understand the architecture we are about to create. On your local machine, you might run everything with a couple of npm start commands. In production, for better performance, security, and scalability, we deploy our application as a set of distinct, connected services.
Multi-Service Architectures on Render
The Render documentation page, "Multi-Service Architectures on Render," provides an excellent conceptual overview of this approach. It explains why we separate the frontend, backend, and database into individual services.
Please read the introduction and the "Example scenario" sections. Focus on the table that maps application components (Frontend, Backend, Database) to Render's service types (Static Site, Web Service, Postgres database).
As you just read, we will deploy three separate components on Render:
- PostgreSQL Database: A managed database service. Render handles the installation, backups, and maintenance.
- Node.js/Express Backend: A Web Service. This is a running server that will handle our API logic. It will have a public URL.
- React Frontend: A Static Site. Render will take our built React files (HTML, CSS, JS) and serve them from a global Content Delivery Network (CDN), which is incredibly fast for users worldwide.
These services will communicate with each other over the network, configured using the environment variables we prepared for in the last lesson.
A Step-by-Step Guide to Deploying on Render
We will now walk through the entire deployment process. The following video provides a clear, practical demonstration of each step. We'll break it down piece by piece.
From GitHub to Production in Minutes with Render | React + Node + PostgreSQL
The video "From GitHub to Production in Minutes with Render" by ByteMonk is a fantastic end-to-end guide that mirrors exactly what we need to do. We'll use it to guide our deployment.
First, watch the introduction from the beginning to 02:25 to get a feel for Render and what it offers. This section explains why a PaaS like Render is often preferred over more complex cloud providers like AWS for many projects.
Make sure you have a Render account (you can sign up with your GitHub account) and have pushed your entire project, including the backend and frontend folders, to a GitHub repository.
Step 1: Provision the Cloud Database
Our backend needs a database to connect to. Instead of the one running on your local machine, we'll create a new, live PostgreSQL database on Render.
From GitHub to Production in Minutes with Render | React + Node + PostgreSQL
Let's create the database. The video demonstrates this process clearly.
Watch the segment from 05:04 to 05:55. Follow the steps to create a new PostgreSQL service on Render. Once it's created, the most important piece of information is the Internal Database URL. Copy this URL; you will need it in the next step.
This Internal Database URL is the secret connection string for your live database. It's exactly the kind of value that belongs in an environment variable.
Step 2: Deploy the Backend Web Service
Now, let's get your Node.js/Express API server running in the cloud.
From GitHub to Production in Minutes with Render | React + Node + PostgreSQL
Next, we'll deploy the backend as a Web Service and connect it to the database we just created.
Watch the video from 04:06 to 05:04, and then continue from 05:55 to 06:45. Pay close attention to these configuration settings: Repository: Select your GitHub project. Root Directory: Set this to backend so Render knows where to find your server code. Build & Start Commands: Render should auto-detect these as npm install and npm start. Verify they are correct. Environment Variables: This is the critical step. Create a new environment variable named DATABASE_URL and paste the Internal Database URL you copied from your Render database. You will also want to add your JWT_SECRET here. After configuring, click 'Create Web Service' and watch the deployment logs.
Once the deploy is live, Render will give you a public URL for your backend (e.g., https://your-app-backend.onrender.com). You can test it by adding an API route (like /api/tasks) to the URL in your browser to see if it works. Copy this backend URL for the final step.
Test your understanding!
Why did we use the Internal Database URL instead of the External one provided by Render?
Show answer
We use the internal URL because both our backend and our database are running within Render's private network. Communicating over this internal network is more secure (traffic doesn't go over the public internet) and has lower latency (it's faster).
Step 3: Deploy the Frontend Static Site
With the backend live, the final step is to deploy our React user interface.
From GitHub to Production in Minutes with Render | React + Node + PostgreSQL
Now we deploy the frontend. This will be a 'Static Site' that communicates with the backend service you just deployed.
Watch from 06:56 to 07:54. The process is similar to the backend: Repository: Select the same GitHub project. Root Directory: Set this to frontend. Build Command: Verify it's npm run build. Publish Directory: The video uses build because it was made with Create React App. Your project uses Vite, so you must set this to dist. Environment Variables: Create a new variable named VITE_API_URL (remember the VITE_ prefix!) and paste the public URL of your backend service from the previous step. Then, create the site and wait for it to go live.
Once deployed, visit your new frontend URL. Your full-stack application is now live on the internet! But you might notice something isn't working quite right...
Handling CORS in Production
If you open your browser's developer console on your live site, you will almost certainly see a CORS error.
This happens because your backend's CORS policy was likely configured to only accept requests from http://localhost:5173. Now, requests are coming from a completely new origin: https://your-app-frontend.onrender.com. The server, by default, will block them for security.
We need to update our Express server to trust our new frontend URL.
How to Deploy a PERN Stack App (PostgreSQL, Express, React, Node.js) | Render + Neon
Fixing CORS errors post-deployment is a rite of passage for web developers. This video from Web Dev Bey clearly demonstrates how to diagnose and fix the issue.
Watch the segment from 19:57 to 21:20. The video shows how to identify the CORS error in the browser console and then update the cors middleware options in the index.js file on the backend to include the frontend's live URL.
To fix this in your backend/index.js file, modify your cors configuration to accept your frontend's URL. A robust way to do this is to allow both your local development server and your new live site.
// In backend/index.js
const cors = require('cors');

const allowedOrigins = [
  'http://localhost:5173', // Your local frontend
  'https://your-app-frontend.onrender.com' // Your deployed frontend
];

app.use(cors({
  origin: function (origin, callback) {
    // allow requests with no origin (like mobile apps or curl requests)
    if (!origin) return callback(null, true);
    if (allowedOrigins.indexOf(origin) === -1) {
      const msg = 'The CORS policy for this site does not allow access from the specified Origin.';
      return callback(new Error(msg), false);
    }
    return callback(null, true);
  },
  credentials: true
}));
Replace https://your-app-frontend.onrender.com with your actual frontend URL. Commit and push this change to your GitHub repository. Render will automatically detect the push and redeploy your backend service with the fix. After the deployment finishes, refresh your frontend, and everything should now work perfectly!
Conclusion
Congratulations! You have successfully deployed a full-stack, database-driven web application to the cloud. This is a massive milestone and a core competency for any web developer.
Key Takeaways:
- Modern web apps are often deployed as a multi-service architecture (e.g., static site, web service, database).
- Platform-as-a-Service (PaaS) like Render automates infrastructure so you can focus on code.
- Environment variables are the glue that connects your services in production. You set them in the PaaS dashboard, not by uploading
.envfiles. - The
DATABASE_URLconnects your backend to its database. - The
VITE_API_URLconnects your frontend to its backend. - CORS policies must be updated in your backend to accept requests from your deployed frontend's URL.
Preview of the Next Lesson:
Your application is live, but what happens when something goes wrong? In the next and final lesson of this module, we will cover how to test the deployed application and debug common deployment issues. You will learn how to read server logs on Render, diagnose common errors, and ensure your application remains healthy and functional.