Hello! Let's continue building our movie search application.
In the last lesson, you successfully integrated the TMDB API into our project. Your App component now fetches a list of movies based on the user's search query and stores this data in its movies state array. The data is there, but our users can't see it yet.
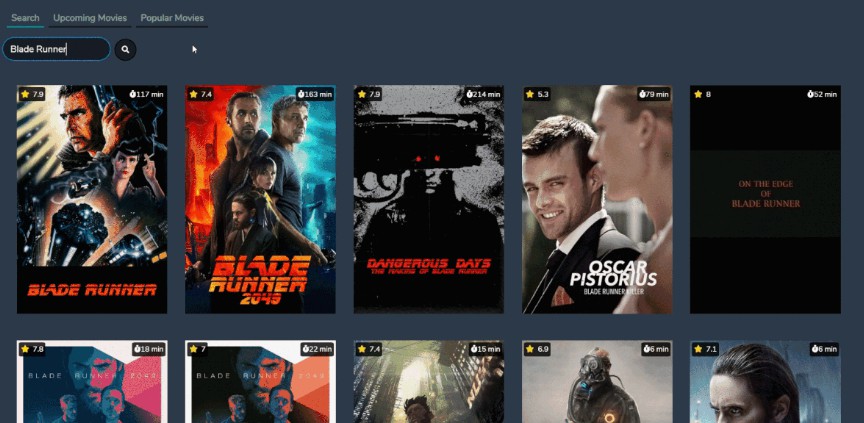
Today, we'll bridge that gap. Our goal is to display the fetched data in a grid of movie cards, passing data via props. This is a fundamental pattern in React: taking a collection of data and rendering a corresponding component for each item. We will create a reusable MovieCard component to display information for a single movie and then use it to render our entire list of search results.
By the end of this lesson, your application will transform from a blank page into a dynamic grid of movie posters that updates as you search.
Part 1: Rendering Lists with the .map() Method
First, how do we take an array of data, like our movies state, and turn it into a list of UI elements? In traditional JavaScript, you might use a for loop to build up an HTML string. In React, we use a more declarative approach by leveraging standard JavaScript array methods directly within our JSX.
The most common method for this is .map(). You've used .map() before in JavaScript to transform arrays. In React, we use it to transform an array of data into an array of components.
To understand this concept clearly, let's review how to create reusable components from an array of data.
Creating Reusable React Components with map()
The article 'Creating Reusable React Components with map()' on dev.to provides an excellent explanation of this core concept.
Please read the sections 'What is map()?' and 'Putting it together'. Focus on how the map method is used inside the JSX curly braces {} to iterate over an array and return a UI element for each item.
As the article shows, you can write something like this inside a component's return statement:
{movies.map(movie => (
    <p>{movie.title}</p>
))}
This code would iterate through your movies array and render a paragraph with the movie's title for each entry. While this works, putting complex HTML for a full "card" inside the .map() function can get messy. A much cleaner approach is to create a separate, reusable component for the card itself.
Part 2: Introducing Props for Component Reusability
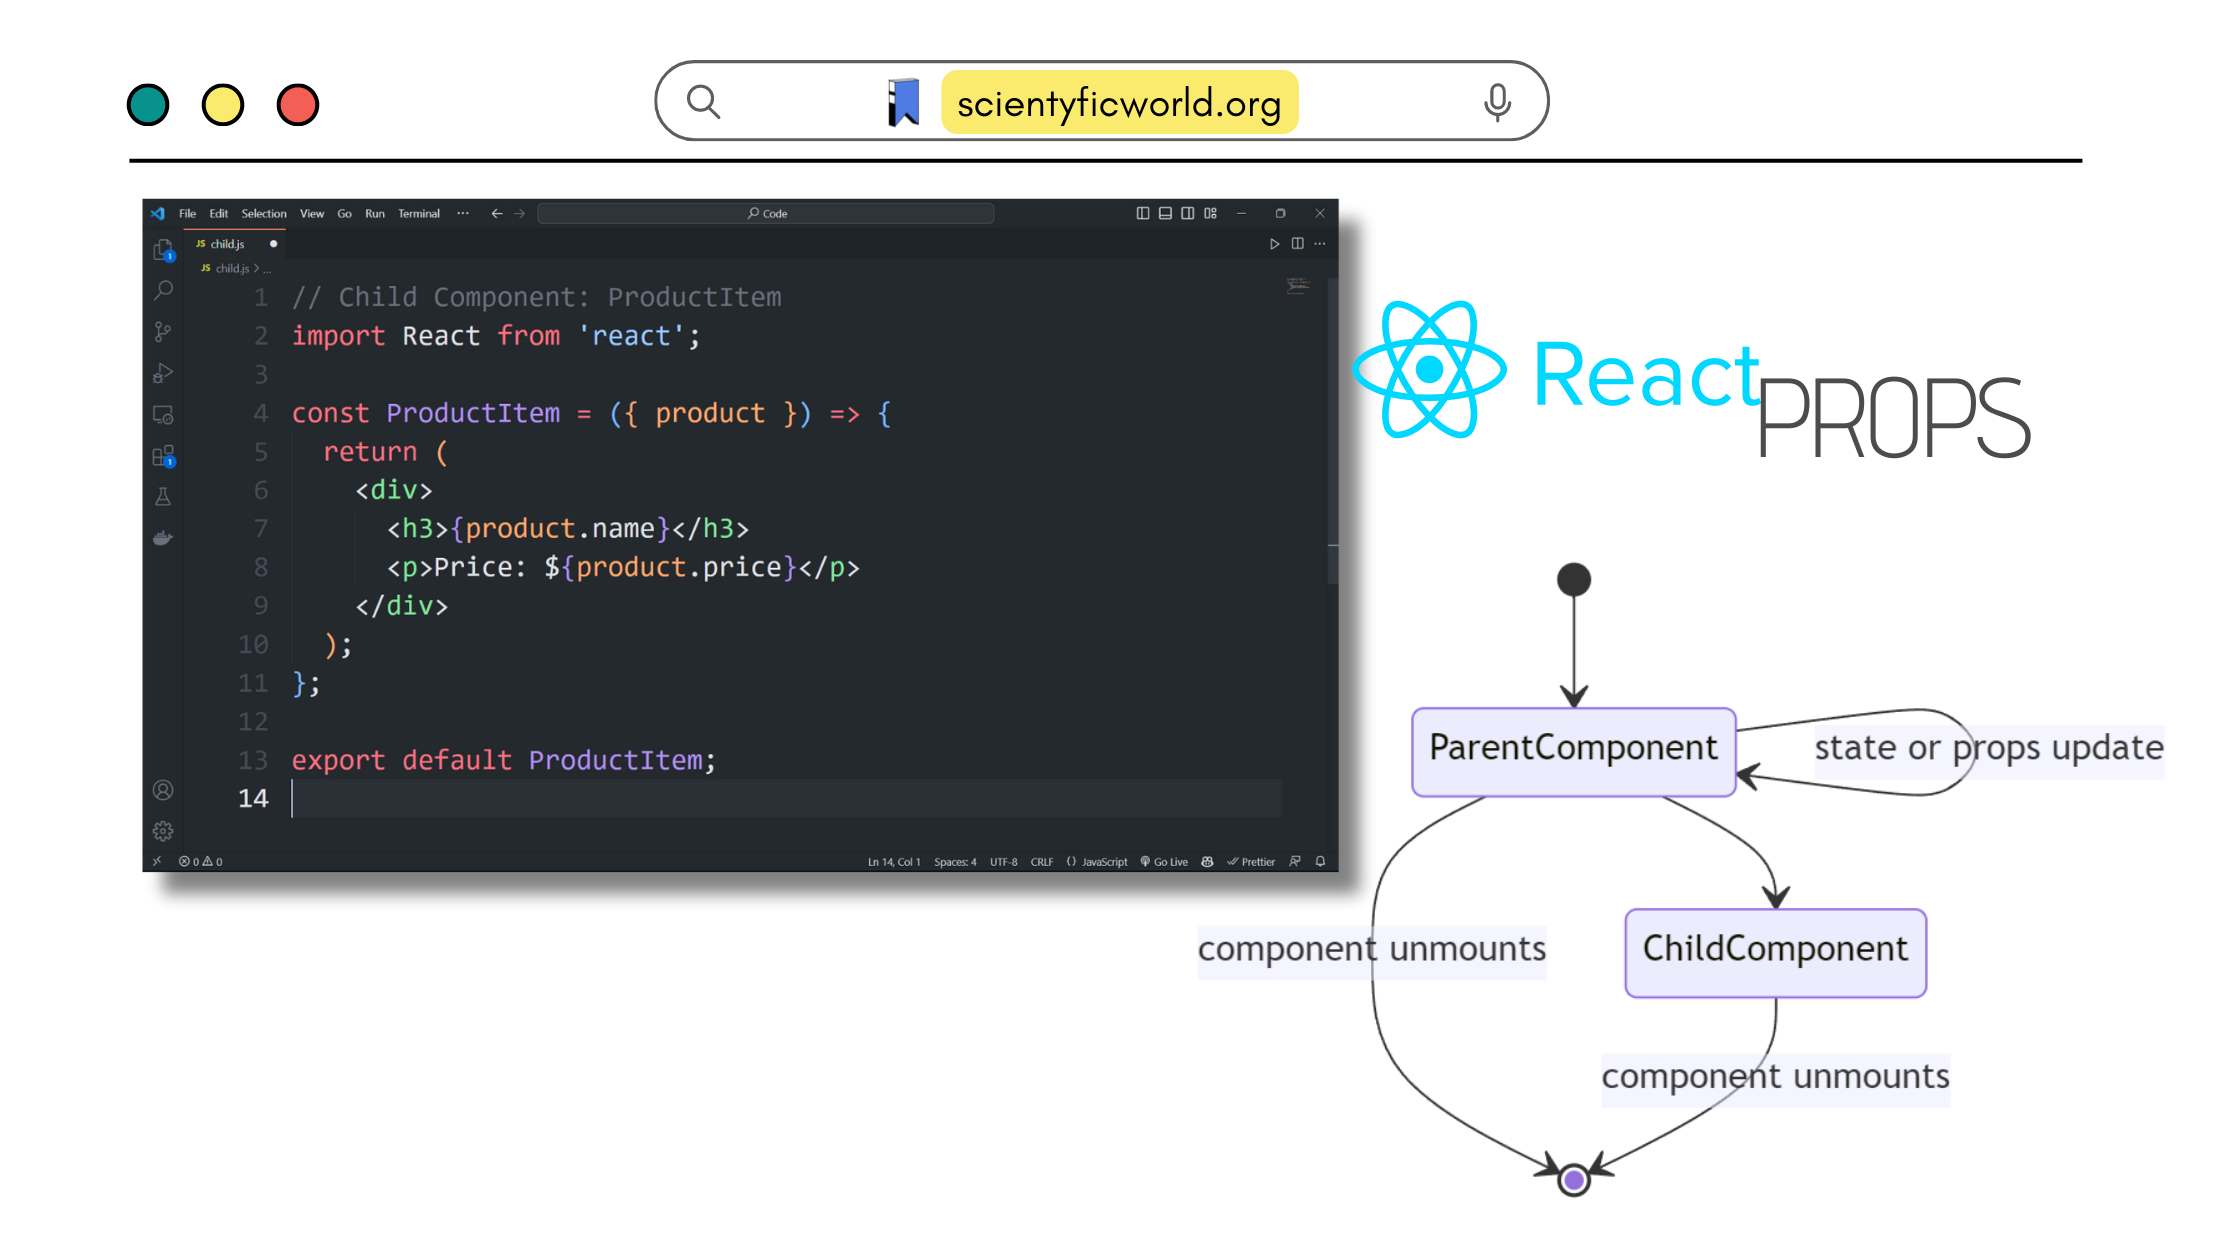
To create a reusable MovieCard component, we need a way to pass the data for a specific movie (its title, poster, etc.) from our main component down to the MovieCard. This is where props come in.
Props (short for properties) are how parent components pass data to their children. They are read-only and allow you to configure child components, making them dynamic and reusable.
The following short video gives a very clear and concise explanation of what props are and how they work.
Watch this video from Bro Code to get a solid grasp of props.
Watch from the beginning to 02:37 to understand the basic concept of passing props. Then, watch the section from 06:13 to 07:56 which demonstrates how reusing a component with different props creates unique elements from the same template.
As you saw in the video, the data flows in one direction: from parent to child.
Part 3: Building the MovieList and MovieCard Components
Now, let's apply these concepts. We will create two new components:
MovieCard.jsx: A component responsible for displaying a single movie's details.MovieList.jsx: A component that takes the entire array of movies, maps over it, and renders aMovieCardfor each one.
This separation of concerns makes our code much cleaner. App.js will manage state and data fetching, MovieList.js will handle the list rendering logic, and MovieCard.js will handle the presentation of a single item.
The following video tutorial walks through this exact process.
This segment from a tutorial by Chris Blakely demonstrates how to create a MovieList component that receives an array of movies and uses .map() to render them. This is the central task of our lesson.
Watch from 03:04 to 06:10. Pay close attention to how he: Creates the MovieList component. Passes the movies array from the parent App component as a prop. Uses props.movies.map() inside MovieList to render an image for each movie.
Let's implement this in our project.
Step 1: Create MovieList.jsx
First, create a components folder inside your src folder if you haven't already. Inside src/components, create a new file named MovieList.jsx.
This component will receive the movies array as a prop and render the list.
// src/components/MovieList.jsx

import React from 'react';

const MovieList = (props) => {
    return (
        <>
            {props.movies.map((movie, index) => (
                <div key={movie.id}> {/* We will replace this div soon */}
                    <img src={`https://image.tmdb.org/t/p/w200${movie.poster_path}`} alt='movie poster'></img>
                    <h5>{movie.title}</h5>
                </div>
            ))}
        </>
    );
};

export default MovieList;
A few important notes:
- Image URL: The TMDB API gives you a
poster_path(like/qNBAXBIQlnOThrVvA6mA2B5ggV6.jpg), not a full URL. You must prependhttps://image.tmdb.org/t/p/w200to create a valid image source.w200specifies the image width. - The
keyProp: Notice thekey={movie.id}. When you render a list of items, React needs a uniquekeyfor each element to efficiently update the list when data changes. The movie'sidfrom the API is perfect for this. Always provide a uniquekeywhen mapping over arrays to create elements.
Step 2: Create MovieCard.jsx
The div in our MovieList is getting crowded. Let's extract it into its own MovieCard.jsx component.
Create a new file src/components/MovieCard.jsx.
// src/components/MovieCard.jsx

import React from 'react';

const MovieCard = ({ movie }) => { // Using prop destructuring
    const posterUrl = movie.poster_path
        ? `https://image.tmdb.org/t/p/w500${movie.poster_path}`
        : 'https://via.placeholder.com/400'; // Fallback image

    return (
        <div className="movie">
            <div>
                <p>{movie.release_date ? movie.release_date.substring(0, 4) : 'N/A'}</p>
            </div>
            <div>
                <img src={posterUrl} alt={movie.title} />
            </div>
            <div>
                <span>Movie</span>
                <h3>{movie.title}</h3>
            </div>
        </div>
    );
};

export default MovieCard;
Here, we've defined a MovieCard component that takes a single movie object as a prop and lays out its title, poster, and year. We've also added a fallback image for movies that don't have a poster.
Step 3: Update MovieList.jsx to Use MovieCard
Now, let's refactor MovieList.jsx to use our new, cleaner MovieCard component.
// src/components/MovieList.jsx

import React from 'react';
import MovieCard from './MovieCard'; // Import the new component

const MovieList = (props) => {
    return (
        // This div will act as our grid container
        <div className="container">
            {props.movies.map((movie) => (
                <MovieCard movie={movie} key={movie.id} />
            ))}
        </div>
    );
};

export default MovieList;
This is much more readable! The MovieList component's only job is to loop through the movies and delegate the rendering of each individual movie to the MovieCard component, passing the necessary data via props.
Test your understanding!
Imagine you forgot to pass the movie prop to the MovieCard component in MovieList.jsx, like this: <MovieCard key={movie.id} />. What would happen when you run the application, and why?
Show answer
The application would likely crash or display a page full of errors. Inside MovieCard.jsx, the code tries to access properties like movie.title and movie.poster_path. Since the movie prop was never passed, it would be undefined. Trying to access a property on undefined (e.g., undefined.title) throws a TypeError, causing the component to fail to render. This demonstrates that child components are completely dependent on the props they receive from their parents.
Part 4: Integration and Styling
Finally, let's put it all together in App.js and add some CSS to create our grid layout.
Step 1: Update App.js
Import and render the MovieList component, passing it the movies state.
// src/App.js

import React, { useState, useEffect } from 'react';
import 'bootstrap/dist/css/bootstrap.min.css';
import './App.css'; // We will create this file next
import MovieList from './components/MovieList';
// ... other imports like SearchBox if you have them

const App = () => {
    const [movies, setMovies] = useState([]);
    const [searchValue, setSearchValue] = useState('');

    const TMDB_API_KEY = 'YOUR_TMDB_API_KEY'; // Paste your key here

    const getMovieRequest = async (query) => {
        if (!query) {
            setMovies([]);
            return;
        }
        const url = `https://api.themoviedb.org/3/search/movie?api_key=${TMDB_API_KEY}&query=${query}`;
        try {
            const response = await fetch(url);
            const data = await response.json();
            if (data.results) {
                setMovies(data.results);
            }
        } catch (error) {
            console.error("Failed to fetch movies:", error);
        }
    };

    useEffect(() => {
        getMovieRequest(searchValue);
    }, [searchValue]);

    return (
        <div className='movie-app'>
            <div className='row d-flex align-items-center mt-4 mb-4'>
                {/* <MovieListHeading heading='Movies' /> */}
                {/* <SearchBox searchValue={searchValue} setSearchValue={setSearchValue} /> */}
            </div>
            <div className='row'>
                <MovieList movies={movies} />
            </div>
        </div>
    );
};

export default App;
Note: I've commented out MovieListHeading and SearchBox for simplicity. Make sure to include them if you have them in your code.
Step 2: Add CSS for the Grid
Create a file named App.css in your src directory and add the following styles. These styles are adapted from the GeeksForGeeks article and will arrange your movie cards in a responsive grid.
The following CSS will style our application. It provides styles for the main app layout, a container for the movie cards, and the individual movie cards themselves, including some nice hover effects.
Copy the CSS code from the provided resource into your src/App.css file. Pay special attention to the .container and .movie classes. The .container uses display: flex and flex-wrap: wrap to create the grid, and the .movie class styles each individual card.
After adding the CSS, run your application. You should now see a grid of movie cards that updates as you type in the search bar!
Conclusion
Excellent work today! You've implemented one of the most fundamental patterns in React development. By combining component-based architecture with JavaScript's .map() method, you can efficiently render dynamic lists of data.
Key Takeaways:
- Rendering Lists: You learned to use the
.map()array method within JSX to transform an array of data into an array of React components. - Props: You now understand that props are the mechanism for passing data from parent components to child components, enabling reusability and clean code.
- Component Composition: You created a
MovieListthat contains multipleMovieCardcomponents, demonstrating how to build complex UIs by composing smaller, specialized components. - The
keyProp: You learned the importance of providing a uniquekeyprop to each element in a list for performance and predictability.
In the next lesson, we will focus on implementing a 'lifting state up' pattern to manage shared application state. This will be crucial for adding features like a "favorites" list, where multiple components need to share and interact with the same piece of data.