Hello! Welcome back to our backend journey with Node.js and Express.
In our last lesson, we mastered dynamic routes using req.params and req.query. You saw how quickly our main server.js file can fill up with route definitions. While this works for small projects, it becomes messy and hard to maintain as an application grows. This is a common challenge in software engineering, and solving it is crucial for building professional, scalable applications.
Today, we will address this problem head-on. Your learning outcome is to organize API routes into modular files using Express Router. By the end of this lesson, you will be able to refactor a cluttered server file into a clean, organized structure where related routes are grouped into their own modules.
Why Modularize Routes?
As applications scale, keeping all your route definitions in a single file leads to several problems:
- Poor Readability: Finding a specific route in a file with hundreds of lines is difficult.
- Maintenance Nightmare: Changing a URL prefix might require you to update many different lines of code.
- Lack of Organization: It's hard to see which routes belong to which feature (e.g., users, products, orders).
The solution is to separate our routes into logical, self-contained modules. This practice, often called creating a "routing layer," is a standard in professional Express development.
Introducing express.Router
The core tool Express provides for this is the express.Router. Think of a router as a "mini-application" that can have its own set of routes and middleware. You can define all routes related to a specific resource (like "users" or "products") on a router, and then "plug" that router into your main application.
Let's start by reading a short, clear explanation of how to create and use a separate route module from the MDN Web Docs.
Express Tutorial Part 4: Routes and controllers - MDN Web Docs
This section from MDN provides a perfect, concise example of creating a router in a separate file (wiki.js) and then using it in the main application file. This demonstrates the fundamental pattern we'll be using.
Read the section titled 'Defining and using separate route modules'. Pay close attention to the two code blocks: one showing the contents of wiki.js and the other showing how app.use() connects it to the main app.
A Step-by-Step Guide to Modular Routing
Now that you've seen the basic pattern, let's walk through the implementation step-by-step. The process can be broken down into three main parts.
1. Create a routes Directory and a Router File
First, we create a dedicated folder, conventionally named routes, to hold our route modules. Inside this folder, we'll create a file for each major resource of our API. For example, all user-related endpoints will go into routes/users.js.
2. Define Routes on the Router
Inside routes/users.js, you'll:
- Import Express.
- Create an instance of the router with
const router = express.Router();. - Define all your user-related routes on the
routerobject instead of theappobject (e.g.,router.get(...),router.post(...)). - Export the router using
module.exports = router;.
3. Mount the Router in the Main App
Finally, back in your main server.js (or app.js), you'll:
- Import your new router module.
- Tell your main app to use it for a specific base path with
app.use('/users', usersRouter);.
This video from Web Dev Simplified provides an excellent walkthrough of this entire process.
Learn Express JS In 35 Minutes
This video clip clearly demonstrates the three steps we just discussed. It shows how to move a set of user-related routes from the main server file into their own dedicated router module.
Watch from 11:11 to 16:03. Notice how he creates the routes/users.js file, moves the routes, changes app to router, and then uses app.use('/users', ...) to mount the router. A key benefit to note is how the paths inside users.js become simpler (e.g., / instead of /users).
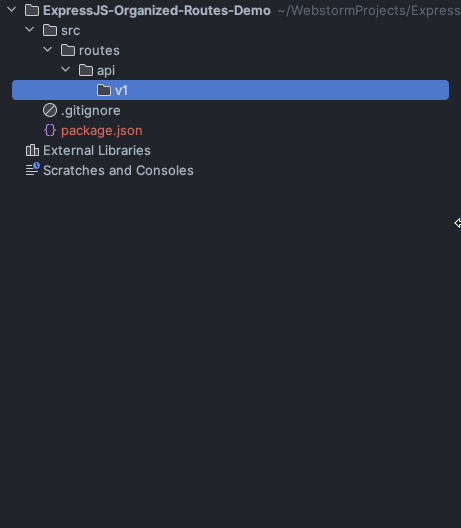
The image below shows the "after" state we're aiming for: a clean main application file that delegates routing to specialized modules.

Chaining Routes for Cleaner Code
A common pattern is to have multiple HTTP methods (GET, PUT, DELETE) for the same route path, especially when dealing with specific resources like /users/:id. Instead of writing router.get('/:id', ...) and router.put('/:id', ...) separately, you can chain them using router.route().
This approach groups all operations for a single endpoint together, making your code more readable.
Learn Express JS In 35 Minutes
This short clip demonstrates how to use router.route() to chain different HTTP methods for the same path. It's a small change that significantly improves code organization within your router files.
Watch from 19:30 to 20:58. See how the separate get, put, and delete handlers for /:id are combined into a single, chained router.route('/:id') block.
Test your understanding!
Imagine you have the following routes in your server.js:
// Get all products
app.get('/api/products', (req, res) => { /* ... */ });

// Create a new product
app.post('/api/products', (req, res) => { /* ... */ });

// Get a single product by ID
app.get('/api/products/:id', (req, res) => { /* ... */ });

// Update a single product by ID
app.put('/api/products/:id', (req, res) => { /* ... */ });
How would you refactor this into a modular routes/products.js file? Describe the contents of products.js and the line you would add to server.js.
Show answer
-
Create
routes/products.js:const express = require('express'); const router = express.Router(); // Routes for /api/products router.route('/') .get((req, res) => { /* Get all products logic */ }) .post((req, res) => { /* Create a new product logic */ }); // Routes for /api/products/:id router.route('/:id') .get((req, res) => { /* Get a single product logic */ }) .put((req, res) => { /* Update a single product logic */ }); module.exports = router;Notice we've simplified the paths to
/and/:idand usedrouter.route()to chain the methods. -
Update
server.js:const productsRouter = require('./routes/products'); app.use('/api/products', productsRouter);This mounts the products router, so any request to
/api/productswill be handled by it.
Further Separation: Routes and Controllers
As your application logic gets more complex, even the route files can become bloated. A common next step in professional development is to separate the routing logic from the business logic.
- Router File (
routes/users.js): This file is only responsible for defining the endpoints (/,/:id) and which function to call for each HTTP method. - Controller File (
controllers/users.js): This file contains the actual functions (e.g.,getAllUsers,createUser) that interact with the database and construct the response.
You don't need to implement this today, but it's important to be aware of this pattern as it's a natural evolution of what you've learned. It represents a core software design principle: Separation of Concerns.
Conclusion
Congratulations! You've learned a fundamental technique for structuring scalable and maintainable backend applications. By organizing your code logically, you make it easier for yourself and others to read, debug, and extend in the future.
Key Takeaways:
express.Routeris used to create modular, pluggable route handlers.- The standard convention is to create a
routesdirectory and place a file for each resource (e.g.,users.js,products.js). - Inside a router file, define routes on the
routerobject and simplify the paths by removing the common prefix. - Use
app.use('/base-path', routerModule)in your main server file to mount the router. - The
router.route()method helps you chain multiple HTTP handlers for the same path, keeping your code clean.
Preview of the Next Lesson:
Now that we have our routes neatly organized, our next step is to learn how to run code that applies to many or all of them. In the next lesson, we will dive deeper into middleware and learn how to write custom middleware to perform tasks like logging requests or validating inputs. You'll see how this ties in beautifully with express.Router, allowing us to apply middleware to specific groups of routes.