Hello! It's great to see you back.
In our last session, you reached a significant milestone by assembling the individual panels of your bodice shell and lining. You now have two distinct, three-dimensional pieces that mirror each other—the architectural, pleated exterior and the smooth, clean interior.
Today, we bring them together. This lesson focuses on the critical step of joining the shell and lining to create a single, beautifully finished bodice. The learning outcome is to join the bodice shell and lining at the neckline and center back edges. This process, often called "bagging out" a lining, is what creates a high-end, professional finish by hiding all the raw seam allowances inside the garment.
From a product design standpoint, think of this as the final assembly of the external housing (your pleated shell) and the internal chassis (the lining). The precision of the interface between these two components—the neckline seam—is what will define the clean, sharp aesthetic of your finished gown.
1. Preparation: Aligning the Shell and Lining
Before you sew, the most important step is to perfectly align your two bodice pieces.
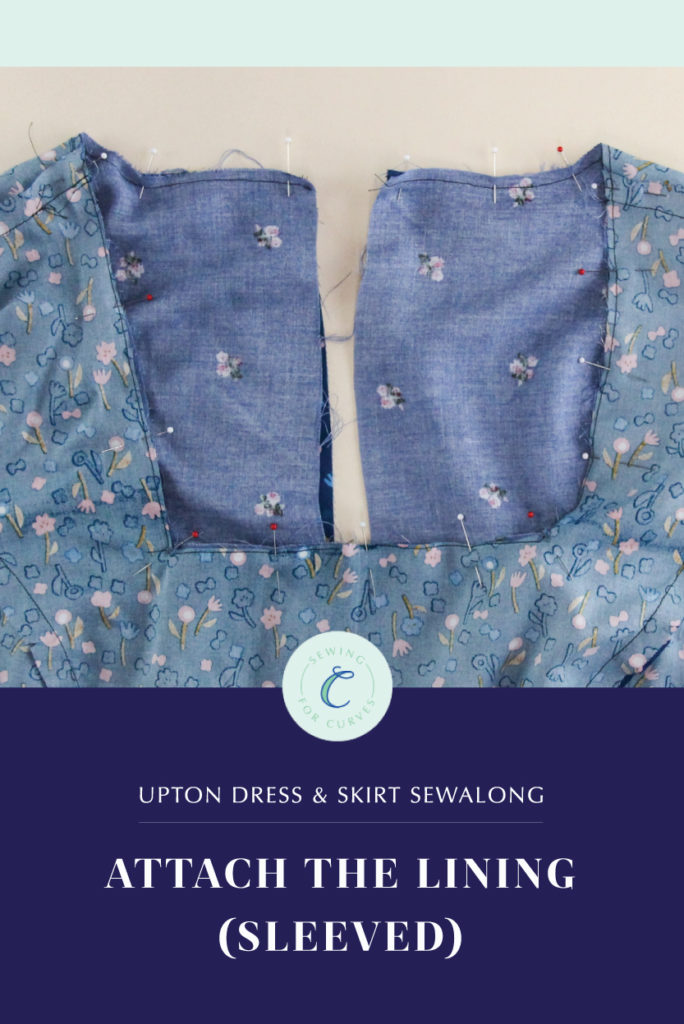
- Take your outer shell and your lining and place them right sides together.
- Carefully match the top edges along the entire neckline.
- Crucially, align the vertical seam lines (your princess seams and side seams) of the shell with the corresponding seams on the lining. Pin them together at these points first. This ensures that the structure of the bodice is perfectly matched inside and out.
- Add more pins along the neckline, about every 1-2 inches, to prevent any shifting.
2. Sewing the Neckline
With your pieces securely pinned, you're ready to stitch the neckline. This seam will permanently join the two layers and define the top edge of your gown.
The video 'Sewing a Strapless Bodice' from SCFE Fashiondesign provides a very clear and direct demonstration of this step. Pay attention to how the two pieces are handled as one.
Watch the section from 17:18 to 18:50. You'll see the process of laying the two bodices together (right sides facing), pinning the top edge, and stitching that seam. Notice that the pieces are already fully constructed, just like yours.
Sew along the neckline using your designated seam allowance. Go slowly and steadily, ensuring the fabric feeds smoothly without any puckers.
3. Clipping the Curves for a Flawless Turn
The neckline of your bodice is curved. To ensure this seam lies flat and smooth when you turn it right-side out, you must clip the seam allowance. This releases the tension in the fabric. This is a non-negotiable step for a professional finish.
There are two types of cuts you'll make:
- Clipping (for inward/concave curves): Making small, straight snips into the seam allowance, stopping just before the stitch line.
- Notching (for outward/convex curves): Cutting small V-shaped wedges out of the seam allowance to reduce bulk.
Georgia Dress Sewalong #8: BONUS strapless variation
The sewalong post 'Georgia Dress Sewalong #8' from By Hand London has an excellent, concise explanation of this concept.
Read the short section titled 'A quick note on clipping and notching curves'. It clearly explains the 'why' and 'how' for both concave and convex curves, which you will have on your strapless neckline.
After stitching your neckline, carefully clip and notch your seam allowance all the way around. This will allow the seam to "open up" properly when you turn the bodice right side out. You can also grade the seam by trimming the seam allowances to different widths (e.g., trim the lining's seam allowance slightly shorter than the shell's) to further reduce bulk.
4. Joining the Center Back Edges
The center back edges are where your zipper will be installed in a later module. There are a few ways to handle this, but for our process, we will prepare the edges now so that installing the zipper later is much simpler.
We will join the shell and lining at the center back by basting them together. This will treat them as a single layer of fabric when it's time to insert the zipper.
Here's how:
- Keep the bodice inside out (with the right sides still facing each other).
- Align the raw edges of the center back opening on one side. The shell and lining should be perfectly flat against each other. Pin them together.
- Using a long stitch length on your machine (a basting stitch), sew the two layers together about halfway into your seam allowance. For example, if your seam allowance is 1.5 cm (5/8"), baste at about 0.75 cm (1/4") from the raw edge.
- Repeat for the other side of the center back opening.
You have now joined the shell and lining at both the neckline and the center back edges.
5. The Reveal: Turning and Pressing
Now for the most satisfying step. It's time to turn the bodice right-side out.
- Reach in between the shell and lining and gently pull the entire bodice through, turning it right-side out.
- Use your fingers or a point turner to gently push out the seam along the neckline. Be careful not to poke through your stitches.
- Take your bodice to the ironing board. Carefully press the neckline seam. The goal is to have the seam sit perfectly on the edge, or roll just slightly to the inside so the lining is completely hidden from the outside. Use a press cloth to protect your fashion fabric.

Conclusion
Excellent work. You have successfully joined the bodice shell and lining, transforming your separate components into a single, cohesive, and beautifully finished garment. This "bagging" technique is fundamental to high-quality garment construction.
Key Takeaways:
- Joining a shell and lining is done with the pieces right sides together.
- Aligning vertical seams between the shell and lining is crucial for a professional result.
- Clipping and notching curved seam allowances is essential for a smooth, flat neckline after turning.
- Basting the center back edges together now prepares the bodice for a straightforward zipper installation later.
In our next lesson, we will perfect the neckline with a technique called understitching. This is a clever stitch, hidden on the inside of the garment, that permanently prevents the lining from rolling to the outside. It's the final touch that ensures your neckline remains flawless.