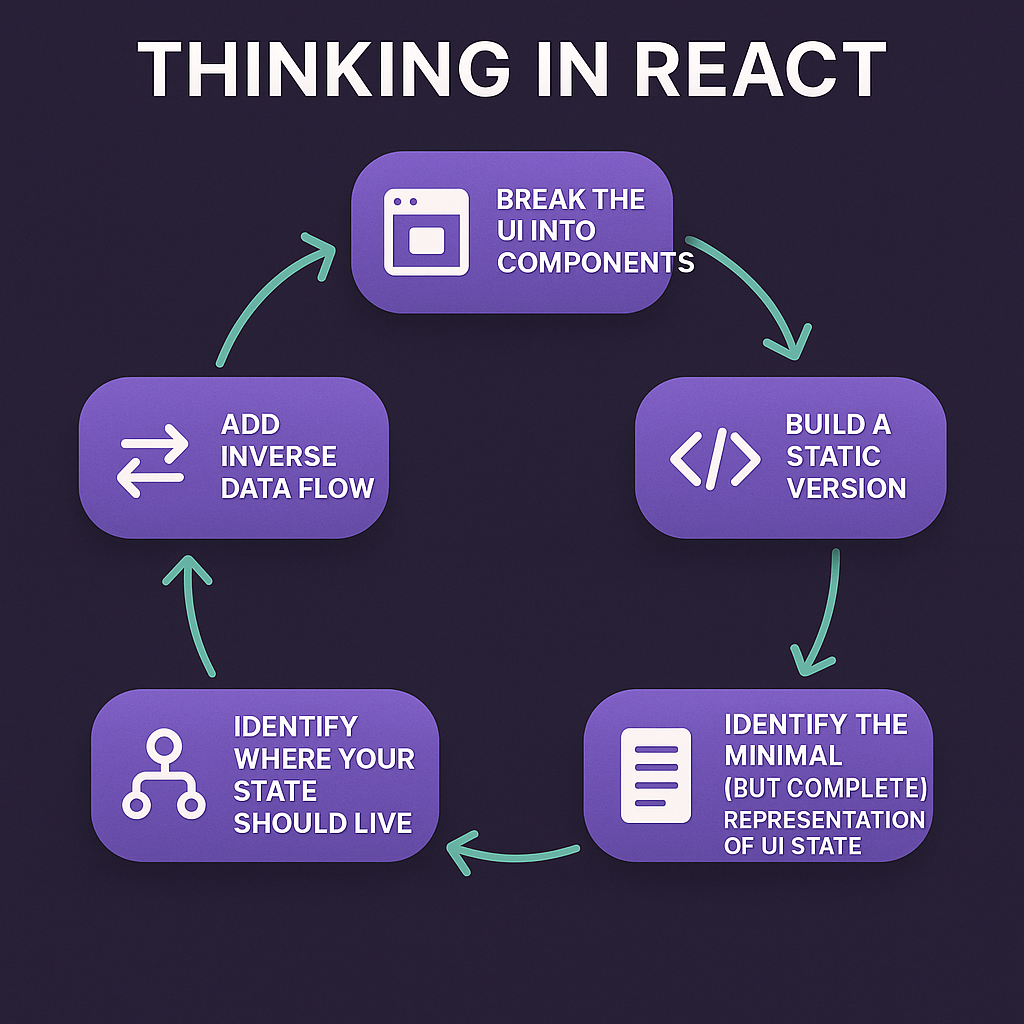
Welcome back! In our last lesson, we took the first crucial step in planning a React application: breaking down a UI mockup into a hierarchical component tree. This gave us a blueprint for the structure of our app.
Today, we move to the second, equally important planning phase. Now that we have our components, we need to decide where our data lives and how it moves between them. This lesson is all about data flow. Your learning outcome is to be able to plan the application's data flow and identify where state should live.
We'll continue following the "Thinking in React" philosophy, focusing on how to make our components dynamic and interactive by managing their data correctly.
The Flow of Data in React
Before we decide where to put our data, we must understand how it moves. React has a core principle called unidirectional data flow. This means that data flows in one direction: from parent components down to child components.
A helpful analogy is to think of your component tree as a river system. Data, like water, starts at a source high up in the component tree and flows downwards, branching out to all the child components that need it.
This downward flow happens through props. But what about data that needs to change, like user input in a search bar or the items in a to-do list? This is where state comes in.
The Single Source of Truth
For any piece of data that changes over time (state), there should be one, and only one, component that "owns" it. This is called the "single source of truth". This owner component is the single place in your app where that state is managed. It can then pass that state down to other components as props.
If multiple components need to share and modify the same state, that state should not be duplicated in each child. Instead, you must "lift it up" to their closest common parent.

To see a great explanation of this data flow model, let's watch a short video.
React Typescript 2023 - 8. Data Flow
This video from Teddy Smith uses a memorable 'Christmas tree and a river' analogy to explain data flow. It introduces the idea of 'smart' components (which hold state) and 'dumb' components (which just display data).
Watch the first 1 minute and 53 seconds of the video. Focus on understanding the concept of data flowing down and events 'hopping up'.
Step 1: Identify What Should Be State
Before we can find the right "home" for our state, we first need to identify what data in our application is state. Not all data is state!
To figure this out, we can apply a simple filtering process to every piece of data in our app. For each piece of data, ask three questions:
- Is it passed in from a parent via props? If so, it isn't state.
- Does it remain unchanged over time? If so, it isn't state.
- Can you compute it based on existing state or props? If so, it definitely isn't state!
Anything that's left is probably state. This follows the DRY (Don't Repeat Yourself) principle. For example, if you have an array of to-do items in state, you don't need another state variable for the to-do count. You can always compute it from the array's length (todos.length).
Let's see this in action with the product table example from our last lesson.
The official React documentation provides the definitive guide for this process. Let's read Step 3 of the "Thinking in React" article.
Read the section titled "Step 3: Find the minimal but complete representation of UI state". Pay close attention to the list of questions used to determine if something is state or not.
As the article explained, for our product table app, the data pieces are:
- The original list of products -> Not state (passed in as props).
- The search text the user enters -> Is state (changes over time, can't be computed).
- The value of the "in stock only" checkbox -> Is state (changes over time, can't be computed).
- The filtered list of products -> Not state (can be computed from the original list, the search text, and the checkbox value).
So, we've identified our minimal state: the searchText and the inStockOnly boolean.
Step 2: Identify Where Your State Should Live
Now for the main event: where do we put these state variables? We'll use another simple algorithm, known as "lifting state up".
For each piece of state you've identified:
- Identify every component that renders something based on that state.
- Find their closest common parent component in the component tree.
- Decide where the state should live:
- Often, the state goes directly into the common parent.
- Sometimes it makes sense to put it in a component even higher up the tree.
- If no existing component makes sense, you can create a new component just to hold the state.
Let's apply this to our product table example.
searchTextandinStockOnlystate are needed by:SearchBar: to display the current search text and whether the box is checked.ProductTable: to filter the list of products it displays.
- The closest common parent of
SearchBarandProductTableisFilterableProductTable. - Therefore,
FilterableProductTableis the component that should "own" the state.
The following video and article walk through this exact process.
5 Steps to THINK in React and Easily Create a ReactJS App From Scratch! (Bonus: Tailwind CSS)
Let's return to the codeSTACKr video from the last lesson. This segment focuses on exactly what we're learning: identifying minimal state and then finding its proper home.
Watch from 05:12 to 08:24. The first part recaps identifying state, and the second part demonstrates finding the common owner component.
To reinforce this with a different example, let's look at another official React guide that focuses exclusively on this concept.
Sharing State Between Components - React
This article, "Sharing State Between Components," provides a very clear, step-by-step example of lifting state up using an accordion UI. It's an excellent breakdown of the 'why' and 'how'.
Read from the beginning up to the end of "Step 3: Add state to the common parent". Then, skip to and read the section "A single source of truth for each state". This will walk you through the entire thought process of moving state from a child to a parent.
As you read, you were introduced to two important terms:
- Uncontrolled Component: A component that manages its own state internally (like the initial
Panels). It's easy to use but hard to coordinate with other components. - Controlled Component: A component that receives its value and behavior via props (like the final
Panels). The parent component "controls" it, making it flexible and easy to coordinate.
Closing the Loop: Data Down, Events Up
We've established that state lives in a parent component (FilterableProductTable) and is passed down as props to children (SearchBar, ProductTable).
But how does the SearchBar tell FilterableProductTable that the user has typed something new?
This is the "inverse data flow" or the "events hopping up" part of the analogy. The parent component passes down not just the state value, but also the function that updates the state.
Here’s the flow:
- Parent (
FilterableProductTable):- Defines state:
const [filterText, setFilterText] = useState(''); - Passes both the state and the updater function down as props:
<SearchBar filterText={filterText} onFilterTextChange={setFilterText} />
- Defines state:
- Child (
SearchBar):- Receives the props:
function SearchBar({ filterText, onFilterTextChange }) { ... } - Uses the
filterTextprop to set the input's value. - Calls the
onFilterTextChangeprop in itsonChangeevent handler, passing up the new value:<input onChange={(e) => onFilterTextChange(e.target.value)} />
- Receives the props:
This pattern—passing data down and handler functions down to be called from below—is fundamental to how interactivity works in React.
Conclusion
In this lesson, we've established a clear strategy for managing data in a React application. By planning your data flow before you code, you create applications that are predictable, maintainable, and easier to debug.
Key Takeaways:
- React uses unidirectional data flow: data flows down from parent to child via props.
- For every piece of state, there must be a single source of truth—one component that owns it.
- To identify state, filter out any data that is passed via props, never changes, or can be computed from other data.
- To find where state should live, find the closest common parent of all components that need that data. This process is called lifting state up.
- To allow children to update a parent's state, pass updater functions down as props. This creates a loop: "data down, events up."
Next Up:
We now have a complete plan for our application: a component tree (from the last lesson) and a data flow diagram (from this lesson). In the next lesson, we'll start bringing this plan to life. We will begin by defining a logical folder and file structure for our project and then move on to implementing the static UI using our component blueprint and passing the initial data down as props.