Hello! Welcome back to our module on Power Apps Component Framework (PCF) Development.
In our last lesson, you masterfully implemented all four core lifecycle methods (init, updateView, getOutputs, destroy) and successfully tested your interactive LinearInputControl in the local test harness. That's a crucial milestone.
Today, we'll take the component out of the lab and into the real world. Our goal is to bind PCF components to field and dataset properties within a Model-driven or Canvas App. You'll learn how to package your component, deploy it to a Dataverse environment, and configure it to enhance the user interface of actual applications. This lesson bridges the gap between local development and live deployment, a key skill for the PL-400 exam.
We'll explore the two fundamental types of data binding for PCF components:
- Field-bound components, like the slider you built, which are attached to a single column on a form.
- Dataset-bound components, which can replace entire grids, such as views or subgrids.
Let's get started!
1. From Local Harness to Live App: Field-Bound Components
The local test harness is excellent for rapid development, but a component's true value is realized when it's part of a live application. The first step is to package it into a Dataverse solution. Since you're interested in professional development practices, we'll use the Power Platform CLI for this process.
Packaging and Deploying Your Component
The process involves creating a solution project, referencing your PCF component within it, and then building the deployable package. The following video provides a clear, step-by-step walkthrough of this entire workflow.
Learn PCF Power Apps Component Code Component in 1 Hour | Installation, Demo and Use in Dataverse
This video by Softchief Learn will guide you through packaging your PCF control into a solution file (.zip) and importing it into Dataverse. It covers the exact CLI commands you need.
Watch from 25:47 to 47:56. This section is dense but critical. Focus on these three key command sequences: pac solution init: To create a new solution project. pac solution add-reference: To link your PCF control project to the solution. ms-build: To compile the solution and generate the .zip file. Please note the instructor's valuable tip on resolving potential ms-build path errors by setting environment variables, a common issue for developers.
To summarize the key steps from the video for packaging:
- Navigate to your project's root folder in the terminal.
- Create a new sub-directory for your solution files (e.g.,
mkdir solutionandcd solution). This keeps your component and solution projects separate and organized. - Initialize a solution project using the CLI:
pac solution init --publisher-name <YourPublisherName> --publisher-prefix <yourprefix>. - Add a reference from the solution project back to your component project:
pac solution add-reference --path <path-to-your-pcf-project>. The path should point to the directory containing thepcfprojfile. - Build the solution using MSBuild:
msbuild /t:build /restore. This command creates the deployable.zipfile in thesolution/bin/debugfolder.
Binding the Component in a Model-driven App
Once your solution is built and imported, you can bind your component to a field on a form. The final part of the video demonstrates this configuration.
Learn PCF Power Apps Component Code Component in 1 Hour | Installation, Demo and Use in Dataverse
Now, let's watch the final part of the video, which shows how to configure the imported PCF control on a model-driven app form.
Watch from 47:56 to 56:36. Pay close attention to how the instructor uses the classic form editor to: Select the target field on the form. Navigate to the 'Controls' tab in the field properties. Add the custom control and configure its properties. Enable the control for different clients (Web, Phone, Tablet).
This process of switching a standard control for your custom PCF component is a fundamental skill. As noted in the video and Microsoft's documentation, this configuration is often still done via the classic solution editor, as the modern interface may not yet support all PCF configuration options.
Test your understanding!
You have successfully deployed a field-bound PCF component designed to replace a date input. Where in the Power Apps maker portal would you go to bind this component to the 'Birthdate' column on the Contact form?
Show answer
You would navigate to the solution containing the Contact table, open the main form for editing, select the 'Birthdate' field on the form canvas, and then go to its 'Controls' tab in the properties pane to add and enable your custom component.
2. Replacing Grids with Dataset-Bound Components
While field components modify a single data point, dataset components are more powerful: they can be bound to a collection of records. This allows you to replace entire views or subgrids with a completely custom user experience.
Manifest and Code Differences
The primary difference starts in the ControlManifest.Input.xml. Instead of a <property> tag, you define a <data-set> tag.
<data-set name="records" display-name-key="Records">
  <!-- property-set definitions for columns go here -->
</data-set>
In your index.ts, you then access this dataset via context.parameters.records (or whatever name you provided). You can iterate through its columns and records to render your custom grid.
The following video provides a concise overview of creating and configuring a dataset component.
PCF Academy - Components of "Dataset" type
This video from PCF Academy by Andrew Butenko clearly demonstrates the differences for dataset components.
Watch the entire video (it's short, under 5 minutes). Focus on: (00:41) The pac pcf init command using the -t dataset template and the resulting <data-set> tag in the manifest. (01:36) How the code iterates through context.parameters.sampleDataSet.columns and context.parameters.sampleDataSet.records to build an HTML table. (03:45) The configuration process, which happens on a view or subgrid's control tab, not a field's.
Configuring a Dataset Component
As you saw, a dataset component is not configured on a field but on a grid. You can apply it to:
- A table's main grid (e.g., the default 'Active Accounts' view).
- A subgrid on a form (e.g., the list of Contacts on an Account form).
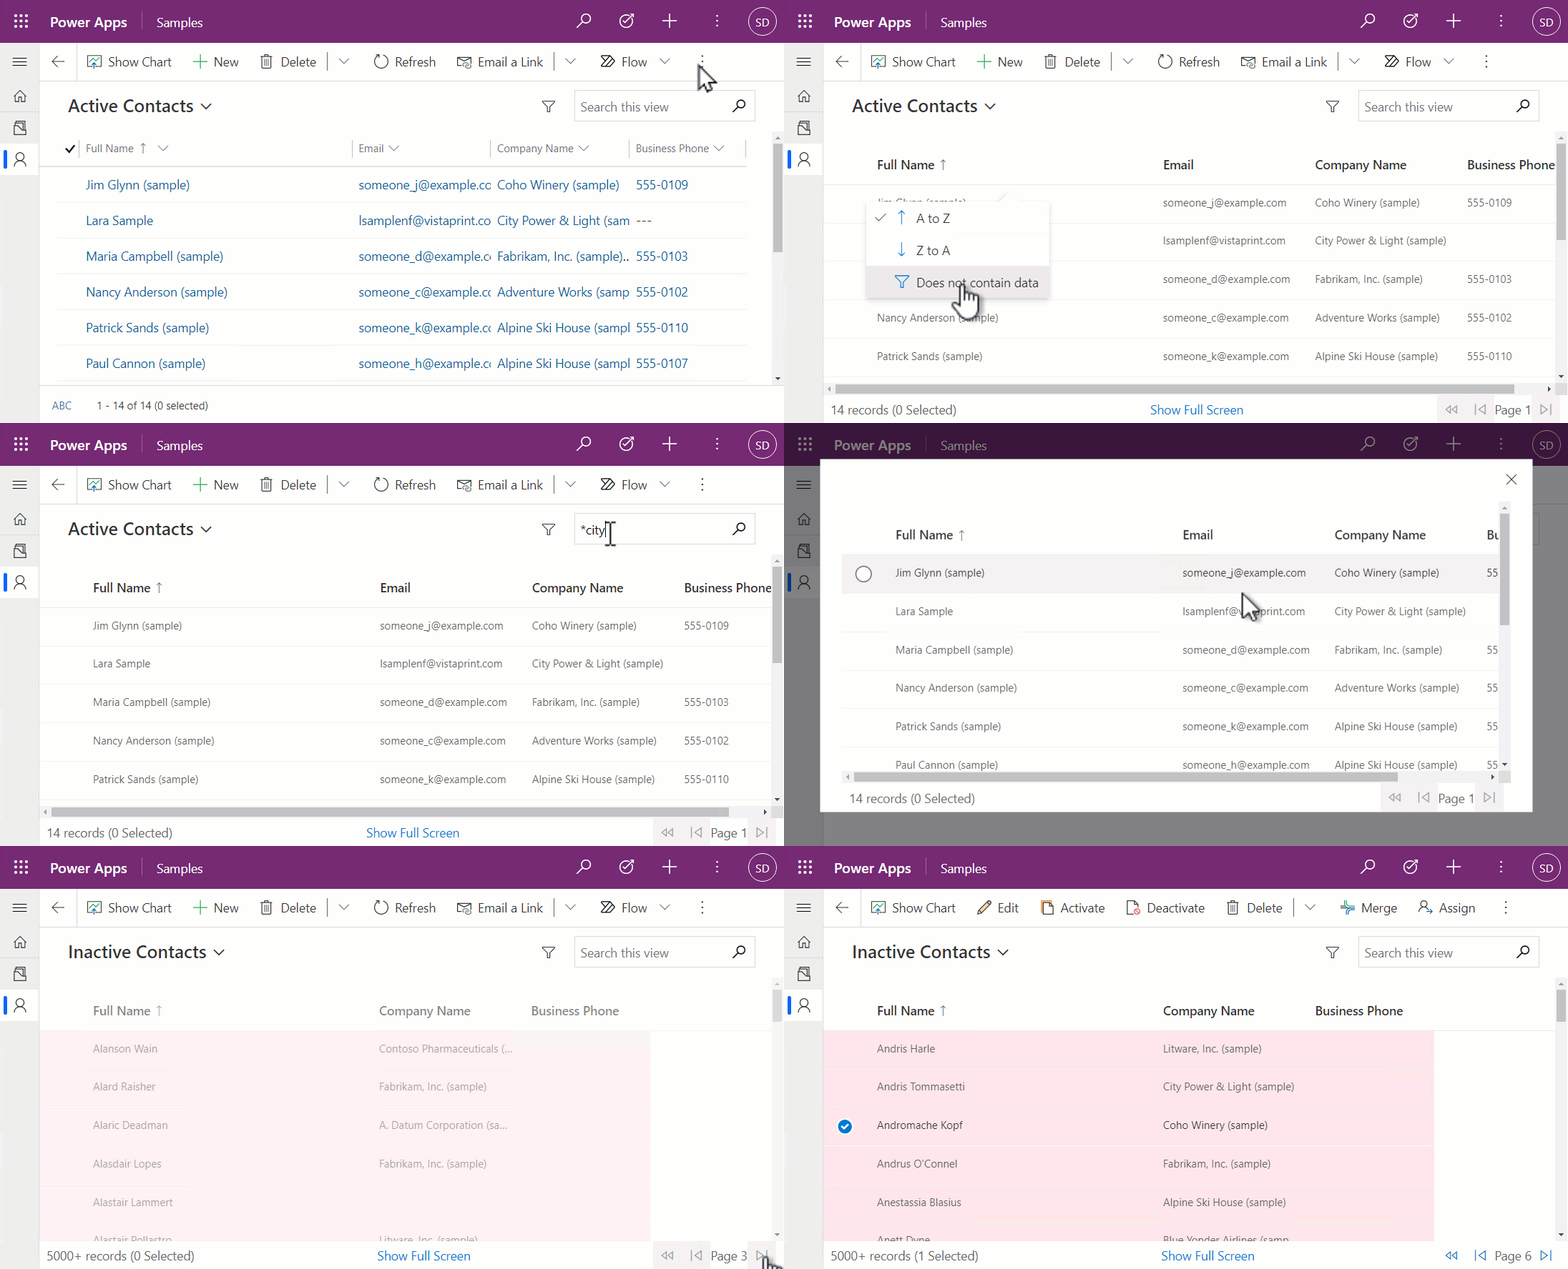
For detailed, step-by-step instructions on configuring these components, the official Microsoft documentation is an excellent reference.
Tutorial: Creating a model-driven app dataset component
The Microsoft Learn tutorial on creating a model-driven app dataset component provides detailed text-based instructions for configuring the component on main grids, views, and subgrids.
Please read the three short sections titled 'Configuring the code component on main grid', 'Configuring the code component on a specific view', and 'Configuring the code component on a form subgrid'. These sections provide the exact steps to bind a dataset component in different scenarios within a model-driven app.
3. Binding Components in Canvas Apps
Canvas apps also support PCF components, but the integration model is different and designed to align with the Power Fx formula-based paradigm.
The high-level process is:
- Enable the Feature: An administrator must enable the "Power Apps component framework for canvas apps" feature in the environment settings.
- Import Component: In the canvas app editor, you don't use solutions in the same way. Instead, you go to
Insert > Get more components, select the Code tab, and import your desired component into the app. - Bind Properties: Once imported, the component appears in the
Insertpanel under "Code components". You add it to a screen and then bind its properties using Power Fx formulas. A dataset component, for example, will have anItemsproperty that you would bind to a data source, likeSearch(Contacts, txtSearch.Text, "fullname").
The following tutorial provides a complete walkthrough of this process. Your task is to focus specifically on the deployment and configuration part.
Tutorial: Creating a canvas app dataset component
This Microsoft Learn tutorial is dedicated to creating a dataset component for Canvas Apps. We will focus on the final section that details how to deploy and configure it within a canvas app.
Please read the entire section titled 'Deploy and configure the component'. It will walk you through everything from the pac pcf push command to binding the component's Items property to a Contacts table and its Selected property to a display form. This is a very practical, hands-on guide.
Test your understanding!
You want to build a highly custom, interactive map component to display a set of sales office locations on a model-driven app dashboard. Each office location is a record in a custom 'Office' table. Should you build a field-bound or dataset-bound PCF component, and why?
Show answer
You should build a dataset-bound component. The component needs to render multiple records (the list of office locations) from the 'Office' table, not just a single field's value. A dataset component can be bound to a view of the 'Office' table to receive all the data it needs to display the locations on the map.
Conclusion
Fantastic work today! You have successfully bridged the gap between local PCF development and real-world application. You now understand the critical process of packaging, deploying, and binding components in both model-driven and canvas apps.
Key Takeaways:
- Packaging is Key: PCF components must be packaged into a Dataverse solution for deployment, typically using
pac solutionandmsbuildcommands. - Two Binding Types:
- Field components are bound to a single column via the Controls tab of a field on a form.
- Dataset components are bound to a table of records via the Controls tab of a view or subgrid.
- App Types Differ: Model-driven apps use solution imports and configuration in the form/view editor. Canvas apps use a direct component import feature and property binding with Power Fx.
What's Next?
So far, our components have been able to render data passed to them. But what if a component needs to fetch additional data on its own or update records directly? In our next lesson, we will explore how to "Use the ComponentFramework.WebApi to perform CRUD operations against Dataverse data from within a component." This will empower you to build even more powerful and self-sufficient components.