Hello! Welcome back to our journey through Power Automate.
In our last lesson, we focused on performance, implementing parallel branches and concurrency control to make your flows run faster and more efficiently. We saw how to execute independent tasks simultaneously and how to process large datasets in batches.
Today, we'll build on that by exploring how to make our automation logic more organized, maintainable, and reusable. This lesson directly addresses the learning outcome: Create and call child flows to build modular and reusable automation logic. Just as you would create reusable methods in C# or functions in JavaScript to avoid duplicating code and to simplify complex logic, child flows serve the exact same purpose within Power Automate. This principle is fundamental for building scalable and enterprise-ready solutions, a key skill for the PL-400 exam.
1. The Principle of Reusability: Introducing Child Flows
As flows become more complex, they can grow to hundreds of steps, making them difficult to navigate and maintain. Child flows allow you to break down these large processes into smaller, logical, and reusable components.
The core idea is a parent-child relationship:
- Parent Flow: The main flow that contains the overall business logic. It can have any type of trigger. It calls one or more child flows to perform specific tasks.
- Child Flow: A smaller, focused flow designed to perform a specific, reusable task (e.g., send a formatted notification, look up a manager, create a record with complex logic). It is called by the parent flow.
Power Automate Cloud flows Best Practices
To start, let's get a high-level overview of the benefits of this approach from this best practices document.
Please read the section 'Create Reusable Code (Child flows)' up to the example diagram. Focus on the four key benefits listed: Modularity, Scalability, Granular Control, and Collaboration.
2. Critical Requirements for Child Flows
Before we start building, there are three non-negotiable prerequisites for creating a child flow. Failing to meet these will prevent a flow from being callable as a child.
- Solutions are Mandatory: Both the parent and child flows must be created within the same Power Platform Solution. The "Run a child flow" action is only available for flows within a solution. This is by design, as it enforces good Application Lifecycle Management (ALM) practices.
- Triggered Manually or from an App: The child flow must use the
Manually trigger a flowtrigger (from the built-in connector) or the PowerApps trigger. - Must Return a Response: The child flow must include a terminating action to send a response back to the parent. This is usually the
Respond to a Power App or flowaction. This action signals completion and allows you to pass data back to the parent.
3. Building and Calling Child Flows: A Practical Walkthrough
Theory is one thing, but the best way to understand this is to see it in action. The following video by Anders Jensen provides an excellent, end-to-end tutorial on creating a "dispatcher" (parent) and "performer" (child) flow.
We will walk through this video in segments.
Child Flows in Power Automate Explained – Tutorial from Start to Finish
First, let's see how to set up the solution and create the child flow. This segment covers creating the flow, defining its inputs, and building the internal logic.
Watch the video from the beginning until the 8:06 mark. Pay attention to: How the process starts by creating a Solution. The use of an Instant cloud flow with a manual trigger for the child flow. How inputs (Name, Email, Webinar) are defined on the trigger card. This is how the parent flow will pass data in. The internal logic being built (in this case, an approval step).
Defining Inputs and Outputs
As you saw, data is passed to a child flow via the input fields on the Manually trigger a flow card.
To pass data back to the parent, you use the Respond to a Power App or flow action.

Let's continue the video to see how to finish the child flow by adding the response action, and then how to build the parent flow to call it.
Child Flows in Power Automate Explained – Tutorial from Start to Finish
Now, let's complete the child flow by adding a response and then construct the parent flow that triggers it.
Watch from 9:02 to 17:44. Focus on: The use of the Respond to a Power App or flow action to define an output and signal completion (14:12). How the parent flow is created (as an automated flow in this case). Adding the Run a child flow action in the parent and selecting the child flow you created. Mapping dynamic content from the parent flow's trigger and steps to the child flow's input parameters.
4. The "Run-Only User" Connection Issue: A Common Pitfall
If you followed the video, you saw a common but critical error appear when publishing the parent flow. This happens when a child flow uses connections (like Outlook, SharePoint, or a custom connector) that require authentication.
The Error: "Update the child flow... to not use run only user connections. Child workflows only support embedded connections."
The Reason: A child flow runs in the context of the parent, but for security and consistency, it cannot implicitly use the connections of the user who triggered the parent flow. You must explicitly tell the child flow which connection to use.
The Fix: This is a crucial piece of practical knowledge for any Power Platform developer.
Child Flows in Power Automate Explained – Tutorial from Start to Finish
Let's watch the specific segment of the video that diagnoses and fixes this connection issue.
Watch from 17:44 to 18:49. Observe the steps carefully: Navigate to the child flow's details page (not the editor). In the bottom-right corner, find the Run only users tile and click Edit. For each connection listed, change the selection from 'Provided by run-only user' to 'Use this connection (...)'. Save the changes. The parent flow can now be saved and run successfully.
5. The Payoff: Reusability in Action
The primary benefit of child flows is reusability. Once you've built and tested your child flow, you can call it from any other flow within the same solution.
To see this powerful concept in action, let's watch the final part of the tutorial, where a second, completely different parent flow is created to handle another webinar, but reuses the exact same child flow.
Child Flows in Power Automate Explained – Tutorial from Start to Finish
This final segment demonstrates the true power of child flows by creating a second parent flow that reuses the performer logic without any changes.
Watch from 20:08 to 24:16. Notice how quickly the second automation is built because the core approval logic already exists in the reusable child flow.
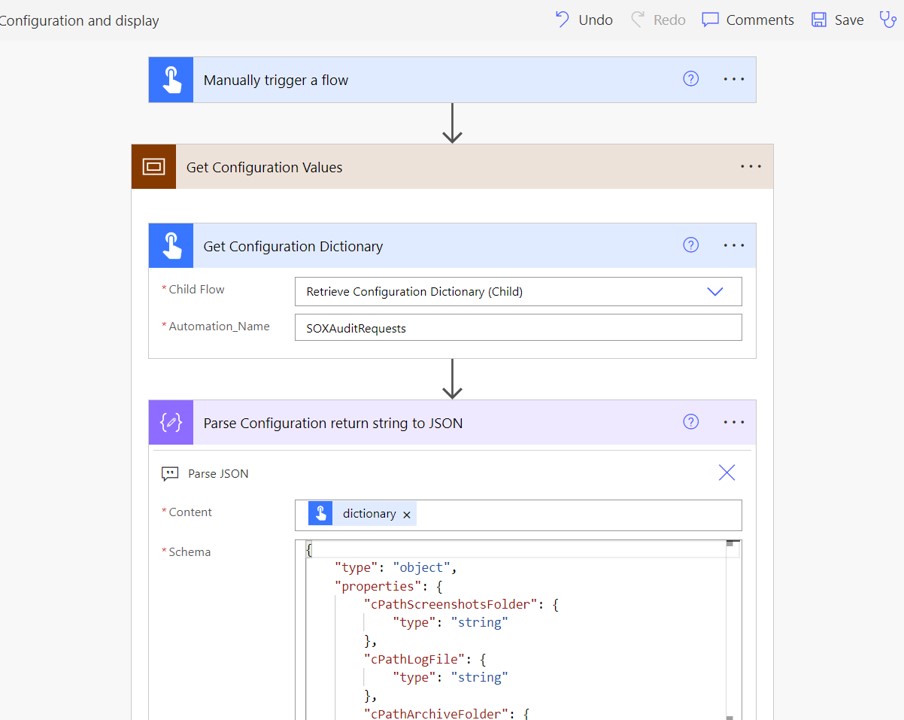
Another great use case is to encapsulate API calls. For example, you could have a child flow that takes a configuration key as input, retrieves the corresponding value from a secure source like Azure Key Vault, and returns it. This centralizes your configuration management.
Test your understanding!
You are designing an automation strategy for an HR department. Several processes require notifying a user's manager via a sophisticated adaptive card in Teams:
- An employee submits a leave request.
- An employee submits an expense report over $500.
- A new hire completes their onboarding tasks.
The logic to find the manager in Azure AD and send the custom adaptive card is complex. You want to avoid duplicating this logic in three separate flows.
- Architecture: How would you design this using a parent/child flow architecture? Briefly describe the purpose of the parent and child flows in this scenario.
- Inputs: What inputs would your child "Notification" flow likely need from any parent flow that calls it?
- Outputs: What output might the child flow return to the parent to confirm its operation?
- Troubleshooting: After deploying your solution, you run the "Leave Request" parent flow. It fails on the
Run a child flowaction with an error about embedded connections. What is the most likely cause and how do you fix it?
Show answer
-
Architecture: You would create one reusable child flow responsible for the entire notification logic (find manager, build and send card, log action). Then, you would create three separate parent flows, one for each trigger event (Leave Request submitted, Expense Report submitted, Onboarding complete). Each parent flow would handle its specific trigger and business logic, and then call the single child flow to handle the notification.
-
Inputs: The child flow would likely need inputs such as:
EmployeeEmail(Text): To look up the manager in Azure AD.NotificationTitle(Text): e.g., "New Leave Request".NotificationDetails(Text): e.g., "Employee X requests leave from Date Y to Date Z".RecordURL(Text): A link back to the item that needs approval (the leave request, expense report, etc.).
-
Outputs: The child flow could return a
Status(Text) output with a value of "Success" or "Failed", or perhaps theMessageIDof the Teams message it posted for tracking purposes. -
Troubleshooting: The cause is almost certainly the connection configuration for the child flow. The child flow likely uses the "Microsoft Teams" and/or "Azure AD" connectors. You need to go to the child flow's details page, edit the Run only users settings, and for both connections, change the configuration from "Provided by run-only user" to "Use this connection".
Conclusion
Today you've learned a powerful technique for structuring complex automations. By creating modular and reusable child flows, you can build solutions that are easier to manage, scale, and maintain. This is a significant step up from building monolithic, single-flow automations.
Key Takeaways:
- Child flows promote modularity and reusability, just like methods or functions in traditional programming.
- They must be created within a Power Platform Solution.
- They are built using the
Manually trigger a flowtrigger and must end with aRespond to a Power App or flowaction. - You must configure embedded connections in the "Run only users" settings for any connector that requires authentication.
What's Next
In our next lesson, we will dive deeper into one of the most common automation scenarios: approvals. We will implement a standard approval workflow using the Power Automate Approvals connector. You'll see how the dedicated approval actions can simplify the logic we built manually today, and you can even encapsulate this more powerful approval logic within a child flow to make it a reusable "approval service" for your organization.