Hello! Welcome to the final lesson in our "Setting Up Your Investment Hub" module.
In our last session, we learned how to read a stock quote, focusing on the current price, day's range, and trading volume. You now know that the "current price" listed is the price of the last transaction. Today, we're going to dig deeper into what prices are available to you right now.
The learning outcome for this lesson is to interpret the bid-ask spread and its impact on trade execution. This might sound technical, but it’s one of the most practical concepts in trading. It's the "hidden" cost you pay on every single trade, whether you're a long-term investor or an active trader. Understanding it is fundamental to controlling your costs and executing your strategy effectively.
What are the Bid and Ask Prices?
When you go to buy or sell a stock, there isn't one single price. Instead, there's always a two-sided market: one price for buyers and another for sellers.
- The Bid Price is the highest price that a buyer is currently willing to pay for a share of the stock.
- The Ask Price (or "Offer Price") is the lowest price that a seller is currently willing to accept for a share of the stock.
The difference between these two prices is called the bid-ask spread.
Let's watch a short video that introduces these concepts clearly.
Bid and Ask Price Explained - 2022 Stock Market Tips
The video 'Bid and Ask Price Explained' by Markus Heitkoetter gives a straightforward definition of the bid and ask prices and the spread between them.
Watch the first 45 seconds of the video (00:00 - 00:45). The host uses an example with Apple stock to illustrate the bid, the ask, and the spread.
As the video explains, buyers want the lowest price possible, and sellers want the highest price possible. The bid-ask spread represents this natural tension in the market. A transaction only occurs when a buyer and seller agree on a price—either a buyer raises their bid to meet the ask, or a seller lowers their ask to meet the bid.
The Spread as a Transaction Cost
The bid-ask spread isn't just a curiosity; it's a real cost you pay to trade. When you want to buy a stock immediately, you typically have to pay the higher ask price. When you want to sell immediately, you have to accept the lower bid price. This means you start every trade at a slight disadvantage equal to the size of the spread.
Let's walk through a concrete example to make this clear.
Understand Bid-Ask Spread and How You Can Use It (2025)
The article 'Understand Bid-Ask Spread and How You Can Use It' from The Trading Analyst provides a perfect real-world example using Nike (NKE) stock.
Please read the section titled 'Real-World Example of Bid-Ask Spread'. It clearly demonstrates how buying at the ask and selling at the bid results in an immediate cost, even if the stock's price doesn't move.
As the example shows, if you bought 100 shares at the ask price and immediately sold them at the bid price, you would lose money solely due to the spread. This is a fundamental cost of trading, separate from any commissions your broker might charge. This is why a stock's price has to move in your favor by at least the amount of the spread before you can break even.
Test your understanding!
You are looking at a stock with the following quote:
- Bid Price: $49.95
- Ask Price: $50.05
You decide to buy 10 shares immediately and then, realizing you made a mistake, sell them immediately. How much money did you lose just from crossing the bid-ask spread?
Show answer
- Calculate the spread per share: $50.05 (Ask) - $49.95 (Bid) = $0.10 per share.
- Calculate the total loss: $0.10 per share * 10 shares = $1.00.
You would lose $1.00 on this round trip, even though the underlying value of the stock didn't change.
What Affects the Size of the Spread?
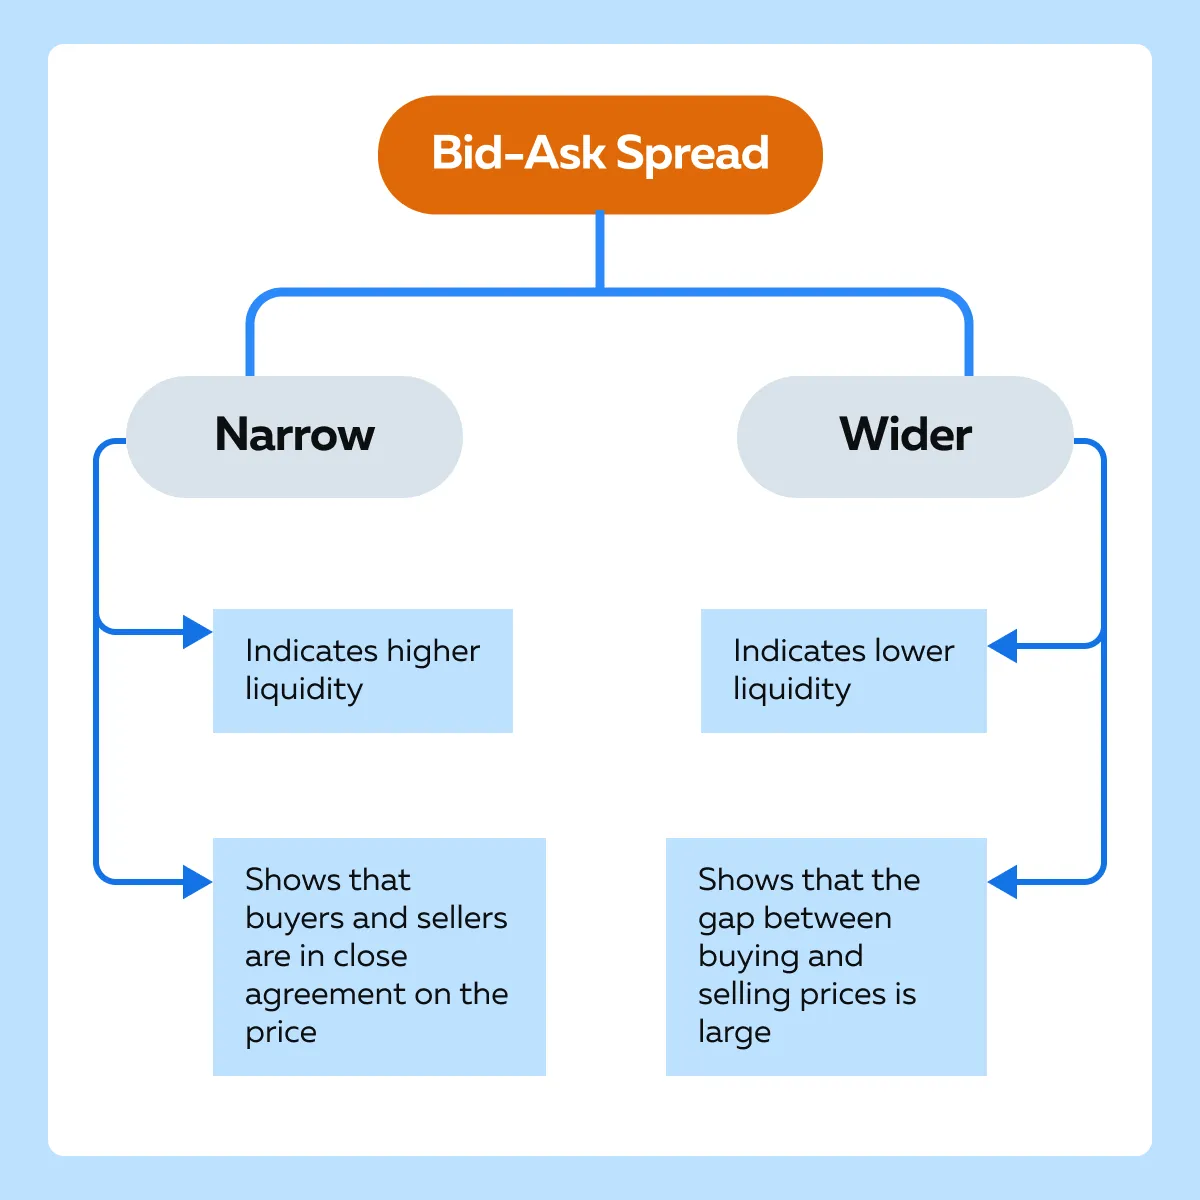
The size of the bid-ask spread tells you a lot about a stock's market dynamics. Spreads can be very narrow (just a penny) or quite wide (many dollars). The primary factor that determines the spread's size is liquidity.
In the last lesson, you learned that volume is a measure of liquidity. The two concepts are directly related:
- High Volume & High Liquidity → Narrow Spread: Stocks like Apple or Microsoft trade millions of shares a day. There are always tons of buyers and sellers, creating intense competition that pushes the bid and ask prices very close together. This results in a narrow or tight spread, making the stock cheap to trade.
- Low Volume & Low Liquidity → Wide Spread: A small, obscure company might only trade a few thousand shares a day. With few buyers and sellers, there is less competition. This results in a wide spread, making the stock more expensive to trade.
The image below provides a great visual summary of this relationship.
Other factors like high market volatility or trading outside of normal market hours (pre-market or after-hours) can also cause spreads to widen temporarily.
Bid Ask Spread: How It Works and Why It Matters
The article 'Bid Ask Spread: How It Works and Why It Matters' by Gotrade neatly lists the factors that influence the spread's size.
Read the section 'What Affects the Size of the Spread?'. Pay attention to the four key factors listed: Liquidity/volume, Volatility, Time of day, and Price level.
The Spread's Impact on Your Trades
So, how does this knowledge practically affect your actions as an investor? It directly influences how you place your orders and whether they get filled.
If you need your trade to happen right now, you have to cross the spread. But what if you're not in a hurry and want to try for a better price?
This is where the concept of "not getting your order filled" comes from. If you try to buy a stock for a price below the current ask price, your order won't execute unless a seller decides to come down to your price.
The following video, while using options as an example, does an excellent job explaining this universal principle.
Get Your Options Filled Quickly (Understanding Bid/Ask Spread)
The video 'Get Your Options Filled Quickly' by Brad Finn powerfully demonstrates why an order might not get filled and what you need to do to ensure execution.
Please watch from 04:15 to 06:57. Even though the example is for options, the principle is identical for stocks. Focus on: Why an order placed 'in the middle' of the spread might not get filled. What you must do to buy or sell immediately (pay the ask or hit the bid). How the spread represents a direct cost when entering and exiting a trade.
As the video illustrates, if you want guaranteed, instant execution, you pay the price in the form of the spread. If you want to try for a better price (for example, by placing an order in the middle of the spread), you trade away that certainty. Your order might sit unfilled if no one comes to meet your price.
This leads us directly to the different types of orders you can use to manage this trade-off, which is the topic of our very next lesson.
Conclusion
Congratulations on completing the "Setting Up Your Investment Hub" module! You've gone from choosing a broker to understanding the intricate details of a stock quote.
Here are the key takeaways from today's lesson on the bid-ask spread:
- The bid price is the highest price a buyer will pay, while the ask price is the lowest price a seller will accept.
- The bid-ask spread is the difference between these two prices and represents a direct, immediate transaction cost for traders.
- The size of the spread is primarily determined by liquidity; high-volume stocks have narrow spreads, and low-volume stocks have wide spreads.
- Your trade execution is directly impacted by the spread. To trade instantly, you must "cross the spread," which is more costly with wider spreads.
In our next lesson, we will kick off Module 3, "Executing Your First Trades." We will build directly on today's topic by learning how to distinguish between market orders, limit orders, and stop-loss orders. You now understand the price landscape of the market (the bid and ask); next, you'll learn the specific commands you can give your broker to navigate it.