Hello! Welcome to the first lesson of our new module on Linux Storage and Filesystem Management.
In the previous module, we explored the dynamic world of users and processes—how they are created, managed, and terminated. We covered everything from creating users with useradd to dealing with the "undead" with zombie processes. Now, we shift our focus from the things running on the system to the foundation where all the data is stored.
Managing disk space is a fundamental skill for any Linux user, especially in system administration and security. A rapidly filling disk can be a symptom of a misconfigured application, a runaway log file, or even a denial-of-service attack. Knowing how to quickly and efficiently diagnose storage issues is crucial.
Today, you'll learn how to check disk usage and free space using df and du. By the end of this lesson, you'll understand the distinct roles these two commands play and how to use them together to get a complete picture of your system's storage.
1. The Filesystem Overview: df (Disk Free)
The first command we'll explore is df. Think of it as your high-level dashboard for storage. It doesn't look at individual files; instead, it reports on the total space used and available for each mounted filesystem.
In your terminal, run the command by itself:
df
You'll notice the output is a bit unfriendly, showing sizes in 1-kilobyte blocks. To make it useful, we add the -h flag for "human-readable" format.
df -h
This is much better. The sizes are now displayed in Gigabytes (G), Megabytes (M), or Kilobytes (K).

To understand the df command and its most important options, let's watch a segment from a helpful video.
Linux Crash Course - The df and du Commands
The video "Linux Crash Course - The df and du Commands" by Learn Linux TV provides a clear walkthrough of the df command and its output.
Watch from 02:15 to 05:41. This section will cover: The purpose of the df command. How the -h option makes the output readable. How to interpret the columns in the output (Filesystem, Size, Used, Avail, Use%, Mounted on). Why you can often ignore tmpfs entries when analyzing disk space.
Key df Options
As you saw in the video, df -h is the most common way to use the command. Here are a few other powerful options:
-T: Shows the filesystem type in a new column (e.g.,ext4,btrfs,xfs). This is useful for understanding what kind of filesystem you're dealing with.-i: Displays inode usage instead of block usage. An inode is a data structure that stores metadata about a file. It's rare, but you can run out of inodes on a filesystem that has millions of tiny files, even if you still have plenty of disk space.-x <type>: Excludes filesystems of a certain type from the output. This is great for cleaning up the view by hiding virtual filesystems you don't care about, liketmpfsorsquashfs.
Practice It:
Try combining these options. To see a human-readable report with filesystem types, excluding tmpfs, you would run:
df -hT -x tmpfs
2. The Directory Deep-Dive: du (Disk Usage)
While df gives you the big picture of the entire filesystem, du tells you how much space is being used by specific files and directories. It works by walking through a directory tree and adding up the size of every file it finds.
This is the key difference: df reports on the filesystem's own metadata (it's fast), while du actively scans directories to calculate usage (it can be slower).
To see du in action, cd into a directory with some files and run it:
# For example, navigate to your config directory
cd /etc
du
The output is a long, recursive list of every subdirectory and its size in blocks—not very helpful. Just like with df, we can use -h to make it readable. But we often need more options to control the verbose output.
Let's watch another segment that demonstrates how to tame du.
Linux Crash Course - The df and du Commands
This part of the "Linux Crash Course" video introduces du and its most important options for controlling the output.
Watch from 09:56 to 14:08. Pay close attention to these options: -h: For human-readable output. --max-depth=N: To limit how many levels deep the command will report. -s: To get a single summarized total for a directory.
Key du Combinations
You'll rarely use du by itself. It's almost always used with a combination of flags to get the exact information you need.
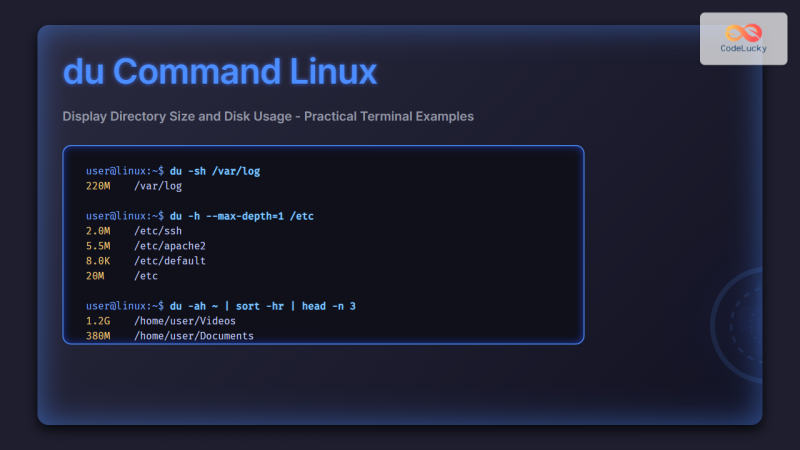
du -sh <directory>: Summarize the total size of a directory. This is one of the most common uses ofdu.# Get the total size of your home directory du -sh ~du -h --max-depth=1 <directory>: Show the usage of the specified directory and only the files and directories one level deep. This is perfect for figuring out which subdirectory is taking up the most space.
(Note: You might need to run this with# See which directories in /var are using the most space du -h --max-depth=1 /varsudoto avoid "Permission denied" errors on system directories).
3. The Practical Workflow: Using df and du Together
Here is where your skills as a future penetration tester and system administrator come into play. The real power of these tools is in using them together to diagnose a problem.
Scenario: You receive an alert that the server's disk is 90% full. How do you find the culprit?
-
Start high-level with
df. First, identify which filesystem is full.df -hLet's say the output shows that
/(the root filesystem) is at 90% usage. -
Drill down with
du. Now, useduto find out what's consuming space within the/filesystem. You can combine it withsortandheadto create a "top 10" list of space hogs.# The '2>/dev/null' part redirects error messages so they don't clutter the output sudo du -h --max-depth=1 / 2>/dev/null | sort -rh | head -n 10Let's break down that pipeline:
sudo du -h --max-depth=1 /: Calculates the disk usage for each directory inside/. We usesudoto ensure we can read all directories.2>/dev/null: This is a standard trick. It redirects standard error (stream 2) to/dev/null, effectively hiding any "Permission denied" errors.|: The pipe sends the output ofduto thesortcommand.sort -rh: Sorts the incoming text.-ris for reverse (largest to smallest), and-htells it to sort based on human-readable numbers (e.g., it knows 2G is larger than 900M).|: The pipe sends the sorted list to theheadcommand.head -n 10: Shows only the first 10 lines of the output.
This one-liner will instantly show you the top 10 largest directories in the root of your filesystem, pointing you directly to the problem area.
This workflow is so fundamental that it's worth seeing it demonstrated.
df vs du: Practically Explained
The video "df vs du: Practically Explained" by Navek does an excellent job of walking through this exact troubleshooting scenario.
Watch from 04:29 to 08:32. This segment covers: The step-by-step process of using df then du. A demonstration of the du | sort | head pipeline. A crystal-clear explanation of the core difference between the two commands.
4. Making It Permanent: Command Aliases
Since you'll be using commands like df -h and du -sh constantly, you can save yourself some typing by creating aliases in your shell's configuration file. As an Arch user, you're likely comfortable customizing your environment, and this is a great practical enhancement.
You can add aliases to your ~/.bashrc file (or ~/.zshrc if you use Zsh).
Manage Linux storage space with du and df commands
For instructions on how to set up aliases, please read the following sections from the article "Manage Linux storage space with du and df commands" on TechTarget.
Read the sections titled "Alias the df command" and "Alias the du command". These short sections provide clear examples of how to create useful aliases for both commands.
After adding aliases like the ones suggested in the article, you'll need to either restart your terminal or run source ~/.bashrc for the changes to take effect.
Conclusion
You've now learned the two essential commands for analyzing disk space on a Linux system. They might seem similar at first, but they serve two very different and complementary purposes.
Key Takeaways:
df(disk free): A high-level, fast overview of filesystem capacity. It tells you how full a whole partition is.du(disk usage): A detailed, low-level analysis of file and directory space usage. It tells you what is taking up that space.- The Workflow: The most effective way to troubleshoot disk space issues is to use
dfto identify the full filesystem, then use adu | sort | headpipeline to pinpoint the specific directory or file causing the problem. - Common Flags:
df -h: The go-to command for a quick filesystem check.du -sh <path>: The best way to get the total size of a single directory.du -h --max-depth=1 <path>: Perfect for exploring which subdirectory is the largest.
Next Lesson Preview:
We've learned how to see the space used on our mounted filesystems. But what are these filesystems? Where do they come from? In our next lesson, we will go one level deeper to list and identify block devices and partitions using lsblk and fdisk -l, revealing the underlying physical and virtual disks that your system is built on.