Introduction
Hello! In our previous lesson, we dove deep into the chmod command, learning how to change file permissions using both symbolic and numeric notation. You now understand what rwx means and how to control it. However, permissions are only one half of the file access puzzle. The Linux kernel first asks, "Who is trying to access this file?" before it asks, "What are they allowed to do?".
This lesson tackles that first question. Our learning outcome is to change file ownership using chown and chgrp. We'll explore how to transfer ownership of files and directories from one user or group to another.
For your goal of mastering ethical hacking, this is a core competency. Control of file ownership is fundamental in many post-exploitation scenarios. For instance, an attacker might change a file's ownership to a less-privileged user to hide malware, or a root user might take ownership of critical system files. Understanding how ownership works is key to both executing and defending against these techniques.
Part 1: Revisiting Ownership with ls -l
Let's quickly refresh our memory. When you run ls -l, you see output like this:
-rwxr-x--- 1 david developers 4096 Oct 26 10:30 script.sh
In the last lesson, we focused on the -rwxr-x--- part. Now, look at the two columns that follow: david and developers.
- User Owner (
david): The specific user account that owns the file. By default, this is the user who created it. - Group Owner (
developers): The group that owns the file. This allows you to manage permissions for a collection of users at once.
Changing these two attributes is the focus of today's lesson.
Part 2: Changing Ownership with chown
The primary command for this task is chown, short for "change owner". Since changing who owns a file is a significant action, it almost always requires elevated privileges. You can't just give away your files to another user—and more importantly, you can't take ownership of their files—unless you are the root user. Therefore, you'll see sudo used with chown in almost all cases.
Changing the User Owner
The simplest use of chown is to change the user owner of a file or directory.
Syntax: sudo chown <new_owner> <file_or_directory>
When you need to change ownership for a directory and everything inside it, you use the recursive -R flag.
Linux Terminal Basics: chown, chgrp - File Ownership
Let's watch a demonstration of chown. This video from quidsup shows how to change the ownership of a directory recursively and explains why sudo is necessary.
Watch from 00:29 to 01:39. Pay attention to the use of sudo, the chown command, and the -R argument for directories.
The Power of Ownership
Why is this so important? Because permissions are checked against the owner. If you don't own a file and aren't in its group, you are considered "other".
This next clip perfectly illustrates the consequence of not owning a file, even if you could read it before.
Linux Terminal Basics: chown, chgrp - File Ownership
This short segment demonstrates the direct impact of changing ownership. After changing a file's owner to root, the original user is now denied write access, connecting the concepts of ownership and permissions.
Watch from 01:39 to 02:41. This is a key concept: the permission denied error isn't because the file's mode (rwx) changed, but because the user trying to write to it is no longer the owner.
Changing User and Group Simultaneously
The most common and efficient way to use chown is to change both the user and the group at the same time using a colon (:) separator.
Syntax: sudo chown <new_owner>:<new_group> <file_or_directory>
This next video from Learn Linux TV, which you've seen before, has an excellent section on chown that covers this combined syntax.
Linux Crash Course - Understanding File & Directory Permissions
This video provides a clear, practical demonstration of using chown to modify both the user and group owner in one command. It also shows a useful shortcut.
Watch from 30:38 to 35:10. Focus on the user:group syntax. Note the shortcut mentioned around 34:10, where chown user: file automatically sets the group to that user's default group.
Part 3: Changing Group Ownership with chgrp
What if you only want to change the group and leave the user owner as is? You can use the chgrp command, short for "change group".
Syntax: sudo chgrp <new_group> <file_or_directory>
Like chown, it supports the -R flag for recursive operations on directories. While you can use chown :<new_group> <file> to only change the group, using chgrp is more explicit and can make scripts or command histories easier to read.
Let's see it in action.
Linux Terminal Basics: chown, chgrp - File Ownership
The chgrp command works very similarly to chown. This final clip from the quidsup video will show you how to use it.
Watch from 02:41 to 03:20. The video demonstrates changing a file's group and then applies the change recursively to a directory.
Here is a static image that summarizes the process of using chgrp recursively.
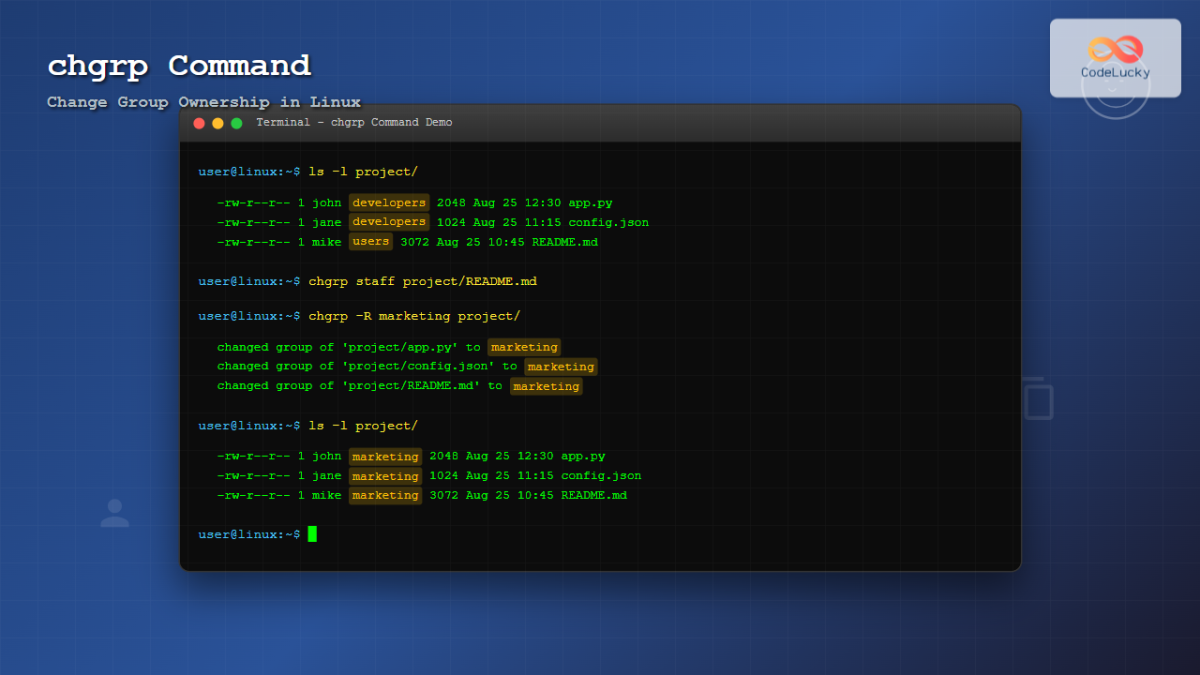
To bring all this information together, let's review a concise written guide.
This guide from DigitalOcean provides clear syntax and examples for both chown and chgrp, including recursive usage and a practical use case for collaboration.
Read the sections titled 'How to Use chown and chgrp', 'Recursive Permissions in Linux', and 'Setting group access for collaboration'. This will reinforce what you've just seen in the videos and provide excellent examples.
Hands-on Lab: Managing a Shared Project
Time to put this into practice on your Arch Linux system. We'll simulate a scenario where you, as a system administrator, need to hand off a project directory to another user and group.
Open your terminal and let's get started.
-
Set up the environment:
First, let's create a new group and a new user for this exercise. (We'll cover user/group management in detail in a future module).sudo groupadd project_team sudo useradd -m -g project_team -s /bin/bash team_lead # The -m creates a home directory, -g sets the primary group, -s sets the shell.Now, create a project directory and some files.
mkdir ~/project_files
touch ~/project_files/config.yaml
echo "Initial data" > ~/project_files/data.log
ls -l ~/project_files
Notice that you are the owner, and your default group is the group owner.
-
Change the group owner:
The project now needs to be accessible to theproject_team. Change the group ownership of the directory recursively.sudo chgrp -R project_team ~/project_files ls -l ~/project_filesVerify that the group for both the directory and the files inside is now
project_team. -
Change the user owner:
Now, hand over ownership of just the log file to theteam_lead.sudo chown team_lead ~/project_files/data.log ls -l ~/project_filesObserve that
data.logis owned byteam_lead, butconfig.yamlis still owned by you. -
Transfer complete ownership:
Finally, theteam_leadis taking over the whole project. Transfer ownership of the entire directory and its contents to theteam_leaduser andproject_teamgroup.sudo chown -R team_lead:project_team ~/project_files ls -l ~/project_filesEverything within
~/project_filesshould now be owned byteam_lead:project_team. -
Cleanup (Optional):
Once you're done, you can remove the user and group.sudo userdel -r team_lead sudo groupdel project_team rm -rf ~/project_files
Conclusion
Excellent work. You have now completed the fundamental triad of Linux file access control: reading permissions (ls -l), changing permissions (chmod), and now, changing ownership (chown, chgrp).
Key Takeaways:
chownis used to change the user owner and, optionally, the group owner of a file or directory.chgrpis used to change only the group owner.- Changing ownership of a file you don't own requires
sudo. - The
-Rflag is essential for applying ownership changes to a directory and all of its contents. - The
user:groupsyntax withchownis the most common and efficient method for setting both at once. - Ownership determines identity; permissions determine capability. The system checks who you are (owner, group, or other) before it enforces the
rwxrules.
Next Lesson Preview:
We've covered the standard permissions model. However, Linux has a few "special" permissions that break the normal rules in very powerful—and potentially dangerous—ways. In our next lesson, we will investigate the security implications of SUID, SGID, and the sticky bit. These are critical concepts in Linux privilege escalation, a topic at the very heart of your ethical hacking goals.