Hello! In our last lesson, we generated a user interface for our Flask prototype, giving us a complete, albeit simple, full-stack application. We have the backend logic in app.py and the frontend presentation in index.html and styles.css.
However, as any developer knows, the first version of any code—especially AI-generated code—is rarely perfect. This brings us to a crucial and practical skill: troubleshooting. This lesson is designed to help you achieve the learning outcome: Debug and troubleshoot AI-generated code by combining your Python knowledge with AI explanations.
We'll treat the AI as a fast but fallible assistant. Your Python proficiency is the key that elevates this partnership from simple code generation to effective problem-solving. You will act as the senior developer, guiding the AI to identify, understand, and fix the inevitable bugs in our prototype.
1. The Art of Debugging with an AI Partner
Before diving into tools, it's important to adopt the right mindset. Think of the AI as a junior developer or a very knowledgeable pair programmer who lacks project-specific context. It can write code quickly but might misunderstand requirements or make logical errors. Your role is to:
- Observe the application's behavior to spot issues.
- Hypothesize the potential cause based on your own technical knowledge.
- Question the AI, providing it with context and evidence.
- Verify the AI's proposed fixes and explanations.
The following guide is an excellent resource on the principles of communicating effectively with AI coding assistants. It forms the foundation of our debugging strategy.
The Prompt Engineering Playbook for Programmers
Let's start with the fundamentals. This playbook by Addy Osmani provides a comprehensive set of principles for crafting prompts that get you the results you need when coding. It's the theoretical bedrock for our practical work today.
Please read the following sections: Foundations of effective code prompting: This covers the core principles like providing context, being specific, and including examples. Prompt patterns for debugging code: This section provides systematic approaches for asking the AI to find and fix bugs. Debugging example: poor vs. improved prompt: Pay close attention to this side-by-side comparison. It clearly demonstrates why a detailed, context-rich prompt is non-negotiable for effective debugging.
The key takeaway is that precision in your prompts—providing code, error messages, and expected behavior—is what transforms the AI from a source of generic advice into a sharp diagnostic tool.
2. A Practical Debugging Scenario
Let's imagine a common bug in the prototype we built. The user fills out the form on the webpage and clicks "Submit," but instead of seeing a result, they see a Method Not Allowed error page, and your terminal shows a "405 Method Not Allowed" error for the POST request.
This is a classic Flask issue. Here’s how you'd tackle it, blending your own knowledge with AI assistance.
Step 1: Your Initial Analysis (The Human Part)
With your Python background, a "Method Not Allowed" error on a Flask route would immediately make you suspect that the route is not configured to handle POST requests. You would look at your app.py and find a line like this:
@app.route('/')
def home():


    # ... some logic ...
    return render_template('index.html')
You've found the likely culprit. The route only accepts GET requests by default.
Step 2: Engaging the AI for Confirmation and Solution
Now, you can use Gemini to confirm your hypothesis and provide the exact code for the fix. You would craft a precise prompt based on the principles from the playbook:
Prompt for Gemini: "I am building a Flask application. When I submit a form from my
index.htmlto the/endpoint, I get a405 Method Not Allowederror. I think the issue is in my route definition. Here is the relevant code fromapp.py:@app.route('/') def home(): return render_template('index.html')How do I modify this route to accept both GET and POST requests?"
Expected AI Response:
The AI would confirm your suspicion and provide the corrected code:
"You are correct. The
405 Method Not Allowederror occurs because your route only handles GET requests by default. To fix this, you need to addmethods=['GET', 'POST']to your@app.routedecorator. You also need to add logic to handle the POST request.Here is the updated code:
from flask import request

@app.route('/', methods=['GET', 'POST'])
def home():
    if request.method == 'POST':
        # Your logic to process the form data goes here
        form_data = request.form['your_form_field_name']
        # ... process data and get a result ...
        return render_template('index.html', result=result)
    return render_template('index.html', result=None)
```"
This interaction is efficient and effective because you guided the AI with a specific problem and a strong hypothesis.
The following video provides more general tips on troubleshooting that complement this workflow.
AI Coding 101: Ultimate Prompt Guide (37 tips)
This video offers a set of practical tips for troubleshooting AI-generated code. It reinforces the importance of providing specific error messages and introduces some creative ways to get unstuck.
Watch the 'Troubleshooting' section (13:57 - 19:04). Pay attention to these key ideas: Sharing exact errors: This is the most direct way to get help. The 'Beaver Method': Asking the AI to add logging/print statements to trace execution flow. 'Radical' approach: Asking the AI for a completely different solution when you're stuck. Knowing when to pause: Recognizing when to stop prompting and rely on your own coding knowledge.
3. The Power User's Toolkit: Gemini CLI and Advanced Techniques
For a developer, working in the terminal is often faster and more powerful than a web UI. Google's Gemini CLI is designed for this and is particularly well-suited for a code-centric workflow. It allows you to interact with Gemini directly from your project directory, referencing files and executing commands.
The following article from Real Python walks through a debugging scenario in a Python project using Gemini CLI, demonstrating a professional-grade workflow.
How to Use Google's Gemini CLI for AI Code Assistance
This Real Python tutorial provides a concrete, step-by-step example of using Gemini CLI to find, fix, and verify a bug in a Python project. It's a perfect illustration of the workflow we're aiming for.
Focus on these two sections: Step 3: Fix the Mutable Default Argument Bug: Notice how the user asks for a suggestion, applies the fix by referencing the file with @, and reviews the proposed changes in a diff view. Verify the Fix Works: This is crucial. See how they prompt the AI to generate a pytest unit test to confirm the bug is gone and prevent future regressions. This is an excellent practice.
Building on this, the next video showcases a collection of "pro tips" for the Gemini CLI that can significantly accelerate your debugging and development process.
Gemini CLI - 11 PRO TIPS in 25 Minutes
This video dives into several advanced features of the Gemini CLI that are extremely useful for debugging and managing a coding project. These techniques will help you work more efficiently.
Watch the following segments on advanced CLI features: Checkpoint Restore (10:38 - 11:48): Learn how to create 'save points' so you can experiment with an AI's suggestions and easily roll back if something breaks. Test-Driven Development (TDD) Cycle (11:48 - 14:56): Understand how you can instruct the CLI to adopt a test-first approach, which proactively reduces bugs. Multimodal Capabilities (14:56 - 17:04): See how you can use screenshots to debug visual UI bugs—an incredibly powerful feature for frontend issues. File References (17:04 - 18:59): This reinforces the @ syntax for referencing files, which is essential for giving the AI accurate context without copy-pasting.
4. Your Integrated Debugging Workflow
By combining these principles and tools, you can create a highly effective debugging workflow.
- Run and Observe: Start your Flask app. Test its functionality. Look for errors in the terminal and visual glitches or unexpected behavior in the browser. Use your browser's Developer Tools (F12) to inspect the console for JavaScript errors or network requests.
- Isolate and Hypothesize: Use your Python and web development knowledge to form a hypothesis. Is it a backend logic error in
app.py? A problem with the HTML form? A broken CSS rule? - Engage with AI:
- Craft a Precise Prompt: Open Gemini (either the web UI or CLI). State the context (Flask app), describe the expected behavior, describe the actual (wrong) behavior, and provide the exact error message and relevant code snippets.
- Use the Right Tool:
- For UI bugs, provide a screenshot.
- In the CLI, reference files directly (e.g.,
Can you check @app.py for issues?).
- Review and Verify:
- Critically analyze the AI's explanation. Does it make sense?
- If using the CLI, review the proposed code changes (the "diff") before applying them.
- Ask the AI to write a
pytesttest to prove the fix works.
- Iterate or Escalate:
- If the AI's fix doesn't work, provide it with the new error message and continue the conversation.
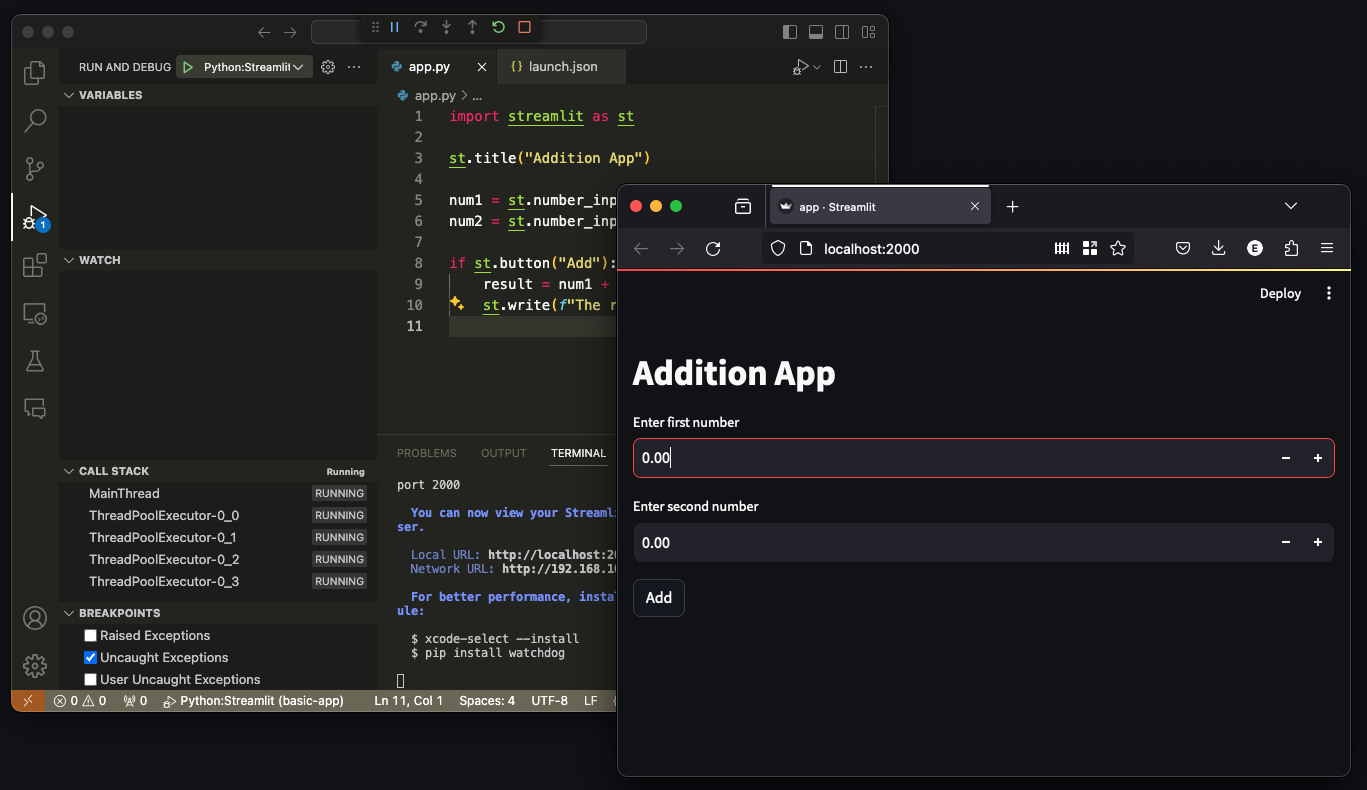
- If you're going in circles, remember the final tip: know when to pause. Fall back on your own expertise. Use a traditional debugger. The image below shows a standard debugging session in VS Code, a powerful tool in your personal arsenal.
Conclusion
You're now equipped with a powerful methodology for troubleshooting AI-generated code. This process is not about blindly accepting AI output, but about engaging in a strategic dialogue where your programming expertise directs the AI's vast knowledge.
Key Takeaways:
- You are the senior developer: Your role is to guide, question, and verify the work of your AI assistant.
- Precision is paramount: Detailed prompts with code, errors, and context lead to actionable solutions.
- A systematic approach wins: Follow a clear workflow of observing, hypothesizing, prompting, and verifying.
- Use programmer-centric tools: Gemini CLI offers a more efficient and powerful workflow with features like file referencing, change previews, and checkpointing.
- Verification is non-negotiable: Use techniques like AI-generated
pytesttests to ensure your fixes are correct and robust.
Next Up:
Our prototype is now functional and debugged. It's time to share it with the world. In our next lesson, we will cover the final step in our prototyping module: Prepare and deploy a simple Python web application to a free hosting service.