Hello! In our last lesson, we successfully generated the Python backend for our web app prototype using Flask and a detailed "master prompt". We now have the engine of our car, but we're missing the body and interior.
Today, we'll build that user-facing part. This lesson focuses on the learning outcome: Generate the corresponding HTML and CSS for the prototype's user interface using AI. We'll explore several powerful techniques to instruct Gemini to create a visually appealing and functional frontend, effectively completing the first full version of our prototype.
1. Connecting Frontend to Backend in Flask
Before we generate the UI, let's briefly review how our Flask backend will serve the frontend files. In a standard Flask application, files are organized into specific folders:
templates/: This folder holds your HTML files. When you callrender_template('index.html')in yourapp.py, Flask looks forindex.htmlinside this directory.static/: This folder contains assets like CSS files, JavaScript files, and images.
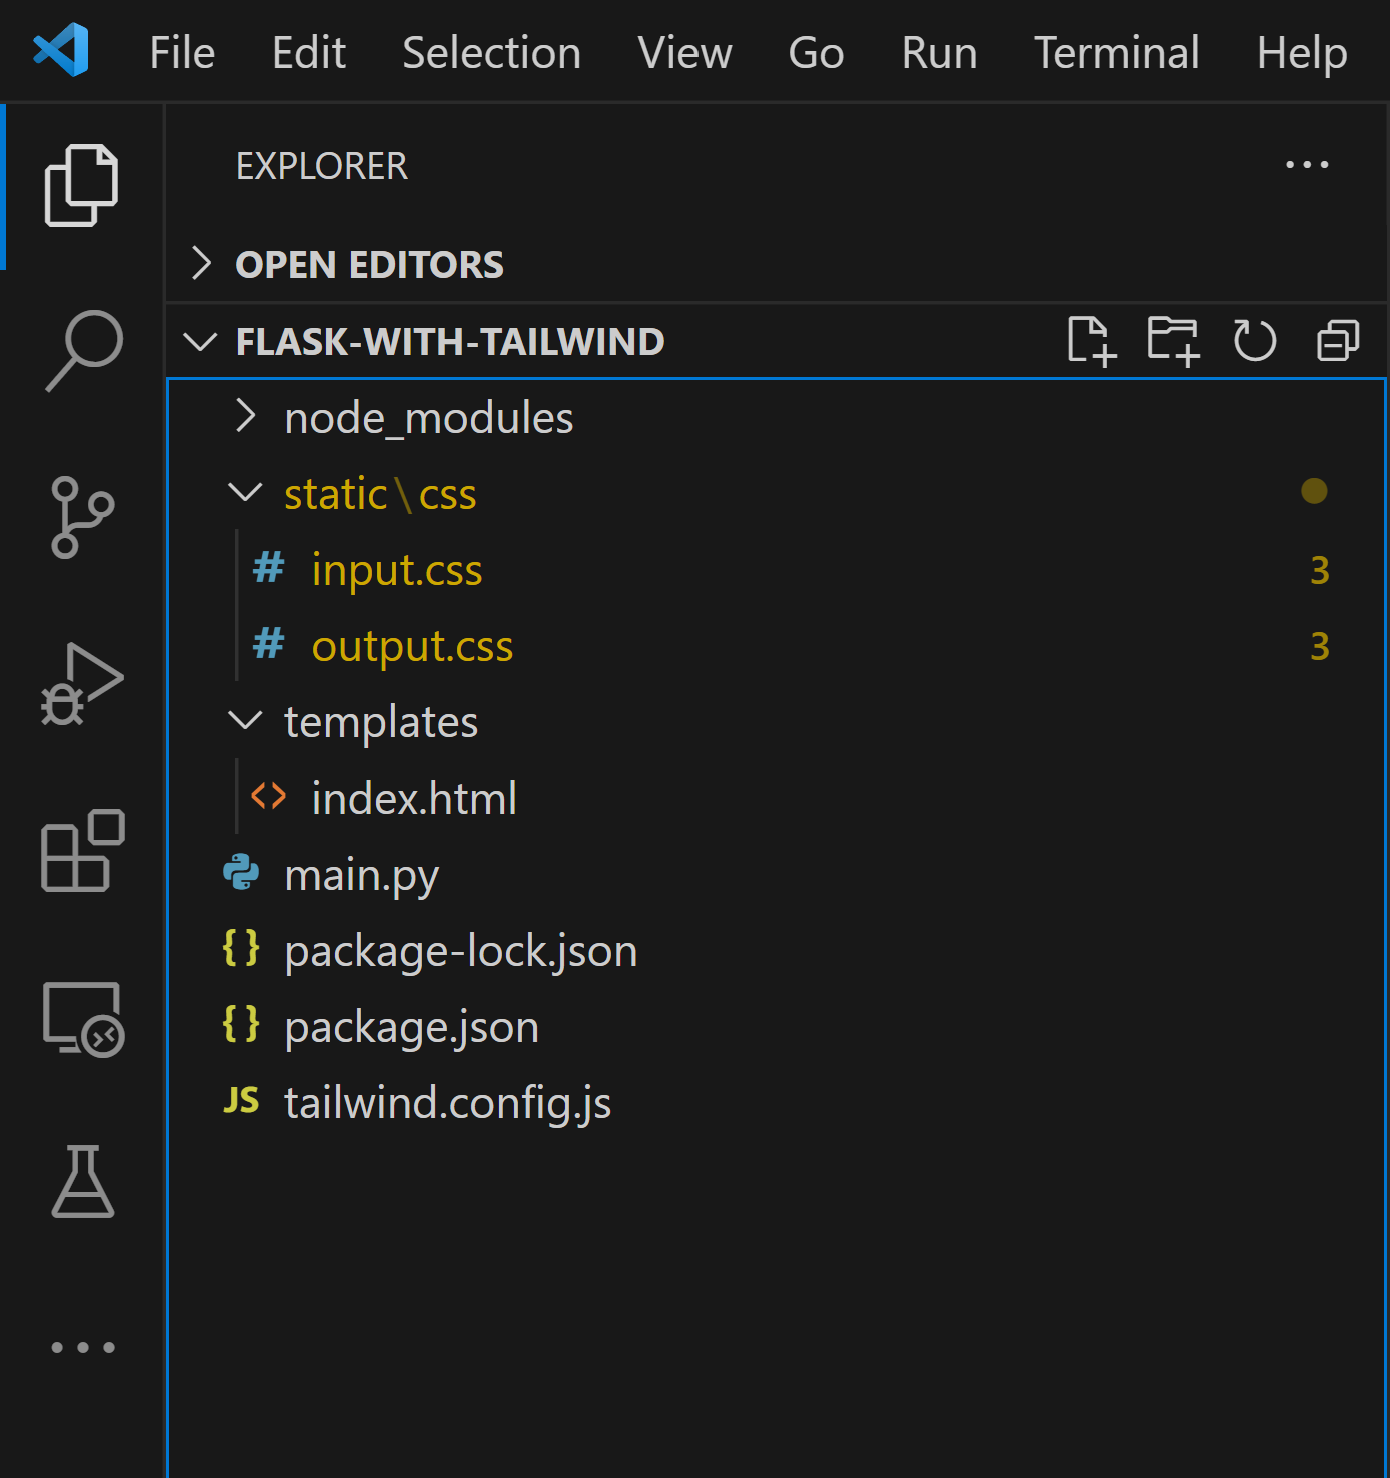
Your app.py file from the last lesson acts as the controller, deciding which HTML page to show the user. The HTML file, in turn, defines the structure of the page, and the CSS file styles it.

2. Generating the UI with "Vibe Coding"
Now for the creative part. We can generate a complete user interface by describing what we want, a technique sometimes called "vibe coding". We don't need to write every line of HTML and CSS ourselves. Instead, we give Gemini a clear vision and inspiration.
The following video from Yuri Souza is an excellent introduction to this workflow within Google AI Studio. It demonstrates two fundamental methods for providing inspiration.
How I Build and Publish Websites for FREE Using Google Gemini + Netlify
This video provides a practical, step-by-step guide to generating a complete website using Gemini Pro. It will show you how to use both a URL and screenshots as visual inspiration for the AI.
Please watch the following two segments: Using a URL for Inspiration (02:32 - 04:51): Observe how a simple prompt combined with the URL of an existing website is used to generate a fully responsive site. This is a very fast way to get a good-looking layout. Using Screenshots for Inspiration (06:12 - 07:55): This section shows an alternative where you upload one or more screenshots to guide the design. This gives you more control if you want to combine ideas from different sources.
These techniques are powerful because they leverage the AI's ability to analyze visual layouts and translate them into code.
3. Advanced Strategy: The Mood Board and Code Replication
For more complex or unique designs, you can take the "inspiration" approach a step further. Instead of providing a single website or screenshot, you can create a "mood board" of different UI components you like and ask the AI to synthesize them into a coherent design.
This next video from Jack Roberts demonstrates this advanced, strategic approach. It also reveals a powerful "hack" that will be particularly useful given your programming background.
How I Build $8,000+ AI Websites in 33 Mins (Gemini 3 FULL Guide)
This video dives deep into a more strategic workflow for generating high-quality websites. You'll learn how to create a 'mood board' for the AI and a clever technique for replicating existing site structures.
Please watch these two key segments: Creating a Mood Board (02:56 - 08:15): Focus on the process, not the specific example. See how he finds inspiration on sites like Dribbble, collects screenshots of different sections (hero, testimonials), and assembles them in Canva to create a detailed visual brief for the AI. The HTML Source Code Hack (10:51 - 14:13): This is a powerful technique. He shows how you can view and copy the raw HTML source code of a site you like, feed it directly to Gemini along with screenshots, and get a remarkably accurate replication. This is great for getting a solid structural base to build upon.
This mood board approach aligns with the "measure twice, cut once" principle we discussed in our first lesson on prototyping. A more detailed visual prompt leads to a better initial output from the AI.
4. Integrating the Generated UI into Your Flask App
After you run your prompt in Google AI Studio, it will generate the code and present it to you, usually separated into index.html, styles.css, and sometimes script.js.
Your Task:
- Choose a strategy: Decide whether to use a URL, screenshots, a mood board, or the HTML source code hack to generate the UI for your prototype.
- Craft your prompt: Based on your chosen strategy, write a prompt in Google AI Studio describing the UI you want for the web app we planned. Remember to be specific about the components (e.g., "a form with a text area for input and a 'Submit' button," "a section below the form to display the result").
- Generate and download: Run the prompt. Once you're reasonably happy with the preview, use the "Download app" button. This will give you a zip file containing the generated files.
- Organize your files:
- Unzip the downloaded folder.
- Create the
templatesandstatic/cssdirectories in your project folder if they don't exist. - Move the
index.htmlfile into yourtemplatesfolder. - Move the
styles.cssfile into yourstatic/cssfolder.
- Link the CSS in your HTML: Open
templates/index.htmland find the line that links the stylesheet (it usually looks like<link rel="stylesheet" href="styles.css">). You need to change this to use Flask's specialurl_forfunction, which correctly generates the path to the static file:<link rel="stylesheet" href="{{ url_for('static', filename='css/styles.css') }}"> - Run your app: Make sure your
app.pyhas a route that renders the template:
Then, run your Flask app from the terminal (@app.route('/') def home(): return render_template('index.html')python app.py) and open the provided URL (e.g.,http://127.0.0.1:5000) in your browser. You should see your AI-generated user interface!
5. Alternative for Rapid Prototyping: The Single-File App
For very simple tools or quick prototypes, managing separate files can feel cumbersome. Given your Python proficiency, you might appreciate a more self-contained approach: embedding the HTML, CSS, and even JavaScript directly within your Python script.
This turns your entire web app into a single, portable .py file. The following resource shows exactly how to prompt an AI to create this structure.
How to use AI to generate a complete Flask Web App in just One File
This GitHub project outlines a clever approach for creating single-file Flask web apps, which is ideal for building simple, local tools without the overhead of a full project structure.
Review these two key parts of the README file: The Example Code: Examine the app.py code block. Notice how the entire HTML, CSS, and JavaScript is contained within a single multi-line string variable (HTML). This is then rendered using render_template_string(). The Prompt: Look at the example prompt provided for Gemini. It explicitly asks the AI to follow the single-file design pattern from an attached example. This is an excellent prompting technique: showing the AI the exact output format you want.
This method is fantastic for quickly turning a Python script into an interactive web tool, which is a powerful capability for both corporate tasks and startup MVPs.
Conclusion
You have now bridged the gap between backend logic and user interface. You've learned how to act as a creative director, guiding Gemini to generate a functional and visually appealing frontend for your application using various inspiration-based techniques.
Key Takeaways:
- AI can generate complete HTML and CSS from high-level descriptions, URLs, or screenshots ("vibe coding").
- For more control, creating a "mood board" of UI components provides a more detailed brief for the AI.
- A powerful hack for programmers is to provide the AI with the raw HTML of an existing site to get a structurally accurate replica.
- Generated frontend files (
index.html,styles.css) must be placed in the correcttemplatesandstaticfolders within your Flask project. - For simple prototypes, a single-file Flask app with embedded HTML/CSS is an efficient and portable alternative.
Next Up:
Our prototype now has both a backend and a frontend, but it's unlikely to be perfect. In our next lesson, we will focus on the crucial final step of the prototyping cycle: "Debug and troubleshoot AI-generated code by combining your Python knowledge with AI explanations."