Hello! In our last lesson, we created a detailed architectural plan for a simple web app prototype, packaged as a "master prompt." We focused on the crucial "measure twice, cut once" principle: a solid plan is the key to getting high-quality results from an AI coding assistant.
Today, we move from blueprint to construction. Our goal is to generate the Python backend code for your prototype using AI and the lightweight web framework Flask. You'll use the master prompt you've already crafted to have Gemini generate the core logic of your application. We will then refine this code and even learn a professional technique to ensure your AI-powered app is responsive and performant.
1. Preparing Your Development Environment
Before we write or generate any code, we need a clean workspace. As a Python programmer, you'll be familiar with this process. We'll create a dedicated folder for our project and set up a virtual environment to manage our dependencies.
For a clear walkthrough of this setup, the following video provides an excellent guide.
Build Your Own AI Agent || Flask + OpenAI + Python Tutorial (Beginner-Friendly) || Coding Hives
This video from Coding Hives, though focused on an OpenAI project, demonstrates the universal first steps for any Python web project: creating a virtual environment and installing libraries. It also introduces the best practice of using a .env file to manage secret keys.
Please watch the following two segments: Setup (01:27 - 03:01): Follow the steps to create a project folder, initialize a Python virtual environment (venv), activate it, and install the necessary libraries. For our project, you'll start by installing Flask: pip install Flask API Key Management (03:01 - 04:50): Pay close attention to how an API key is stored in a .env file. This is a critical security practice to avoid hardcoding secrets directly in your code. You'll need this for your Google AI API key.
Once you have your virtual environment set up and Flask installed, create an empty file named app.py. This is where Gemini will generate our backend code.
2. Generating the Backend from Your Master Prompt
Now it's time to use the master prompt you created in the previous lesson. You will provide this detailed set of instructions to Gemini to generate the first draft of your application's backend.
We'll use Google AI Studio, which is a web-based interface for prototyping with Gemini models.
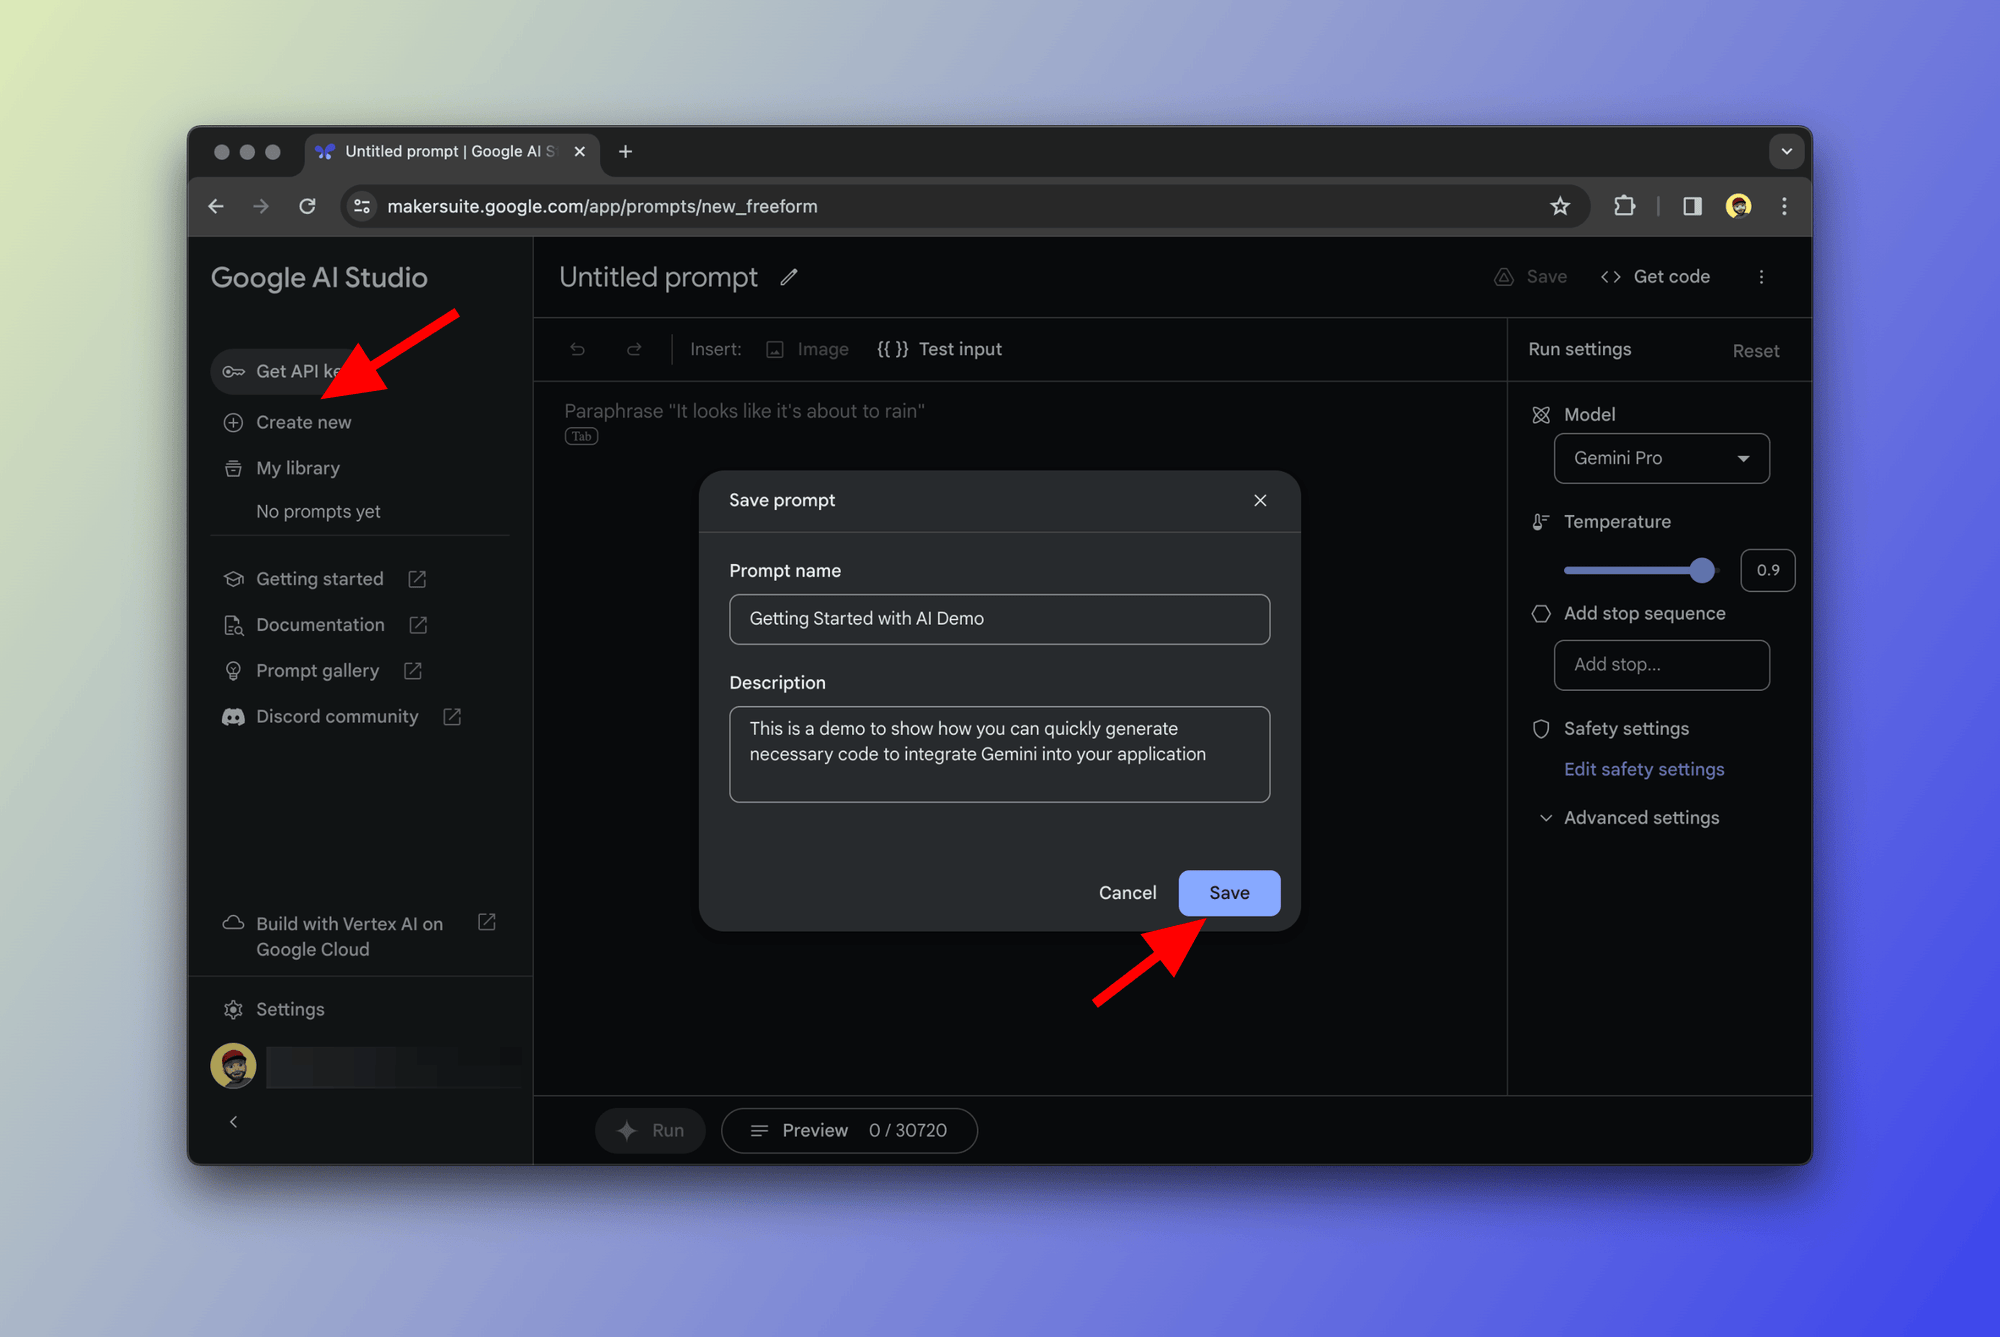
Your Task:
- Navigate to Google AI Studio.
- Start a new prompt.
- Copy the entire "master prompt" you wrote in the last lesson (including the Persona, Goal, Context, and Format sections).
- Paste it into the prompt window in AI Studio.
- Run the prompt and examine the Python code that Gemini generates for your
app.pyfile.
The AI should provide you with a block of Python code. Copy this generated code and paste it into the app.py file you created in your project folder. It should also provide a list of requirements for a requirements.txt file. Make sure you install those using pip install -r requirements.txt.
3. Understanding the Anatomy of the Generated Code
The code Gemini provides should follow the structure of a basic Flask application. To help you understand and verify the output, let's analyze a complete, well-structured example of a Flask backend designed to interact with Gemini.
The following resource is from a Google Codelab that builds an application to turn wireframe drawings into websites. The app.py file is a perfect example of what a functional, AI-powered backend looks like.
Transform your imagination into a website using Gemini models!
This reading from a Google Codelab provides the complete backend code for a Flask application that uses the Vertex AI SDK to communicate with Gemini. Studying this will help you understand the key components you should see in your own generated code.
Read the section titled 'Step 3: Build the Backend (Generative AI)'. Focus on the app.py code block and the explanations that follow. As you read, identify these key parts: Imports: Flask, render_template, request, and the vertexai libraries. Initialization: The app = Flask(__name__) line and the vertexai.init() call. Routes: The functions decorated with @app.route(...). Note how one handles GET requests for the homepage and another handles POST requests from a form. The generate function: This is the core logic that takes user input, packages it for the Gemini model, and processes the stream of responses.
Compare the code you just read with the code Gemini generated from your prompt. Does your app.py have similar components? Can you identify the routes and the main processing logic? This analysis is crucial for debugging and for the next step: refinement.
4. Iterative Refinement: Improving the First Draft
The first version of AI-generated code is a starting point, not a final product. The real skill lies in iterating and refining it. You can do this by having a conversation with the AI, asking it to add features or make changes to the existing code.
The following video demonstrates this iterative process masterfully. The presenter starts with a basic generated app and then uses the AI assistant to make changes across multiple files to add a new feature.
Building an AI Web Application with Python and Flask
In this clip from a Microsoft Reactor presentation, the presenter uses GitHub Copilot to add an interactive form to a basic Flask app. This showcases the power of iterative refinement, where you build on AI-generated code with further prompts.
Watch the segment from 08:07 to 13:43. Observe how the presenter doesn't write the new code by hand. Instead, they provide a natural language prompt: "Can you add a form to the web page and have the backend process the form?" The AI then suggests changes to both the HTML (frontend) and the app.py (backend) to implement the feature.
This workflow directly applies the Iterative Refinement and Extension Prompting techniques we've discussed. If your generated app.py is missing a feature from your original plan, or if you think of an improvement, try crafting a follow-up prompt in Gemini.
For example:
"Now, modify the Flask app to handle file uploads. Add a new route
/uploadthat accepts a POST request with a file."
5. Pro-Tip: Building Performant AI Apps with Asynchronous Code
Here's a crucial consideration for any application that calls an LLM: API calls can be slow. A standard Flask app is synchronous. This means if one user makes a request that calls Gemini, the entire server will wait for Gemini's response before it can handle requests from any other user. This can lead to a terrible user experience.
The professional solution is to use an asynchronous framework. Since you are proficient in Python, this is a concept you can readily apply. An asynchronous app can make a request to the LLM and, while waiting for the response, continue to handle other incoming requests.
The video below demonstrates how to refactor a synchronous Flask app into an asynchronous one using Quart, a framework with a very similar structure to Flask.
Building an AI Web Application with Python and Flask
This final segment from the Microsoft Reactor video is a mini-masterclass in building production-ready AI web apps. It explains why synchronous frameworks are a problem and shows how to convert a Flask app to an asynchronous one.
Watch the two connected parts from 50:46 to 56:22. Porting Flask to Quart (50:46 - 53:43): Note the reasoning for the switch and see how the AI is prompted to "Port the flask app to court." The changes are minimal: importing Quart instead of Flask and adding the async keyword to route functions. Asynchronous API Calls (53:43 - 56:22): This is the key. The code is modified to use an asynchronous version of the API client and the await keyword. This ensures the API call itself doesn't block the server.
While you may not need to implement this for your very first simple prototype, understanding this principle is vital for any serious AI application you plan to build for your startup. It's a significant differentiator between a quick demo and a scalable product.
Conclusion
Congratulations! You've moved from a plan to a functional piece of software. You've used your detailed prompt to generate a Flask backend, analyzed its structure, and learned how to refine it. Most importantly, you've been introduced to an advanced technique for ensuring your AI applications are performant and scalable.
Key Takeaways:
- A detailed "master prompt" can be used to generate a strong first draft of a Flask backend.
- Analyzing a canonical example (like the Google Codelab) helps you verify and understand your generated code.
- AI-driven development is an iterative conversation. Use follow-up prompts to refine, extend, and debug your code.
- For AI applications, synchronous frameworks like Flask can be a performance bottleneck. Asynchronous alternatives like Quart are a professional-grade solution.
Next Up:
A backend isn't very useful without a frontend. In our next lesson, we will complete the loop by generating the corresponding HTML and CSS for your prototype's user interface, bringing your application to life in the browser.