Hello! Welcome back to your second lesson.
In our last session, we took the essential first step of installing Python. Now that we have the engine, we need a place to build with it. Today, we'll set up your professional coding workshop: Visual Studio Code.
This lesson will guide you through installing VS Code and adding the necessary Python extension. A good code editor is like a well-organized workbench for a craftsperson—it provides the tools you need in an intelligent way, helping you write code more efficiently and with fewer errors. By the end of this lesson, your computer will be a fully-featured development environment, ready for you to start coding.
What is Visual Studio Code?
You could write Python code in a simple text editor like Notepad, but it wouldn't be a pleasant experience. A modern code editor like Visual Studio Code (often called VS Code) is designed specifically for programming. It provides powerful features, including:
- Syntax Highlighting: Makes code readable by coloring different parts, like commands and text, differently.
- IntelliSense: Offers intelligent code completions and suggestions as you type.
- Debugging: Helps you find and fix errors in your code step-by-step.
- Extensions: Allows you to add new tools and support for virtually any programming language.
VS Code is free, maintained by Microsoft, and is one of the most popular code editors in the world. Learning to use it is a valuable skill in itself.
Step 1: Install Visual Studio Code
First, let's get VS Code installed on your machine. The process is straightforward and involves downloading the installer from the official website.
The following video provides a clear, quick walkthrough of the installation process.
How to set up Python on Visual Studio Code
This video will guide you through downloading and installing Visual Studio Code. Pay attention to the recommended options during setup.
Watch from 01:23 to 02:10. This part covers downloading from the correct website (code.visualstudio.com) and running the installer. During installation, it's a good idea to check the 'Create a desktop icon' option for easy access.
After the installation is complete, you should be able to open Visual Studio Code from your desktop or applications folder. You'll be greeted by a welcome screen, which you can explore or close.
Step 2: Install the Python Extension
Out of the box, VS Code is a general-purpose editor. To unlock its full power for Python development, we need to install an extension. An extension is an add-on that teaches VS Code the specifics of a programming language. The official Python extension from Microsoft is essential.
This next video explains what the Python extension does and shows you how to install it. It makes a very important distinction between the Python interpreter (the program we installed in the last lesson) and the VS Code extension (the tool that helps VS Code work with the interpreter).
Getting Started with Python in VS Code (Official Video)
Watch this official video from the Visual Studio Code team to understand why the Python extension is necessary and how to install it.
Watch from 01:27 to 02:24. This section clearly explains the role of the extension and walks you through finding and installing it from the VS Code Marketplace.
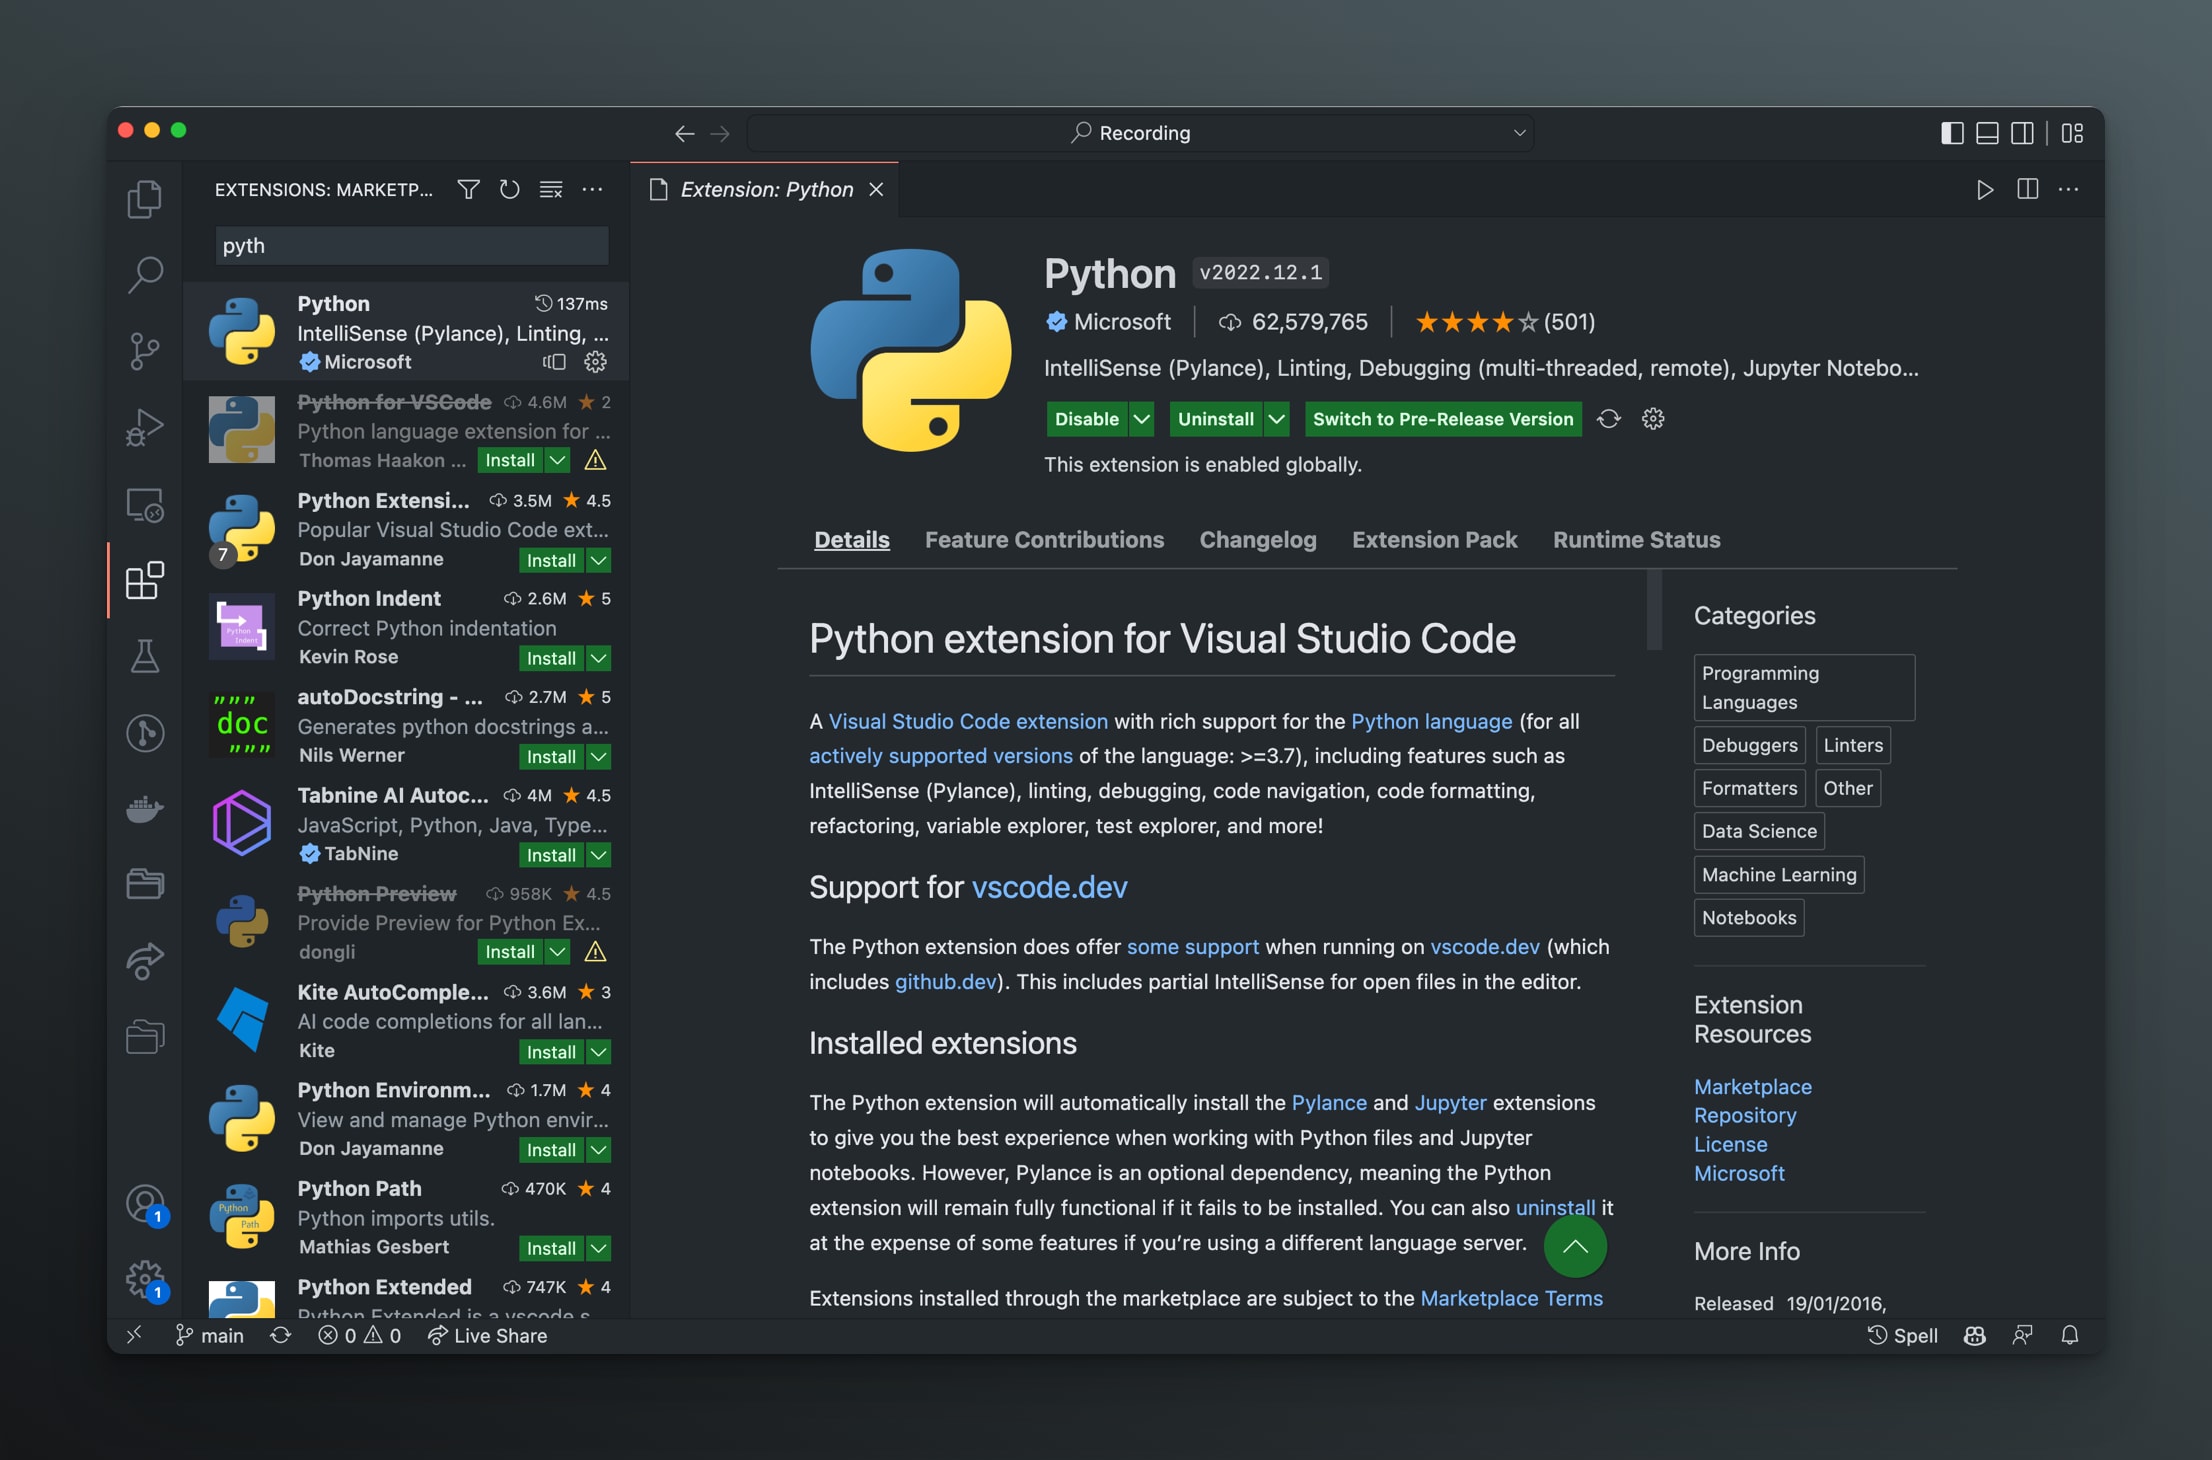
To find the Extensions view in VS Code, click the icon with the four squares on the left-hand side Activity Bar.

Once in the Extensions view, search for "Python" and select the one published by Microsoft. It should be the first result. Click the "Install" button.
Step 3: Connecting VS Code to Your Python Installation
The final step is to ensure VS Code knows which Python installation to use. We need to point it to the Python interpreter we installed in our last lesson. The Python extension you just installed makes this easy.
- Create a Workspace Folder: First, create a new folder somewhere on your computer where you plan to save your projects. You could name it something like
python-projects. - Open the Folder in VS Code: In VS Code, go to
File > Open Folder...and select the folder you just created. Working within a specific folder is standard practice and keeps your projects organized. - Create a New Python File: With the folder open, create a new file by going to
File > New File. Save it immediately (File > SaveorCtrl+S/Cmd+S) with the namehello.py. The.pyextension is crucial—it tells VS Code that this is a Python file. - Select the Python Interpreter: As soon as you save the file with a
.pyextension, the Python extension will activate. Look at the bottom-right corner of the VS Code window. You might see a pop-up asking you to select an interpreter.- Click it and choose the Python version you installed in the previous lesson (e.g.,
Python 3.12.4). - If you don't see a pop-up, you can do this manually:
- Open the Command Palette by pressing
Ctrl+Shift+P(on Windows) orCmd+Shift+P(on macOS). - Type
Python: Select Interpreterand pressEnter. - A list of available Python interpreters will appear. Select the one you installed.
- Open the Command Palette by pressing
- Click it and choose the Python version you installed in the previous lesson (e.g.,
Once selected, you will see the Python version displayed in the bottom-right corner of the status bar. This confirms that VS Code is now connected to your Python installation and is ready for coding.
Conclusion
Excellent work! You have now set up a professional-grade development environment. This setup—Visual Studio Code paired with the official Python extension—is used by countless developers worldwide and will serve you well on your path to becoming a backend developer.
Key Takeaways:
- Visual Studio Code is a powerful code editor that will be your primary tool for writing code.
- Extensions, like the official Python extension, add language-specific features to VS Code.
- You must tell VS Code which Python interpreter to use so it can run and debug your code correctly.
Next Up:
In our next lesson, we will finally get to write some code! We'll use the environment you just set up to write and run your very first Python script: the classic "Hello, World!" program. You'll see your code come to life and print output to the console.