Hello! Welcome to the second-to-last lesson in your course.
In the previous lesson, you accomplished the most safety-critical part of the tyre change: correctly tightening the lug nuts on the spare wheel using the star pattern. Your car is now structurally sound and resting on four wheels again.
This lesson focuses on the final clean-up phase, addressing the learning outcome: Securely stow the damaged tyre and all tools in your vehicle. While this might seem like simple housekeeping, it is a crucial safety step. We'll explore why it's so important to secure these items and then cover the practical steps for doing so.
Part 1: The Danger of Loose Cargo
Before we get to the "how," let's cover the "why." You have a heavy, dirty tyre and several metal tools to deal with. Just tossing them in the boot or on the back seat is a bad idea. In your work as a designer, you know that every element should have a purpose and a place; in a vehicle, this principle is critical for safety.
An unsecured object in a moving car can become a dangerous projectile during a sudden stop, a swerve, or a collision.
Motor Vehicle Safety (Loose Cargo)
To understand the forces involved, please read this short article from Safety Talk Ideas about the dangers of loose cargo.
Please read the sections 'Loose Cargo in Vehicles' and 'Mitigation Actions'. Pay close attention to the statistic about the force a 20-pound object can exert at 55 mph.
As the article highlights, an object's effective weight multiplies enormously during a crash. A car tyre can weigh between 20 and 30 pounds (or more), and a steel jack is also quite heavy. If left unsecured, these items pose a serious risk to you, your passengers, and your vehicle's interior in an emergency manoeuvre. Securing them properly is not just about being tidy—it's about mitigating a significant safety hazard.
Part 2: How to Stow the Damaged Tyre and Tools
Now for the practical steps. The good news is that your car is designed with a dedicated space for everything. Your task is simply to put the damaged items back where the spare parts came from.
Storing the Flat Tire and Tools After Changing
This brief guide from CRHT explains the process of stowing your flat tyre and tools.
Please read the section titled 'Storing the Flat Tire and Tools After Changing'.
Let's break down the process with some visuals.
Stowing the Damaged Tyre
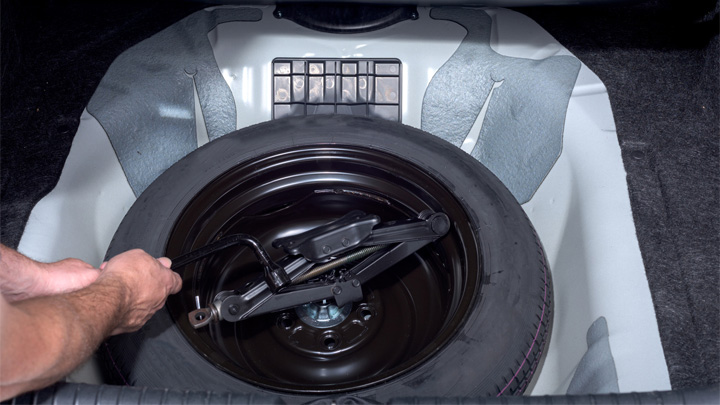
- Open the Boot: Your spare tyre was likely located in a compartment under the floor of your boot (or trunk). Lift the floor panel to reveal the wheel well.
- Place the Tyre: Put the damaged tyre into the now-empty wheel well. It will likely be dirty, so be careful not to get grime on your clothes or the car's upholstery. The tyre should sit flat in the compartment.
- Secure the Tyre: Your spare tyre was held in place by a large bolt or clamp mechanism. You will use this same device to secure the damaged tyre. Place it through the centre of the wheel and tighten it down by hand until it's snug. This prevents the tyre from moving, as mentioned in the reading.
Stowing the Tools
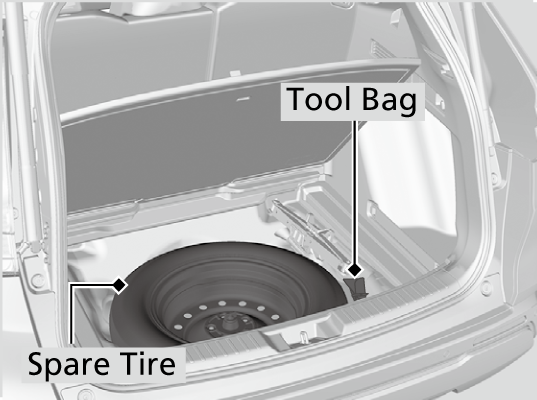
Your jack and lug wrench also have a home. In many cars, they are stored in a foam insert inside the spare wheel itself, or in compartments next to it.
- Locate the Storage Spot: Find the designated spot for your jack and wrench. It might be a moulded plastic tray or a simple tool bag.
- Secure the Tools: Place the jack, lug wrench, and any other tools (like wheel chocks) back in their holders. Make sure they fit snugly and won't rattle around when you drive. A well-organized tool kit is safer and ensures you can find everything the next time you need it.
The Final Sweep
Before you close the boot and drive away, take one last look at the area where you worked. As the CRHT article advised, "double-check that nothing has been left behind." It's easy to forget a lug nut, a hubcap, or even the wheel chocks. Make sure you have all your equipment before leaving the scene.
Conclusion
You have now completed all the physical steps of the tyre change. The old tyre and tools are safely stowed, and you are ready to get back on the road—with a few important caveats.
Key Takeaways:
- Unsecured heavy items like a tyre or jack become dangerous projectiles in a sudden stop.
- The damaged tyre goes into the wheel well where the spare tyre was located.
- Use the same hold-down bolt or clamp that secured the spare to secure the damaged tyre.
- Return all tools to their designated storage spots to prevent rattling and ensure they are ready for future use.
- Always perform a final check of your work area to ensure no tools or parts are left behind.
In our final lesson, we will cover the crucial last pieces of information: understanding the driving limitations of a temporary spare tyre and the necessary next steps to take, such as visiting a garage.