In our previous lesson, we explored the theoretical foundation of web development, learning the distinct roles of HTML, CSS, and JavaScript. You now understand what tools are used to build a website. Today, we shift from theory to practice by setting up your digital workshop. Every craftsperson needs a good workbench and tools, and for a web developer, the most essential tool is a code editor.
Our goal is to set up your professional development environment. By the end of this lesson, you will have installed and configured a modern code editor, ready for you to start writing the code for your first website.
Your Digital Workbench: The Code Editor
You could technically write code in any basic text application, like Notepad on Windows or TextEdit on macOS. However, that would be like a carpenter trying to build a house with only a pocketknife. Professional developers use specialized tools called code editors.
A code editor is a text editor supercharged with features designed specifically for writing software. These features include:
- Syntax Highlighting: Makes code readable by coloring different parts (tags, attributes, text) differently.
- Autocompletion: Suggests code as you type, saving time and reducing typos.
- File and Folder Management: Allows you to easily navigate the entire structure of your project.
- Extensions: A marketplace of plugins to add new features, support new languages, and connect to other tools.
- Integrated Terminal: A command-line interface built directly into the editor, so you don't have to switch windows to run commands.
For this course and your journey into web development, we will use Visual Studio Code (VS Code). It is free, incredibly powerful, and the most popular code editor in the industry.
Installing Visual Studio Code
First things first, let's get the software installed on your computer. It's important to distinguish Visual Studio Code (with a blue logo) from its larger cousin, Visual Studio (with a purple logo). We want the former.
The following video provides a clear walkthrough of the download and installation process, along with an excellent overview of the user interface.
VS Code for Absolute Beginners
This video, "VS Code for Absolute Beginners" from the Coder Coder channel, is a perfect starting point. It covers downloading the correct version and gives you a tour of the main interface components.
Watch from the beginning to the end of the UI tour. Pay close attention to the part where the presenter distinguishes between Visual Studio and VS Code. Also, familiarize yourself with the names of the UI elements she points out, like the Activity Bar, Side Bar, and Status Bar.
Once you have VS Code installed and open, you should see the Welcome Page, which provides quick links to common actions.
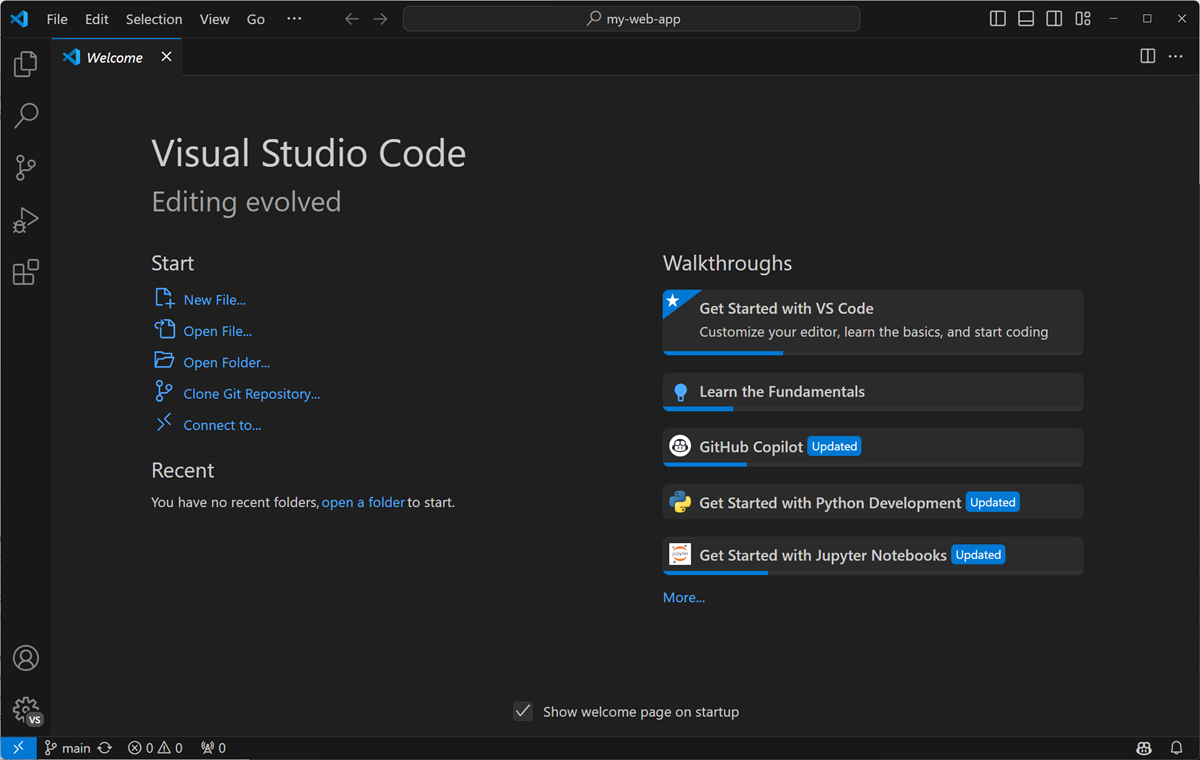
The Golden Rule: Always Open a Folder
This is the single most important habit to build when starting with VS Code. While you can open individual files, you should always open the entire folder that contains your project. This tells VS Code that all the files within that folder are related. It enables features to work correctly, makes file navigation simple, and creates a self-contained "workspace" for your project.
Let's create the folder for our first project now. On your Desktop or in your Documents folder, create a new folder and name it my-first-website.
Now, watch this segment where web developer Kevin Powell passionately explains why this "open folder" approach is so crucial.
How to get started with VS Code
In this clip from his "How to get started with VS Code" video, Kevin Powell explains the critical difference between opening a single file and opening a project folder.
Watch the section from the beginning of his explanation until he finishes creating a new file. His reasoning will help solidify this best practice in your mind.
Now that you understand the "why," let's do it.
- In VS Code, go to the
Filemenu and selectOpen Folder.... - Navigate to and select the
my-first-websitefolder you just created. - VS Code might ask you if you trust the authors of the files in this folder. Since you created it, you can click "Yes, I trust the authors."
Your VS Code window should now show the name of your folder in the "Explorer" view on the left-hand side.
Powering Up with Extensions
One of VS Code's greatest strengths is its ecosystem of extensions. These are add-ons that enhance its functionality. We will install two essential extensions for web development.
- Live Server: This magical extension launches a small web server on your computer. When you're working on your files, it automatically reloads the web page in your browser every time you save. This creates a seamless workflow where you can see your changes instantly.
- Prettier - Code Formatter: This extension automatically cleans up your code to follow a consistent set of style rules. It fixes indentation, spacing, and more. It not only makes your code easier to read but also helps you learn good formatting habits without thinking about it.
The following article from freeCodeCamp will guide you through installing Live Server. We'll then use another video to walk through installing both Prettier and Live Server.
How to Set Up VS Code for Web Development in A Few Simple Steps
This section of the article clearly explains what extensions are and shows you how to find and install the Live Server extension.
Please read the section titled "VS Code Extensions". Start from the beginning of the section and follow the steps to install and use Live Server. You can stop reading when you reach the "Conclusion".
Now, let's get a video walkthrough for installing both Prettier and Live Server, and see how to configure Prettier to work automatically.
VS Code for Absolute Beginners
We return to the Coder Coder video, which has an excellent segment on installing and configuring these two essential extensions.
Watch the segment from the beginning where the presenter introduces extensions, and continue until she demonstrates stopping the Live Server. Follow along to install both Prettier and Live Server. Pay close attention to the steps for setting Prettier as the default formatter and enabling "Format on Save".
Creating Your First File
With our environment fully configured, the final step is to create the first file for our website.
- Make sure you have your
my-first-websitefolder open in VS Code. - In the Explorer panel on the left, hover your mouse next to the folder name, and click the "New File" icon.
- Name the file
index.htmland press Enter. - The file will open in the main editor pane. Type
Hello, World!into the file. - Save the file by pressing
Ctrl+S(on Windows) orCmd+S(on Mac).
Your screen should look something like this:
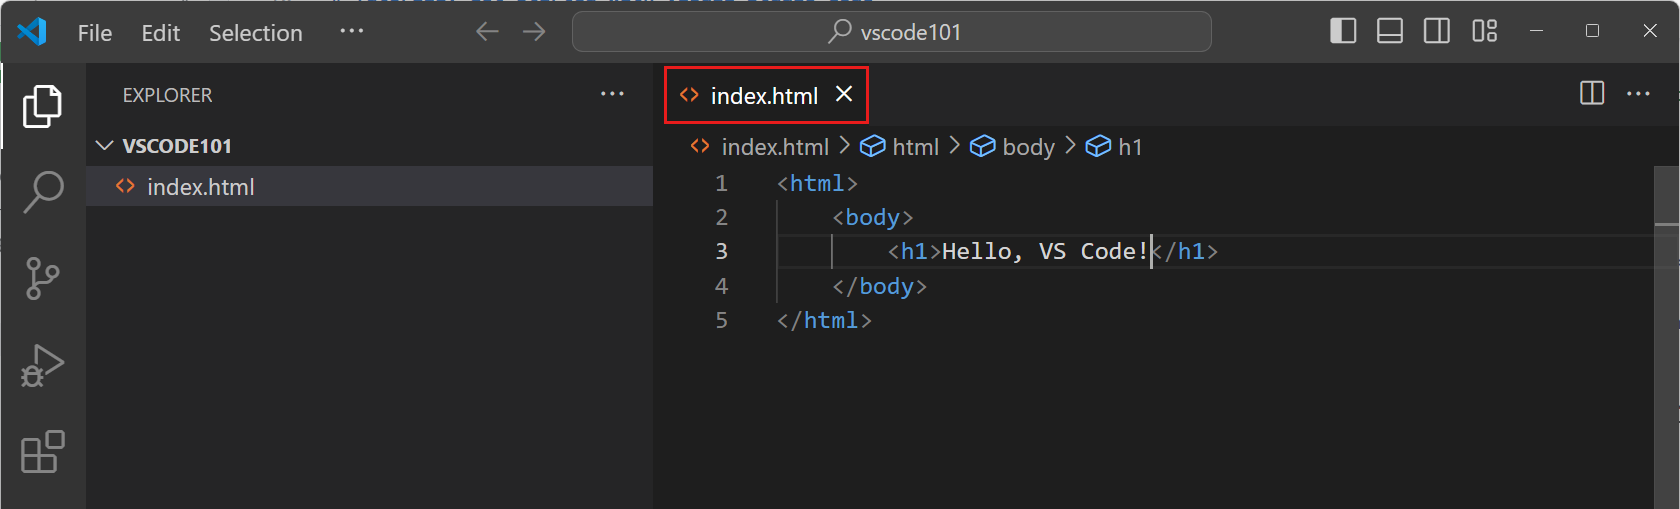
This index.html file is the default file that web browsers look for when someone visits a website. It will be the home page of our project.
Conclusion
Congratulations! You have successfully set up a professional-grade development environment. This is a huge and practical step forward. While it may seem like a lot of setup, this initial investment will make the process of building your website significantly smoother and more enjoyable.
Key Takeaways:
- A code editor like VS Code is an essential tool for developers, providing features like syntax highlighting and autocompletion.
- The most important workflow habit is to always open a project folder, not individual files.
- Extensions supercharge VS Code. Live Server provides instant browser previews, and Prettier keeps your code clean and consistently formatted.
- You have created your first project folder (
my-first-website) and its main file,index.html.
Your workshop is now ready. In the next lesson, we will put it to immediate use. You'll learn how to write the basic structure of an HTML document, add some content, and use the Live Server extension to view your very first webpage live in your browser.