Welcome back! In our last session, we prepared your digital workshop by installing and configuring a professional code editor, Visual Studio Code. You created a project folder and your very first file, index.html. So far, it's just an empty file, but that's about to change.
Today, we take the crucial step from setup to creation. You will write your first lines of HTML code and see them come to life as a real webpage in your browser. This lesson is all about closing the loop between writing code and seeing the result, a fundamental workflow you will use constantly as a web developer.
Writing Your First HTML
Let's start by opening the project you created.
- Launch Visual Studio Code.
- Go to
File > Open Folder...and select yourmy-first-websitefolder. - In the Explorer panel on the left, click on your
index.htmlfile to open it.
Right now, the file is blank. An HTML file is simply a plain text file, but with a special .html extension that tells web browsers to interpret its contents as a webpage. The instructions inside are written using HTML tags.
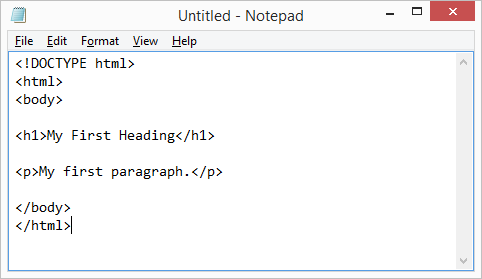
Let's write some code. Type or copy the following into your index.html file:
<h1>My First Heading</h1>
<p>My first paragraph.</p>
This code uses two basic HTML tags:
<h1>defines a top-level heading. Thehstands for heading, and the1represents the highest level.<p>defines a paragraph.
Each element consists of an opening tag (e.g., <p>) and a closing tag (e.g., </p>). The content goes in between. When a browser reads this file, it will understand how to display this structured content.
Opening Your Page in the Browser
Now that you've written the code, how do you see the webpage? There are two common ways.
Method 1: The Manual Approach
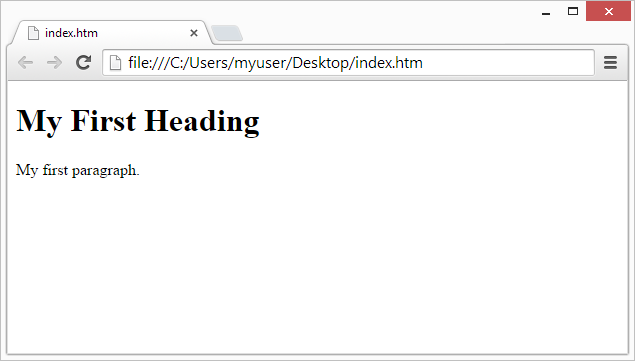
The most direct way is to open the file just like you would any other document on your computer. This method is fundamental to understanding how browsers work with local files.
The following reading provides a concise guide on this process.
An Introduction to HTML for Beginners
This guide from freeCodeCamp explains how to run an HTML file from your local computer.
Read the first three short subsections under the heading "How Do I Run HTML Code Step by Step?". Focus on the instructions to save and open the file.
Now, try it yourself:
- Save your
index.htmlfile in VS Code (Ctrl+Son Windows orCmd+Son macOS). - Locate the
my-first-websitefolder on your computer using your file explorer (e.g., Windows Explorer or macOS Finder). - Double-click the
index.htmlfile.
Your default web browser should open and display your page. It should look like the image below.
If you make a change to your code, you'll need to save the file and then manually click the "refresh" button in your browser to see the update. This works, but it can become tedious.
Method 2: The Professional Workflow with Live Server
In our previous lesson, you installed the Live Server extension. This tool creates a much more efficient workflow by starting a small web server on your computer and automatically refreshing the browser whenever you save a file.
This short video clip demonstrates exactly how it works.
This clip from the "HTML Tutorial For Beginners" by The Coding Sloth shows the magic of the Live Server extension.
Watch from the demonstration. Notice how after the presenter saves the file, the webpage in the browser updates instantly without needing a manual refresh.
Let's use this better workflow.
- If you still have the browser tab open from the manual method, close it.
- Go back to VS Code, right-click anywhere inside your
index.htmlfile's text editor. - Select "Open with Live Server" from the context menu.
A new browser tab will open with your webpage. Look at the address bar. Instead of file:///..., you'll see something like http://127.0.0.1:5500/index.html. The address 127.0.0.1 is a special IP address that always refers to your own computer (also known as "localhost"). This indicates your page is being "served" by the development server, which is the standard way developers work.
Now, test the auto-reload feature:
- Arrange your VS Code and browser windows so you can see both.
- In
index.html, change the text inside the<p>tag to something new, for example:<p>Live Server is amazing!</p>. - Save the file.
As soon as you save, you should see the browser update with the new text instantly. This rapid feedback cycle is invaluable and will save you a tremendous amount of time.
Conclusion
Excellent work! You have successfully bridged the gap between writing code and seeing a tangible result. You've created a simple but real webpage, viewed it in your browser, and established a professional development workflow. This cycle of writing code, saving, and instantly seeing the result is the core activity of front-end development.
Key Takeaways:
- An HTML file is a text file with a
.htmlextension that contains instructions for a web browser. - HTML uses tags (e.g.,
<h1>,<p>) to give structure and meaning to content. - You can open an HTML file directly in a browser (
file:///protocol), but this requires manual refreshing. - Using a development tool like Live Server provides a local server (
http://127.0.0.1) and auto-reloads the browser on save, creating a highly efficient workflow.
In this lesson, we used a couple of tags to get started. However, a proper, valid HTML document requires a bit more structure. In our next lesson, we will dive into the essential boilerplate that forms the skeleton of every webpage, learning about the <!DOCTYPE>, <html>, <head>, and <body> tags.