Hello! Welcome back to our ray tracing journey.
In the last lesson, we built an essential tool for our toolkit: a robust random number generator using C++'s <random> library. We finished by creating a random_double() helper function that gives us a random floating-point number between 0.0 and 1.0.
Today, we put that tool to work. We're going to tackle one of the most visible artifacts in basic ray tracing: aliasing, or the "jaggies." Our goal is to implement multi-sample antialiasing (MSAA) by averaging the colors from multiple random rays shot through each pixel. By the end of this lesson, the sharp, jagged edges of your sphere will be replaced with smooth, more realistic transitions.
Let's look at the difference this technique makes.

The Problem: One Sample Isn't Enough
As we've discussed, the core of our ray tracer so far involves sending a single ray through the center of each pixel. This is a form of point sampling—we're trying to determine the color of a square area (the pixel) by checking the color at just one single point within it.
This is a poor approximation. If a pixel straddles the edge of an object, that single sample will either hit the object or miss it entirely. The result is a binary, all-or-nothing decision that creates the harsh, staircase-like edges you see in your renders.
To solve this, we need to gather more information about the area that the pixel covers.
Ray Tracing with Voxels in C++ Series – Part 3
The article 'Ray Tracing with Voxels in C++' on Jacco's Blog provides an excellent visual explanation of this problem. It clearly shows why a single sample is inadequate.
Read the section titled 'Starting Point'. Pay close attention to the two diagrams that show a zoomed-in pixel grid. The first shows how a single sample can misrepresent the pixel's true color, and the second illustrates how multiple samples provide a better estimate.
The solution, as the article suggests, is to average the results from multiple samples. Instead of one ray per pixel, we'll cast many. This is a form of Monte Carlo integration, where we use random sampling to approximate a definite integral—in this case, the integral of light coming through the pixel's area.
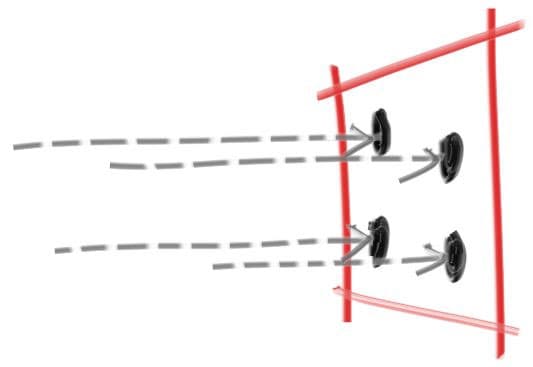
The Antialiasing Algorithm
The logic for multi-sample antialiasing is a straightforward extension of our current rendering loop:
- For each pixel in the image:
- Initialize an accumulator for the color (e.g.,
vec3 pixel_color(0, 0, 0)). - Loop a fixed number of times (e.g., 100 times). Let's call this
samples_per_pixel.
a. For the current sample, calculate a randomly jittered position within the current pixel.
b. Generate a ray that passes from the camera through this new jittered point.
c. Callray_color()to get the color for this one ray.
d. Add the resulting color to yourpixel_coloraccumulator. - After the inner loop finishes, divide the accumulated
pixel_colorbysamples_per_pixelto get the average color. - Write this final average color to your image file.
Implementing Multi-Sample Antialiasing
Let's translate this algorithm into C++. We'll primarily be modifying the main render loop in your main.cpp file. The canonical guide, Ray Tracing in One Weekend, provides a very clean implementation.
Peter Shirley's 'Ray Tracing in One Weekend' demonstrates exactly how to modify the main loop to incorporate multi-sampling. We will follow this approach.
Read the chapter titled 'Chapter 6: Antialiasing'. Focus on the explanation and the final code block for main. This is the pattern we will implement. You can ignore the parts about abstracting the camera class for now; we'll focus on the sampling loop.
Based on this guide, here are the changes you'll need to make in your main.cpp:
-
Add a constant for the number of samples. At the top of your
mainfunction, define how many samples you want per pixel. 100 is a good starting point for a high-quality result.// Image const auto aspect_ratio = 16.0 / 9.0; const int image_width = 400; const int image_height = static_cast<int>(image_width / aspect_ratio); const int samples_per_pixel = 100; // New! -
Modify your main render loop. You need to wrap your existing ray generation logic inside a new loop that runs
samples_per_pixeltimes, accumulating the color.// Render std::cout << "P3\n" << image_width << ' ' << image_height << "\n255\n"; for (int j = image_height - 1; j >= 0; --j) { std::cerr << "\rScanlines remaining: " << j << ' ' << std::flush; for (int i = 0; i < image_width; ++i) { color pixel_color(0, 0, 0); // Initialize accumulator for (int s = 0; s < samples_per_pixel; ++s) { // Generate a randomly jittered ray for this pixel auto u = (i + random_double()) / (image_width - 1); auto v = (j + random_double()) / (image_height - 1); ray r = cam.get_ray(u, v); // Add this sample's color to the accumulator pixel_color += ray_color(r, world); } // Write the final, averaged color write_color(std::cout, pixel_color, samples_per_pixel); } } -
Update your
write_colorfunction. Yourwrite_colorfunction previously just wrote the color it was given. Now, it needs to perform the division bysamples_per_pixelto get the average.// In your color utility header (or wherever write_color is defined) void write_color(std::ostream &out, color pixel_color, int samples_per_pixel) { auto r = pixel_color.x(); auto g = pixel_color.y(); auto b = pixel_color.z(); // Divide the color by the number of samples. auto scale = 1.0 / samples_per_pixel; r *= scale; g *= scale; b *= scale; // Write the translated [0,255] value of each color component. out << static_cast<int>(256 * clamp(r, 0.0, 0.999)) << ' ' << static_cast<int>(256 * clamp(g, 0.0, 0.999)) << ' ' << static_cast<int>(256 * clamp(b, 0.0, 0.999)) << '\n'; }Don't forget to update the function signature in its declaration as well.
After making these changes, compile and run your program. You'll immediately notice two things: the image quality is dramatically better, and the render time is significantly longer.
Test your understanding!
If your scene takes 3 seconds to render with samples_per_pixel = 10, approximately how long would you expect it to take if you change samples_per_pixel to 50? Why?
Show answer
You would expect it to take approximately 15 seconds.
The total render time is directly proportional to the total number of rays traced. By increasing samples_per_pixel from 10 to 50, you are firing 5 times as many rays for each pixel. Therefore, the render time should increase by a factor of 5 (3 seconds * 5 = 15 seconds).
The Trade-off: Quality vs. Performance
This trade-off is fundamental to ray tracing and especially relevant in a VFX production environment. More samples give you a cleaner image (less noise), but at the cost of longer render times. Finding the right balance is a constant challenge.
Raytracer from Scratch in C++ Part 8/9 (Reflections and Anti-Aliasing)
Caleb Piercy's video on antialiasing clearly demonstrates this relationship between sample count and render time.
Watch from 1:02:20 to 1:08:26. The presenter increases the 'AA depth' (which corresponds to the square root of our sample count) and explicitly calls out how the render time increases quadratically with this depth, which is linearly with the total number of samples.
A Glimpse of Production Techniques: Progressive Rendering
Our current implementation is what's known as a "bucket" renderer: it completely finishes one pixel (calculates all its samples) before moving to the next.
Many modern renderers used in DCC tools like Houdini or Maya use a different approach for their interactive preview windows (often called IPR for "Interactive Photorealistic Rendering"). They use progressive rendering.
The idea is to get a noisy, full-image preview very quickly, and then progressively refine it over time. This is achieved by:
- Creating an "accumulation buffer" in memory to store the running total color for each pixel.
- In the first pass, trace one random ray for every pixel and add the result to the buffer. Display the buffer's current state. The image is very noisy.
- In the second pass, trace another random ray for every pixel, add it to the buffer, and display the average of the two samples. The noise is reduced.
- Repeat this process. The image converges toward a clean result over time. If the camera moves, the buffer is cleared and the process restarts.
This provides immediate visual feedback, which is invaluable for artists.
Sebastian Lague's 'Coding Adventure: Ray Tracing' video provides a great visualization of this progressive refinement.
Watch from 17:55 to 19:53. Notice how he keeps the number of rays per frame low but averages the result over multiple frames to improve quality over time. This is the essence of progressive rendering.
While we won't implement a full progressive system right now, it's crucial to understand this concept as it directly relates to the tools you use in your work. Our multi-sample approach is computationally identical; it just organizes the work differently (pixel by pixel instead of frame by frame).
Conclusion
Congratulations! You've implemented one of the most important techniques for improving the visual quality of a ray tracer. The smooth edges on your objects are a direct result of applying a powerful idea from statistics—Monte Carlo sampling—to a graphics problem.
Key Takeaways:
- Aliasing ("jaggies") is caused by under-sampling a pixel's area.
- Multi-sample antialiasing (MSAA) solves this by tracing multiple, randomly jittered rays per pixel and averaging their colors.
- The implementation requires adding a new loop inside your main render loop to accumulate color samples.
- There is a direct, linear trade-off between the number of samples per pixel and the total render time.
- Progressive rendering is a related technique used in production renderers to provide fast, interactive feedback that refines over time.
Next Steps
Now that you've mastered adding randomness to your primary rays for antialiasing, you're ready to apply the same concept to another fundamental camera effect: Depth of Field. In the next lesson, we will simulate a camera's aperture to create realistic focus blur, allowing some parts of your scene to be sharp while others are elegantly blurred. You'll find that the core idea of jittering rays is surprisingly similar to what we've done today.