Hello! Welcome to the first lesson in our module on the muscles of the torso.
In our last session, we mapped out the critical bony landmarks of the skeleton. You learned to see them as a fixed, reliable framework. Today, we begin to drape that framework with muscle, starting with one of the most prominent groups: the pectoralis major, or the chest muscles. Our goal is to identify and draw the pectoralis major and its effect on chest surface form. You'll see how this muscle directly anchors to the clavicle and sternum—landmarks you're now familiar with—and how its shape dynamically changes with arm movement.
1. The Anatomy of the Pectoralis Major
Before we can draw the chest, we need to understand its structure. The pectoralis major isn't just a simple block; it's a fan-shaped muscle composed of distinct sections that all converge from the torso towards the arm.
To get a clear picture of this structure, let's turn to Proko, a resource we'll use often for anatomy.
This video, "How to Draw Pecs - Anatomy," breaks down the pectoralis major into its core components. It will explain where the muscle originates, where it inserts, and how it's structured.
Watch from 00:32 to 05:02. As you watch, focus on these key concepts: Origin & Insertion (00:58): Where does the muscle attach to the skeleton? Notice the connections to the clavicle and sternum. The "Folding Fan" (01:41): Pay attention to the criss-crossing fiber direction. This is the key to understanding how the muscle functions. The Three Portions (02:40): Learn to distinguish the clavicular (top), sternal (middle), and abdominal (bottom) sections. This is crucial for drawing the muscle's form accurately.
To reinforce those origin and insertion points, here is a clear diagram and a concise table from the resource "How to Draw the Torso Easier, an Illustrated Guide."
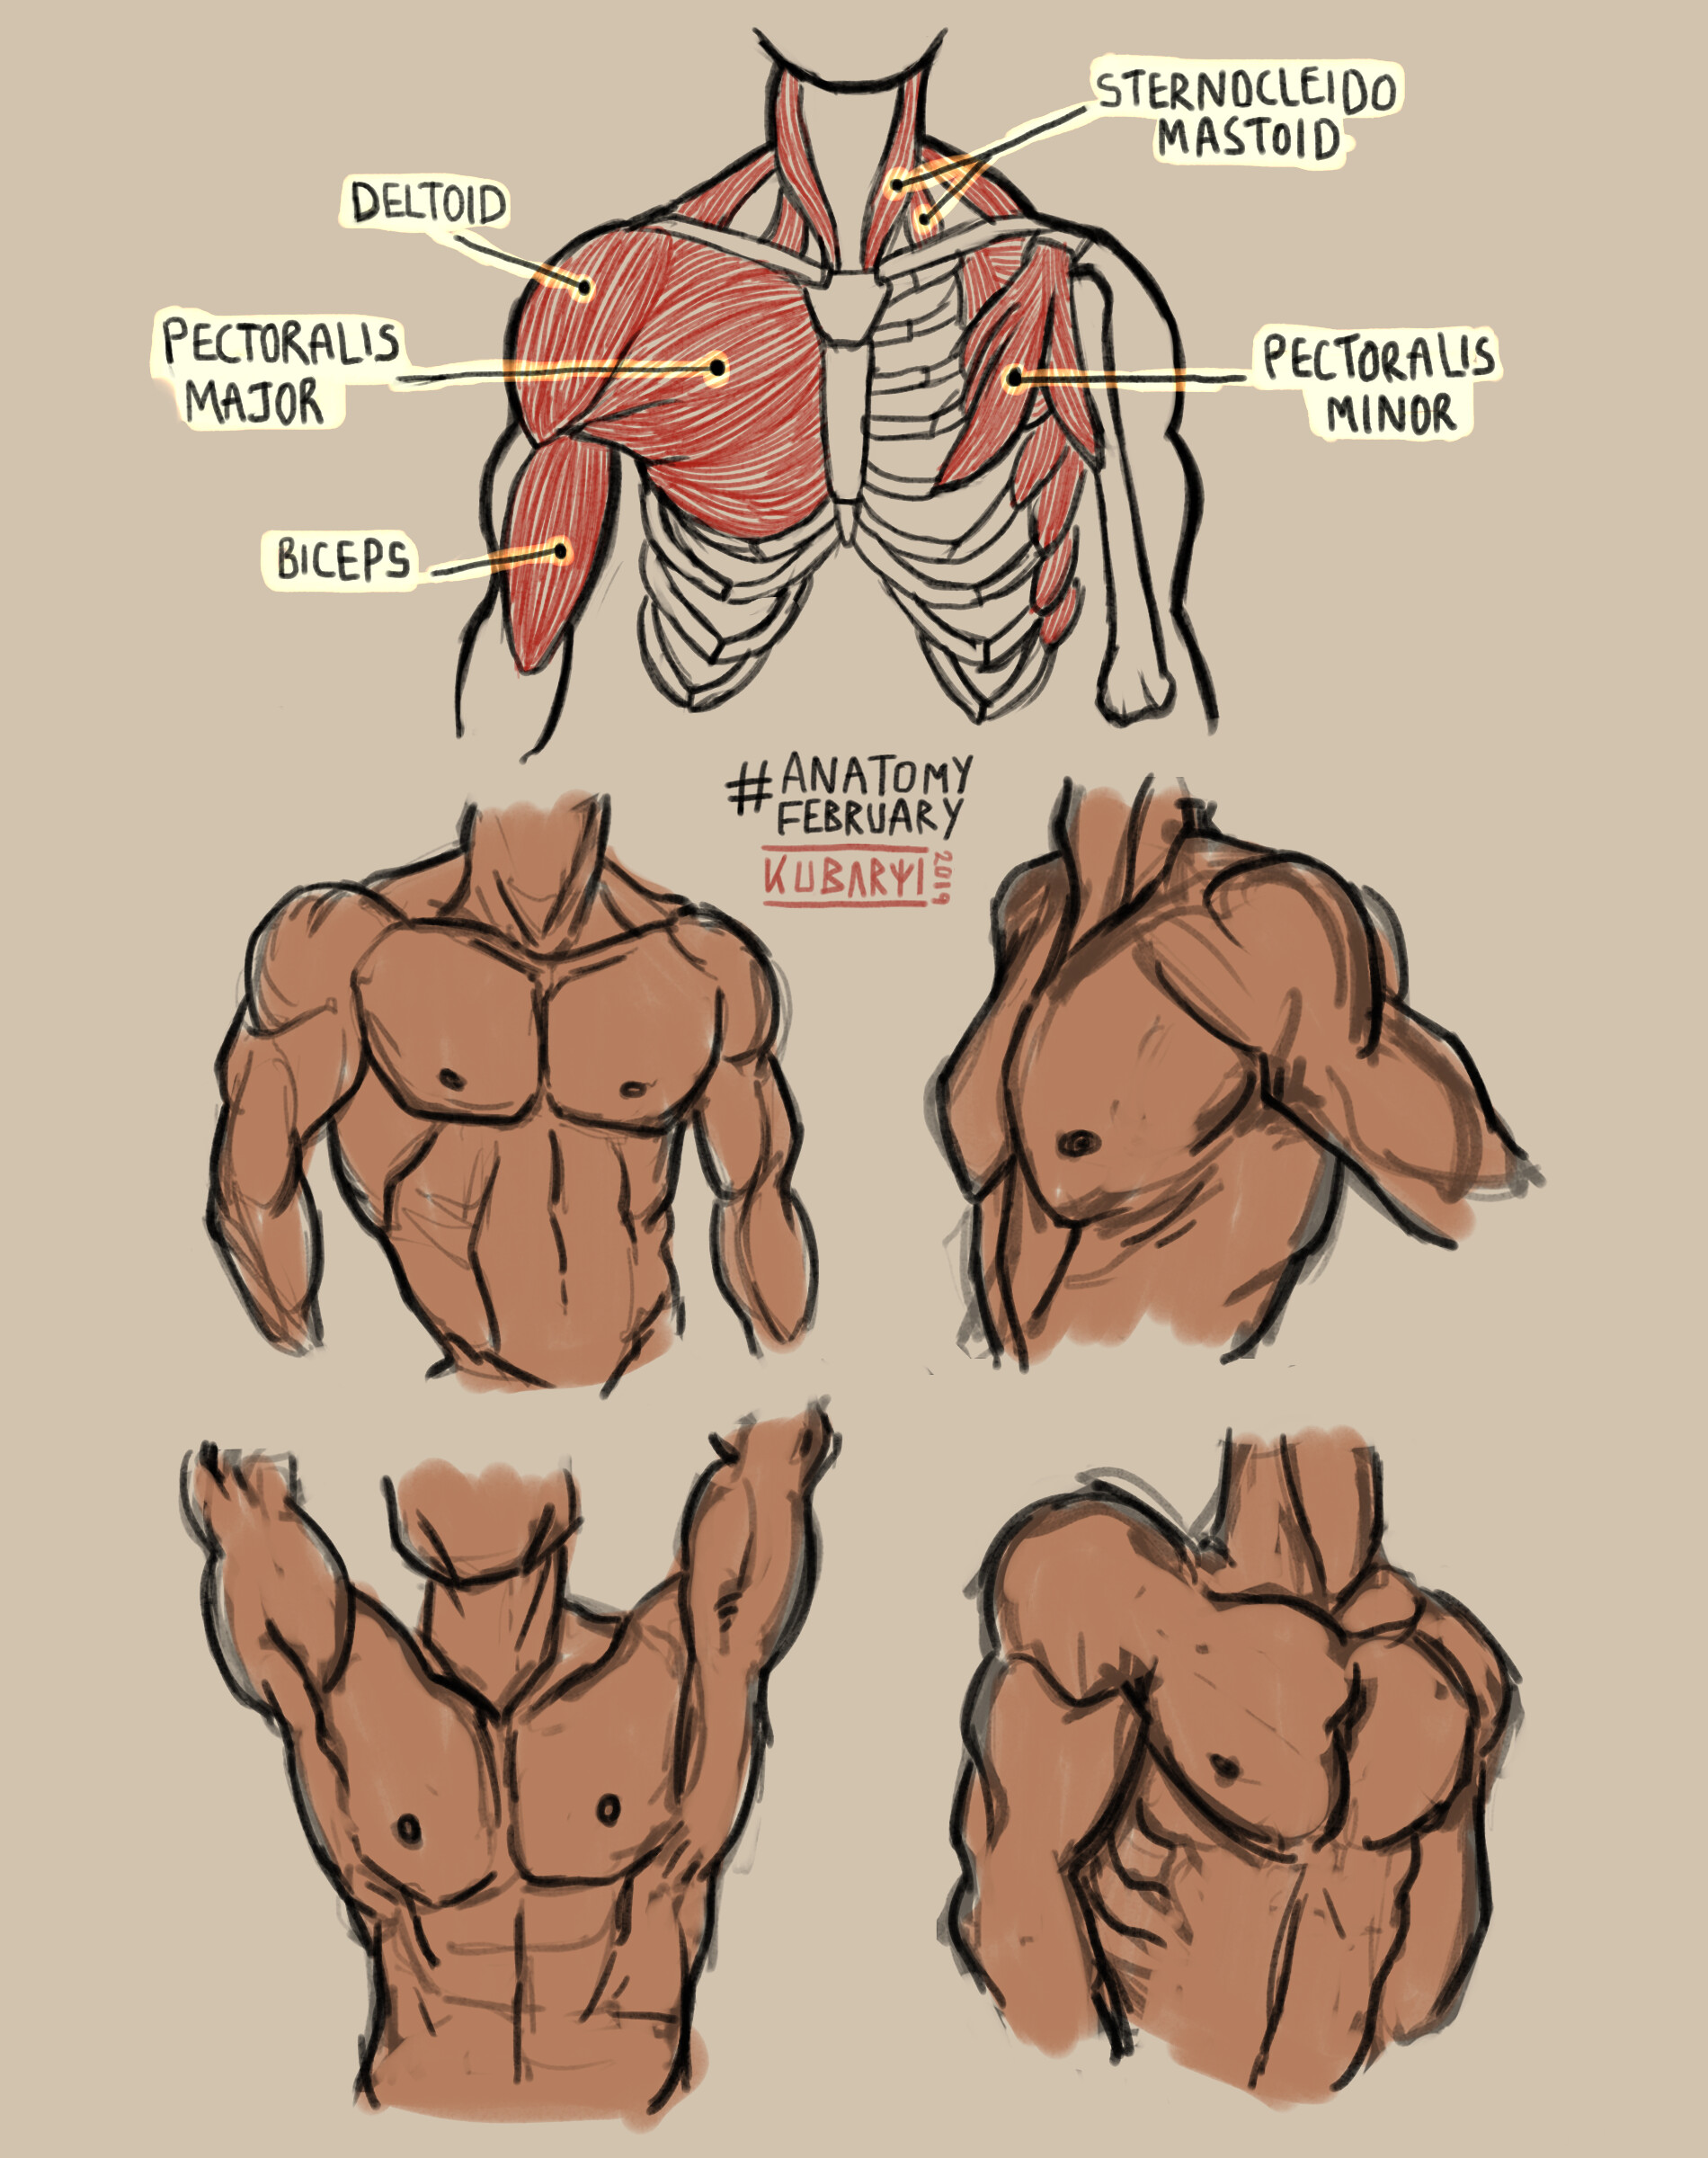
And here's a quick reference table summarizing what you just learned.
| Muscle | Origin | Insertion |
|---|---|---|
| Pectoralis Major | Sternum, medial part of the clavicle, and upper ribs (abdominal section) | Humerus (bone of the upper arm) |
| (Source: GVAAT.com) |
The main takeaway is that fibers from the clavicle, sternum, and lower ribs all "fan out" and converge to attach to the arm bone (humerus).
2. Simplifying the Chest for Drawing
Knowing the detailed anatomy is essential, but trying to draw every single fiber is overwhelming. The next step is to translate that complex information into simple, manageable shapes and forms.
First, let's simplify the overall shape.
How to Draw Chests – 5 SIMPLE LINES of the pectoral muscle
The article "How to Draw Chests – 5 SIMPLE LINES" from Love Life Drawing offers a very practical way to simplify the pecs into a basic shape.
Read the first few sections, from the start down to 'Moving bones'. Focus on the idea of the 'Pentagonal Pecs' as a starting point. Also, note the explanation of how the muscle rests on the curved, sloping surface of the ribcage.
Now that you have a simple shape in mind, let's see how to give it three-dimensional form and adapt it to different arm positions.
We'll return to Proko for the follow-up video, "How to Draw Pecs - Form." This video demonstrates how to apply your anatomical knowledge to construct the chest as a 3D form.
Watch from 00:25 to 02:52. Pay close attention to: How the pec is visualized as a flat front plane and a bottom plane. How the muscle stretches and changes shape when the arm is raised. How the bottom edge of the pec can be used as a cross-contour line to show the form of the ribcage.
Think of this as moving from a 2D schematic to a 3D model. You start with a simple pentagon or box shape, then you wrap it around the curve of the ribcage and stretch or compress it based on the pose.
3. Practice: Building the Pectorals
It's time to put this into practice on your iPad. This exercise will help you solidify the connection between the skeleton, the muscle's structure, and its final appearance.
Exercise: Trace and Invent (30 minutes)
Part 1: Tracing from a Reference (Anatomy Study)
- Find a clear reference photo of a well-lit male torso. Search for terms like "male figure drawing reference" or "anatomy study photo" on Pinterest or a stock photo site.
- Import the photo into Procreate.
- On a new layer, use a bright color to trace the outline of the pectoralis major.
- Inside this outline, draw arrows to indicate the direction of the muscle fibers, fanning out from the arm towards the clavicle and sternum. Refer to the Proko videos to guide you.
- This is a study, not a finished piece. The goal is to train your eye to see the muscle on a real person.
Part 2: Inventing on the Skeleton (Construction Practice)
- Open one of your "superstickman" drawings from the previous lesson, or quickly create a new one based on the bony landmarks of a skeleton. Make sure the clavicles, sternum, and ribcage are clearly indicated.
- On a new layer, use the simplified pentagonal shape from the Love Life Drawing article as a starting point to block in the chest muscles. Make sure the top edge aligns with the clavicle and the inner edge aligns with the sternum.
- Now, refine this blocky shape. Think about the form principles from the Proko videos. Carve out the space between the pecs, show where the muscle tucks under the deltoid (shoulder), and define the bottom plane.
- Experiment with drawing the chest with the arm in different positions (e.g., down at the side vs. raised). Observe how the shape stretches and flattens.

Conclusion
Great work today. You've taken your first major step in anatomical drawing, moving from the bony foundation to the muscular forms that define the body's surface.
Key Takeaways:
- The pectoralis major is a fan-shaped muscle with three main parts: clavicular, sternal, and abdominal.
- It originates on the clavicle and sternum and inserts onto the humerus (upper arm bone).
- For drawing, you can simplify its complex anatomy into a basic pentagonal or boxy shape that wraps around the curved ribcage.
- The shape and form of the chest muscle change dramatically depending on the position of the arm.
In our next lesson, we will continue building out the torso by focusing on the abdominal muscles—the rectus abdominis and the external obliques. You will see how these muscles fit together with the pectorals to create the complete structure of the front of the torso.