Hello! Welcome back to your digital art course.
In our last session, we mapped out the Procreate interface, locating the key toolsets and learning the basic gestures for navigation. You should now be comfortable finding your way around the Gallery and the main canvas.
Today, we'll start making our first intentional marks. Our goal is to select appropriate brushes from Procreate's default library and adjust their basic properties like size and opacity. Think of this as learning to choose and calibrate your primary tools. Just as in development where you select the right programming language or library for a task, in art, you select the right brush. Mastering this is the first step toward creating confident lines and smooth shading.
1. The Brush Library: Your Arsenal of Tools
First, let's open our toolkit. As we saw in the last lesson, the Brush tool is in the top right corner of the screen, represented by a paintbrush icon. Tapping it opens the Brush Library.

The library can seem overwhelming at first, but it’s logically organized. On the left is a list of Brush Sets, which are like folders grouping brushes by their intended use (e.g., Sketching, Inking, Painting). When you select a set, the individual brushes within it appear on the right.
For a quick orientation on how to navigate this library, please review the guide below.
Beginner's Guide to How to Use Procreate
This article from Well Crafted Studio provides a clear, concise overview of how to find and select brushes.
Please read the short section titled '3. How to Open the Brush Library and Choose a Brush'. This will reinforce what we've just discussed.
2. A Starter Toolkit: Three Essential Brushes
You don't need to know every single brush to get started. Instead, let's build a small, versatile toolkit for the three most common tasks: sketching, line art, and shading.
Watch the following video to see a few excellent default brushes in action. We'll focus on one brush from each of the three main categories.
The Best Procreate Default Brushes ✨️🖌||My Favorite Picks Every Beginner Needs 🎨✨️
This video from Rachel’s Art Studio provides a great tour of some of the best default brushes in Procreate. We'll watch specific segments to identify our starter set.
Please watch the following three clips: For Sketching (00:55 - 01:20): Focus on the demonstration of the 6B Pencil. Notice its texture and how it mimics a traditional pencil. For Clean Lines/Coloring (02:45 - 03:05): Pay attention to the Studio Pen (in the Inking set). See how it produces smooth, solid lines, perfect for clean line art or filling in color. For Shading (04:22 - 04:44): Observe the Soft Brush (in the Airbrushing set). Note how it creates soft, diffused edges, ideal for smooth gradients and shading.
Based on the video, let's establish our core toolkit:
- Sketching: 6B Pencil (from the Sketching set). Great for initial drawings, with a pleasing texture and responsiveness.
- Line Art: Studio Pen (from the Inking set). A reliable choice for clean, opaque lines.
- Shading: Soft Brush (from the Airbrushing set). Essential for creating smooth blends and gradients.
These three brushes will be your workhorses as you begin to practice the fundamentals.
3. Controlling Your Brush: Size and Opacity
Now that you've selected a tool, you need to control it. The two most fundamental properties you'll adjust are size and opacity. In Procreate, these are controlled by the two sliders on the left-hand sidebar.
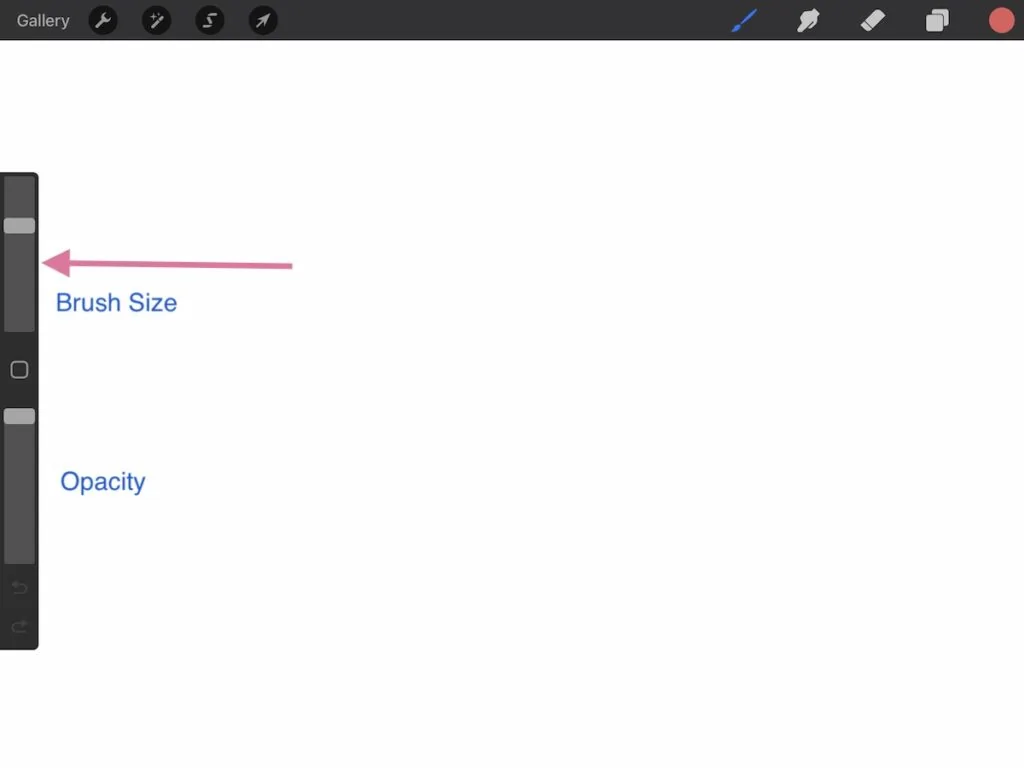
Let's get a precise definition of what these sliders do from the official Procreate Handbook.
Interface — Procreate Handbook
The Procreate Handbook provides the most accurate descriptions of its tools. Read these two brief sections to understand the size and opacity sliders.
Read the sections titled 'Brush size' and 'Brush opacity' on the handbook page. Note the tip for making finer, more precise adjustments.
To summarize:
- Brush Size: Determines the diameter of your brush tip, making your stroke thicker or thinner.
- Brush Opacity: Determines the transparency of your stroke. 100% is fully opaque, while lower values make the stroke more see-through, allowing colors underneath to show.
4. Practical Exercise: Getting a Feel for Your Brushes
Theory is useful, but muscle memory is essential. Let's apply these concepts in a hands-on exercise. Please open Procreate and create a new Screen Size canvas.
Part 1: Exploring Size
- Open the Brush Library and select the 6B Pencil from the Sketching set.
- Set the bottom Opacity slider to its maximum (100%).
- Set the top Size slider to its minimum (~1%). Draw a line.
- Now, set the size slider to about 25% and draw another line next to it.
- Repeat this for 50%, 75%, and 100% size.
You should now have five lines of increasing thickness, giving you a tangible sense of the brush's size range.
Part 2: Exploring Opacity
- Select the Studio Pen from the Inking set.
- Set the Size slider to a comfortable medium setting (e.g., 20%).
- Set the Opacity slider to 100%. Draw a short, horizontal line.
- Now, set the opacity to about 50%. Draw another line that partially overlaps the first one. Notice how you can see the first line through the second.
- Repeat this with opacity at 25% and 10%.
This demonstrates how opacity allows for layering and creating tints. With multiple strokes, low-opacity colors will build up towards a more solid color.
Part 3: Exploring Pressure Sensitivity
Your Apple Pencil adds another layer of control: pressure. Many brushes, especially those in the Sketching set, are designed to respond to how hard you press down.
- Select the 6B Pencil again.
- Set the size to about 30% and opacity to 100%.
- Draw a single, continuous line. Start with the lightest possible touch, then gradually increase the pressure on the screen, and finally lighten it again.
Observe how the line changes. With the 6B Pencil, increasing pressure makes the line both thicker and more opaque. This dynamic behavior is what makes digital drawing feel so natural and expressive.
Spend about 10-15 minutes experimenting. Try this with the Soft Brush as well. See how pressure affects the softness and size of the shading.
Conclusion
Great work today! You've moved from simply navigating the app to actively making and controlling marks on the canvas.
Key Takeaways:
- The Brush Library is organized into sets for different artistic tasks.
- A great starter toolkit includes the 6B Pencil (Sketching), Studio Pen (Inking), and Soft Brush (Airbrushing).
- The left-hand sliders give you direct control over your brush's Size and Opacity.
- Pressure sensitivity is a key feature that allows many brushes to change dynamically as you draw.
In our next lesson, we'll look at the other side of the coin: making corrections. We will focus on the Eraser tool, and you'll discover that it functions just like a brush—meaning everything you learned today about selecting brushes and adjusting their properties will apply directly to erasing.