In our last lesson, we focused on seeing the architectural "scaffolding" inside objects by breaking them down into simple geometric shapes. This analytical approach gives you a powerful tool for establishing correct proportions and structure. Now, we will shift our attention from the internal construction to the external boundary, a skill that requires a different, more meditative kind of observation.
This lesson introduces contour drawing, a fundamental practice for training your eye to see with precision and your hand to follow with fidelity. You will learn to create a line drawing of an object by focusing exclusively on its edges. This exercise is less about producing a finished piece and more about synchronizing your hand-eye coordination. In a way, it's like learning to trust your live visual "telemetry" over your brain's cached, symbolic idea of an object. This skill is indispensable for capturing the specific, unique likeness of a person's features, which is our ultimate goal.
By the end of this lesson, you will be able to create a contour drawing of a simple object by carefully observing its edges, a practice that will fundamentally sharpen your observational abilities.
What is a Contour?
The word "contour" simply means "outline." In drawing, a contour line defines the outermost edges of an object, as well as the significant interior edges where planes change direction. A pure contour drawing contains only lines, with no shading or value. It's a record of pure observation of form.
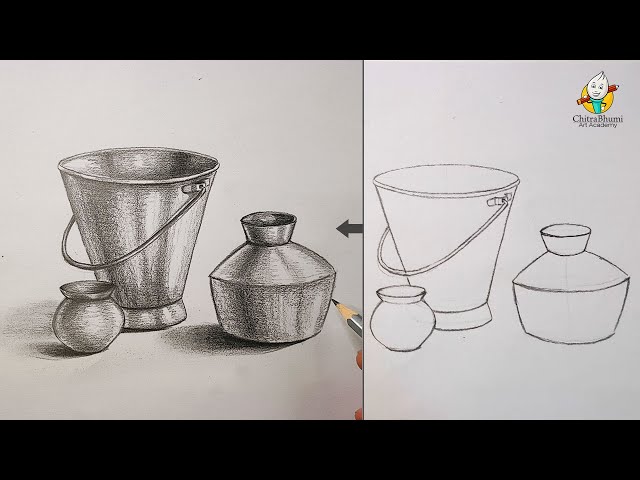
This might seem simple, but the practice forces a profound shift in how you perceive the world. To understand the core principles, let's start with a clear definition.
How to Draw Contour Line Art: 4 Key Steps
This article from the PrepScholar Blog provides a straightforward introduction to what contour drawing is and why it is such a crucial exercise for artists at all levels.
Read the first section, What Is Contour Line Drawing?. Pay attention to the distinction it makes between drawing an outline and adding shading.
The key takeaway is that contour drawing is an exercise. Its purpose is to train you, not to produce a masterpiece. The strange-looking drawings that often result are evidence that the exercise is working—it's rewiring your brain to bypass familiar symbols and see what's truly in front of you.
The Process: Seeing Inch by Inch
Contour drawing is a slow, deliberate process. The goal is to make your pencil an extension of your eye, moving only as your eye traces the object's edge. Think of your eye as a sensor slowly scanning a surface, and your hand as a plotter recording that data in real-time.
A wonderful explanation and demonstration of this process is provided in the following video by Emily from The Pencil Room.
Contour Drawing: What Is It? How Do You Do It?
This video, "Contour Drawing: What Is It? How Do You Do It?", breaks down the mindset and technique of contour drawing beautifully.
Watch these two key segments: The explanation of the process. Notice the emphasis on moving your eye and hand together very slowly, as if "millimeter by millimeter." The instructor's advice to spend about 70% of your time looking at the subject and 30% at your drawing is a great guideline. The summary of benefits. This reinforces why this practice is so valuable for improving observation, coordination, and focus.
The core principles of the contour drawing process are:
- Look More, Draw Less: Spend the vast majority of your time observing the object, not your paper.
- Go Slow: Let your pencil travel at the same slow speed as your eye as it creeps along the edges of the object.
- Use a Continuous Line: Try to keep your pencil on the paper as much as possible, which forces you to find the connections between different edges.
- Trust Your Eye: Record every little bump, dip, and curve you see, no matter how small or seemingly insignificant. Resist the urge to "correct" or simplify what you see.
Hands-On Practice (30 minutes)
It's time to put this into practice. For these exercises, you'll need your pencil and some paper. Choose a single, moderately complex object. Your own hand is a perfect subject, as are a crumpled piece of paper, a shoe, or a leafy plant. Avoid simple geometric objects like boxes or cans for this exercise.
We'll start with a "semi-blind" approach and then move to a "pure blind" one. The following video by instructor Ed Cooper provides an excellent, down-to-earth guide through these exact exercises. His explanation of why the drawings will look distorted is particularly helpful for setting the right expectations.
Contour Drawing for Beginners: Step-by-Step Exercises to Improve Fast!
This video, "Contour Drawing for Beginners," walks you through the exercises and explains the philosophy behind them, emphasizing that they are about training your perception, not creating a 'good' drawing.
Please watch the following sections to prepare for and understand the exercises: Introduction to the exercise: He explains why contour drawing is such a critical exercise for breaking bad observational habits. Why distortion is expected: He reads a fantastic quote that will help you embrace the process without self-criticism. A full blind contour demo: Watch him draw his hand completely blind. Notice the resulting line quality—it's hesitant but also honest. The semi-blind approach: He demonstrates the next step, where you can occasionally glance at your paper to re-orient yourself. This is where we will start.
Now, let's draw.
Exercise 1: Semi-Blind Contour Drawing (15-20 minutes)
This is the "70/30" method we learned about. You'll focus on your object but allow yourself quick, occasional glances at your paper to check your position.
- Set up: Place your chosen object (e.g., your non-drawing hand) in a comfortable position.
- Begin: Pick a starting point on the object. Place your pencil on the paper.
- Trace with your eye: Begin slowly moving your eye along an edge of the object.
- Draw simultaneously: As your eye moves, move your pencil. Try to match the speed and direction exactly.
- Observe everything: If your eye follows a wrinkle into the form and back out, your pencil should do the same.
- Glance, don't stare: Spend most of your time looking at your hand. Only flick your eyes to the paper for a split second to re-orient yourself, then immediately look back at your hand.
- Don't erase or "fix" it. The drawing is a record of the process. Accept the distortions and keep going. Continue for at least 10 minutes.
Exercise 2: Blind Contour Drawing (5-10 minutes)
Now for the more intense version. This time, you will not look at your paper at all until you are finished. You can even use your other hand or a piece of cardboard to block your view of the paper.
- Reset: Get a fresh sheet of paper. Reposition your object if you like.
- Commit: Place your pencil on the paper.
- Draw blind: Trace the object with your eye and draw what you see, but do not look at your paper. Fight the urge!
- Keep the line continuous: Do your best to keep the pencil on the paper for the entire drawing.
- Finish: After about 5 minutes, stop and look at your drawing. It will likely be a fascinating, distorted mess. That's a sign of success! It proves you were focused on observation, not the result.
Compare your two drawings. The semi-blind drawing will likely be more recognizable, but the blind drawing may have moments of surprising accuracy in its line quality, even if the parts don't connect correctly. This "truthfulness" of the line is what we're after.
Conclusion
In this lesson, you stepped away from constructing objects and dove into the practice of pure observation. You learned that contour drawing is a powerful exercise for building the crucial link between your eye and your hand.
Here are the key takeaways:
- Contour drawing is an exercise in seeing, focusing on an object's edges without shading.
- The process requires you to slow down and look at your subject far more than your paper.
- Blind and semi-blind contour drawings are designed to break your reliance on symbols and force you to observe what is truly there. The resulting distortions are not failures, but proof of intense focus.
You've now practiced analyzing an object's internal structure and tracing its external form. These are two complementary ways of seeing. In our next lesson, we will explore a third way: drawing the negative space. By focusing on the shapes around an object, you can define its silhouette with even greater accuracy. This will add another powerful tool to your observational arsenal as we continue building the foundational skills for portraiture.