In our last lesson, you learned to control the character of your lines, using pressure and speed to vary their weight and create a sense of depth. This gave you the ability to make marks that are not just accurate, but also expressive. Now, we will focus on what to draw with those lines to build a solid foundation for any subject.
This lesson addresses the next fundamental skill: identifying and sketching the basic geometric shapes that form the underlying structure of complex objects. Think of this as the architectural phase of drawing. Before worrying about surface details and textures, a skilled artist first constructs a scaffold of simple forms—circles, ovals, rectangles, and their 3D counterparts. This method transforms an intimidatingly complex subject into a manageable set of simple problems, a process that might feel familiar from your work in systems design.
By the end of this lesson, you will be able to look at any object, from a coffee cup to the human head, and see the simple geometry that holds it together.
Seeing in Shapes: Deconstructing Reality
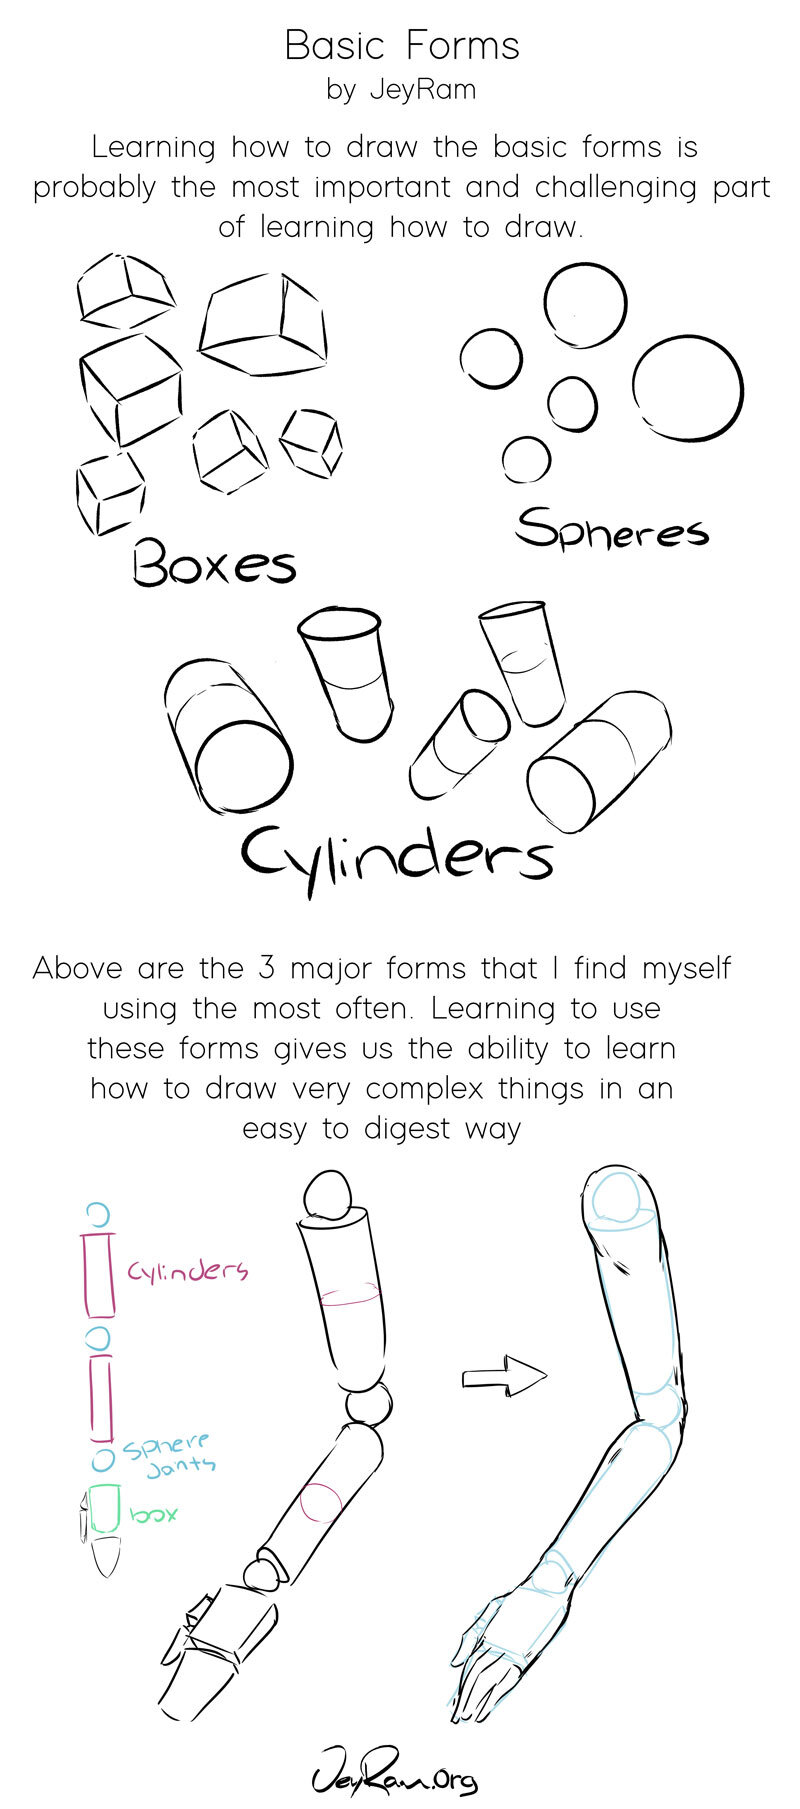
One of the most significant shifts in learning to draw is moving from seeing objects as what they are (a hand, a tree, a face) to seeing them as a collection of simple, interconnected forms. Almost everything in the world can be broken down into combinations of spheres, cylinders, and boxes.
This approach allows you to establish the core proportions, placement, and volume of your subject with light, easily correctable lines before committing to final details.
To begin, it's helpful to clarify two terms that are often used interchangeably. Let's refer to a resource from artist Francesca Sciandra that provides a clear distinction.
Drawing with Confidence, Part 5: Breaking Down Complex Subjects ...
This article explains the foundational concept of simplifying what you see. It provides a clear definition of shapes versus forms and gives a practical example.
Read the first few sections of the article, starting from the top. Pay close attention to the section titled Understanding Form vs. Shape, and the subsequent analytical process using a teapot as an example.
As the article notes, we start by blocking in 2D shapes (circles, ovals, rectangles) to map out the drawing, but we must think in terms of 3D forms (spheres, cylinders, cubes) to eventually create a convincing illusion of reality.
A Systematic Approach to Construction
To make this deconstruction process more concrete, we can use a structured, question-based framework. This turns the initial, often intimidating, phase of a drawing into a repeatable algorithm. The goal is to work from big to small, establishing the largest, most general shapes first and progressively adding smaller ones.
The following video by instructor Brent Eviston introduces an exceptionally clear five-question system for this process. His methodical approach provides a reliable way to start any drawing.
The 5 Questions That Let You Draw Anything
This video presents a powerful strategy for simplifying any subject by asking a series of five questions. It demonstrates how to apply this framework by drawing a bird.
Watch the following segments: The introduction, where he outlines the core idea and lists the five questions. The first application, where he demonstrates using the questions to draw the bird's body, the largest shape. Notice his emphasis on light lines and making corrections without erasing. This iterative process of refinement is key.
Here are the five questions from the video for your reference. You will ask yourself this sequence over and over, once for each major shape you identify:
- What is the biggest shape? (Start with the largest component you haven't drawn yet).
- What is its axis? (What is its tilt or orientation?).
- How big does it need to be? (Relative to the page or to shapes you've already drawn).
- Where on the page does it need to go? (Its position relative to the edges of the paper or other shapes).
- What changes can I make? (After your first attempt, assess and adjust. Assume your first line is an approximation, not a final statement).
This process encourages you to see drawing not as making a single, perfect outline, but as a process of building, measuring, and refining a structure.
Hands-On Practice (30-35 minutes)
Now it's time to apply this thinking. Your goal in these exercises is not to create a finished drawing, but to practice the skill of seeing and sketching the underlying geometric structure. Use light lines so you can easily adjust your shapes, applying the control you developed in the previous lessons.
1. Form Spotting in Your Environment (10 minutes)
This first exercise is about quick observation. Follow the "Activity: Form Spotting" from the same article by Francesca Sciandra.
Drawing with Confidence, Part 5: Breaking Down Complex Subjects ...
This activity prompts you to apply the concept of simplification to objects around you.
Find the section titled Activity: Form Spotting and follow the instructions. Choose three different objects in your room and, for each one, create a quick sketch using only simple geometric shapes.
Don't spend more than a few minutes on each object. The goal is rapid analysis, not a perfect drawing.
2. Learning from Examples (5 minutes)
Seeing how this is applied to various subjects can help solidify the concept. The next video shows this process in action on a few different objects. Notice that there's often more than one way to break down a subject.
How to Draw ANYTHING Using Simple Shapes
This video from RapidFireArt provides quick, clear demonstrations of breaking down different objects into simple shapes.
Watch these three short examples: The soda can: A simple object broken down into rectangles and trapezoids. The bird: A natural form constructed from ovals and triangles. The motorcycle: A complex machine tackled with two different shape-based approaches.
The key takeaway here is flexibility. The choice of shapes is a tool for understanding, and different approaches can lead to the same result. The best method is whichever one helps you make sense of the subject's structure.
3. Deconstruction and Reconstruction (15-20 minutes)
For the final exercise, we will use a more in-depth analytical process on a single object. This will bridge the gap between seeing the underlying structure and creating a recognizable drawing.
Drawing with Confidence, Part 5: Breaking Down Complex Subjects ...
This exercise deepens your observational skills by having you analyze and draw a single object in three different ways.
Find the Exploration Activity near the end of the article. Choose a complex natural object (a plant, a piece of fruit, a crumpled piece of paper) and create the three suggested drawings.
This three-step process is powerful. The first drawing relies on your current observational habits. The second forces pure structural analysis. The third drawing asks you to synthesize the two, building a drawing on a geometric foundation while adding just enough detail to capture the object's character.
From Simple Objects to the Human Head
This entire lesson—seeing the world in shapes and building from simple to complex—is the absolute foundation for our ultimate goal: drawing faces. A human head, with all its subtle curves and intricate features, is constructed from a very simple set of forms. The skull is fundamentally a sphere, and the jaw is a block attached to it.

Mastering the ability to see and draw these underlying forms is the single most important step you can take toward drawing realistic, three-dimensional heads from any angle.
Conclusion
In this lesson, you have learned to look past the surface details of a subject and see its architectural core. This analytical way of seeing is a cornerstone of realistic drawing.
Here are your key takeaways:
- Any complex object can be broken down into a combination of basic geometric shapes and forms.
- Using a systematic, big-to-small approach, like the 5 Questions framework, provides a reliable method for starting any drawing and ensuring good proportions.
- The initial drawing phase is about construction, not detail. Use light, easily adjustable lines to build a structural scaffold.
You have now practiced controlling your line's path and weight, and you have learned how to use those lines to construct the foundational forms of a subject. In the next lesson, we will focus on the outer boundary of objects by learning to draw contours. This will sharpen your observation of specific edges and silhouettes, building directly upon the structural awareness you developed today.