Welcome back. In our last lesson, you practiced controlling the path of your pencil, learning to draw straight lines, smooth curves, and clean ellipses by using your whole arm. You built the foundational muscle memory for making intentional marks, much like mastering the basic syntax of a programming language before building complex applications.
Today, we will add a crucial layer of expressiveness to those marks: line weight. This lesson is about learning to produce a range of line thicknesses and values by varying your pencil pressure and speed. Mastering line weight is what elevates a simple outline from a flat symbol to a dynamic representation of a three-dimensional form. It's the tool that allows you to suggest depth, create emphasis, and breathe life into your drawings, a fundamental step on the path to rendering realistic faces.
What is Line Weight and Why Does It Matter?
Line weight, or line variation, refers to the changing thickness and darkness of a line within a drawing. A drawing where all lines are identical can look flat, like a technical diagram. By varying our line weight, we can communicate a surprising amount of information to the viewer.
A primary use of line weight is to create the illusion of depth and form. As a rule of thumb:
- Thicker, darker lines appear to come forward. They are often used for the main contours of an object, especially on the parts that are closer to the viewer or in shadow.
- Thinner, lighter lines appear to recede. They are used for details within a form, for textures, or for edges that are further away or hit by light.
Look at this simple example of three cubes.
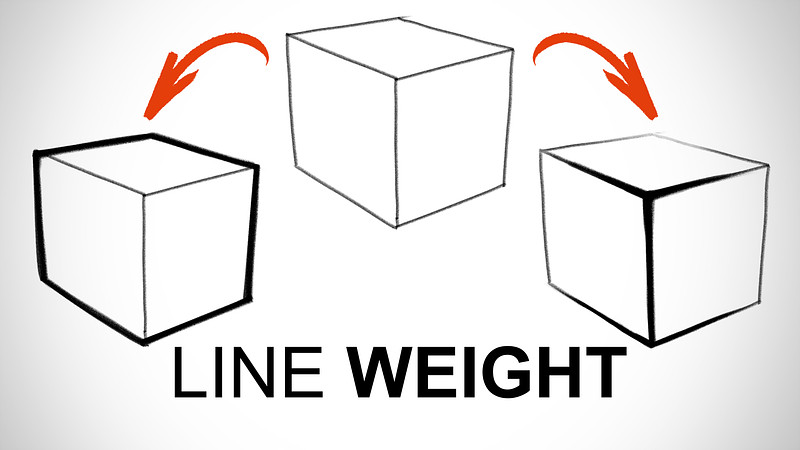
The cube in the middle uses uniform line weight and looks like a flat symbol. The cubes on the sides use heavier lines on the outer contours or shadow-side edges, which immediately makes them feel more solid and grounded in space. This principle is fundamental to making a portrait feel like a real head, not just a collection of lines.
The Mechanics: How to Control Your Line
Creating varied line weight is a physical skill that comes from controlling three main variables: pressure, speed, and the angle of your pencil.
In the previous lesson, you practiced with the overhand grip. This grip is particularly effective for controlling line weight because it allows you to use the long, sharpened side of your pencil's lead, not just the tip.
The following video from the Proko channel revisits pencil control, focusing specifically on how to manipulate the tool to achieve different marks.
How to Hold and Control Your Pencil
This video demonstrates how to use the overhand grip and different parts of the pencil lead to create a wide variety of line thicknesses and edges.
Please watch these two key segments: First, review how the overhand grip enables you to use the side of the lead from using the side. Next, pay close attention to the section on controlling thickness. The artist demonstrates how rolling the pencil, changing the angle of your stroke, and turning your wrist can all be used to create lines that transition from thin to thick.
As the video shows, you have a sophisticated tool at your disposal. By combining pressure with changes in the pencil's orientation, you can create a line that starts thin, swells to become thick, and then tapers back to a fine point, all in a single stroke.
The Tapered Stroke: A Foundational Technique
One of the most effective ways to practice and apply line weight is through the tapered stroke. This is a single, fluid mark that is thicker in the middle and tapers to a point at both ends. It’s created by starting the stroke with the pencil already in motion just above the paper, gently lowering it to make contact, applying pressure through the middle of the stroke, and then lifting it off again, all without stopping.
The motion is like a car smoothly accelerating and then coasting to a stop, as opposed to starting and stopping abruptly. This technique is key to creating lines that feel energetic and confident rather than hesitant and choppy.
This next video, also from Proko, is dedicated entirely to this essential stroke.
How to Draw Confident Lines - The Tapered Stroke
This video breaks down the tapered stroke, explaining how it's made and why it's so valuable for both clean, constructed drawings and loose, gestural sketches.
Watch the following sections to understand its application: First, see the definition and a demonstration of the tapered stroke. Next, learn how multiple tapered strokes can be layered to construct complex lines with clean contours. This is a very systematic approach to building a final line. Finally, see how tapered strokes are used for loose sketching, creating drawings with energy and momentum. Notice how the lines don't always connect perfectly, but the drawing still feels dynamic and intentional.
The tapered stroke is a universal tool. The constructive method is akin to building a stable architecture for your drawing's final outline, while the loose, gestural application is about exploring ideas and capturing energy quickly.
Hands-On Practice (30-40 minutes)
It's time to put these concepts into practice. For these exercises, continue using the overhand grip and drawing from your shoulder to maintain fluidity.
1. Line Character Drill (10 minutes)
This first exercise will help you develop a feel for how speed and pressure interact. We'll use a guide from The Virtual Instructor to explore different types of line endings.
10 Drawing Exercises for More Confident Lines and Hatching
This article provides an excellent, systematic breakdown of how to create different line characteristics by consciously manipulating your speed and pressure.
In the article, find the section titled "Exercise 1 – Drawing Straight Lines." Read the description of the four types of lines labeled a, b, c, and d.
Now, take a sheet of paper and try to reproduce these four line types.
- Fill several rows with each type of line.
- For the 'full stop' lines (a, d), feel how you need to slow down at the beginning or end.
- For the 'sharp' or tapered lines (b, c), feel the "flicking" motion and the lighter touch as you start or finish the stroke.
2. Graduated Pressure Drill (10 minutes)
This exercise focuses on creating smooth transitions in line weight within a single, continuous curve. The Design Sketchbook offers a perfect drill for this.
TIP 383: 6 Easy Exercises to Improve Your Line Quality
This resource offers several practical exercises for improving line confidence. We will focus on the one that deals directly with pressure modulation.
Find "EXERCISE 2. Play with Pressure" and read the two-step practice suggestion.
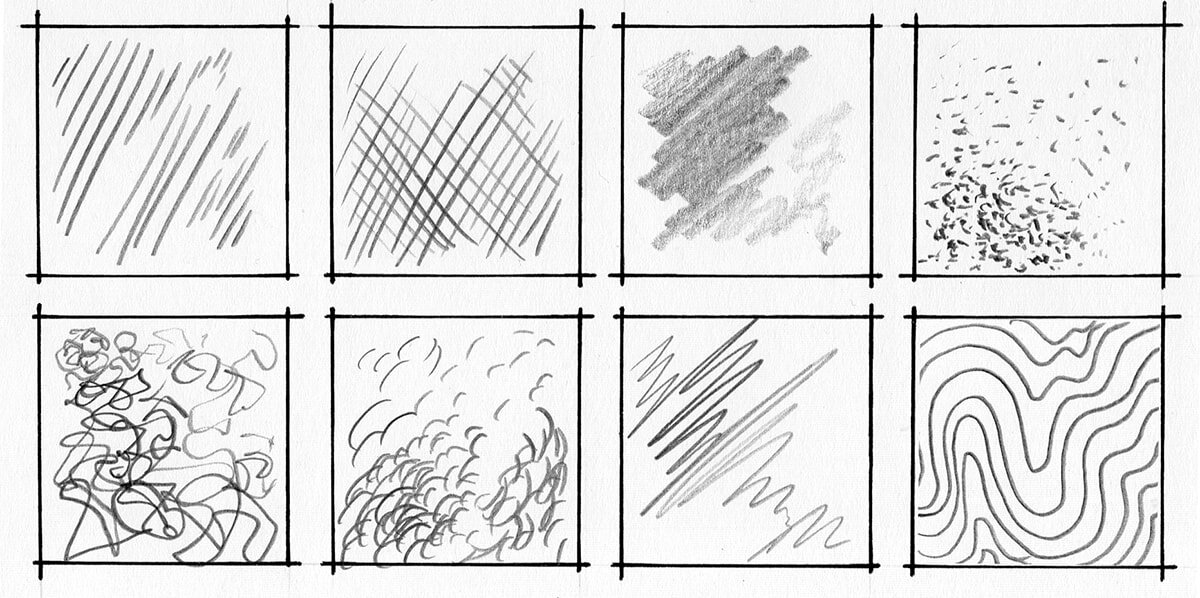
On a new sheet of paper, fill the page with S-curves and random, meandering lines. As you draw each line, consciously modulate your pressure. Start light, press harder through the middle of the curve, and then ease up again towards the end. The goal is to create lines that swell and shrink gracefully.
3. Applying Line Weight for Depth (10-15 minutes)
Finally, let's use line weight for its intended purpose: creating form. We'll use another exercise from the same Design Sketchbook article.
TIP 383: 6 Easy Exercises to Improve Your Line Quality
This exercise demonstrates how to apply line weight strategically to suggest a light source and create the illusion of three-dimensionality.
Find "EXERCISE 3. Trajectory Control" and read the step-by-step approach.
Follow the instructions:
- Draw several simple shapes like circles, ovals, and the "bean shapes" mentioned in the article.
- For each shape, pick a direction for an imaginary light source (e.g., from the top left).
- Go over the contour of the shape again, applying heavier, darker lines on the side that is opposite the light source.
- Let your line become progressively lighter as it curves around towards the light.
This simple exercise is a critical bridge between line drawing and shading, which we will cover in the next module.
Conclusion
In this lesson, you've added a vital dimension of control to your drawing. You've moved beyond simply dictating a line's path to controlling its character.
Here are the key takeaways from today:
- Line weight is the variation in a line's thickness and darkness, used to create depth, emphasis, and form.
- It is controlled by three variables: pencil pressure, speed, and angle.
- The tapered stroke is a fundamental technique for creating confident, energetic lines that can be used for both clean construction and loose sketching.
- Applying heavier lines to the parts of an object in shadow is a powerful way to make it feel three-dimensional.
You now have the ability to make marks that are not only accurate but also expressive. In our next lesson, we will begin applying this skill by learning to identify and sketch the basic geometric shapes (circles, ovals, rectangles) that form the underlying structure of complex objects. This is the architectural phase of drawing, where you'll use light, controlled lines to build the scaffold for the final portrait.