Introduction
Welcome to the first lesson of our final module, "Deployment: Shipping Your Tool." In the last lesson, you successfully created a self-contained prediction pipeline, bugfix_pipeline.joblib, and a script, predict.py, to use it. That script was a crucial proof-of-concept, but its reliance on basic sys.argv for arguments makes it cumbersome and error-prone for anyone to use.
Today, we'll fix that. Our goal is to build a Command-Line Interface (CLI) for local usage of your tool using a library like Typer or Click. We will transform your predict.py script into a polished, professional CLI application. This is a significant step towards your goal of "building and shipping" a real product, as it creates a tool that can be easily run and understood by other developers (or even your future self!).
Part 1: Beyond sys.argv - The Case for a CLI Framework
Your predict.py script worked by manually parsing command-line arguments from sys.argv. This is fine for simple scripts, but it has several drawbacks for a real tool:
- No Help Text: Users have no easy way to know what arguments are expected or what they do.
- No Validation: If a user provides the wrong number of arguments or an incorrect file path, the script might crash with an unfriendly error.
- Verbose Parsing: You have to write boilerplate code to check
len(sys.argv)and access list elements by index.
Modern CLI frameworks solve these problems elegantly. They let you define your commands, arguments, and options declaratively, and they automatically generate help messages, validate user input, and parse arguments for you.
For this course, we'll use Typer. It's modern, easy to use, and builds on your existing Python knowledge, particularly type hints. Let's look at why it's a great choice.
Building CLI Tools with Python: Click, Typer, and argparse - Dasroot!
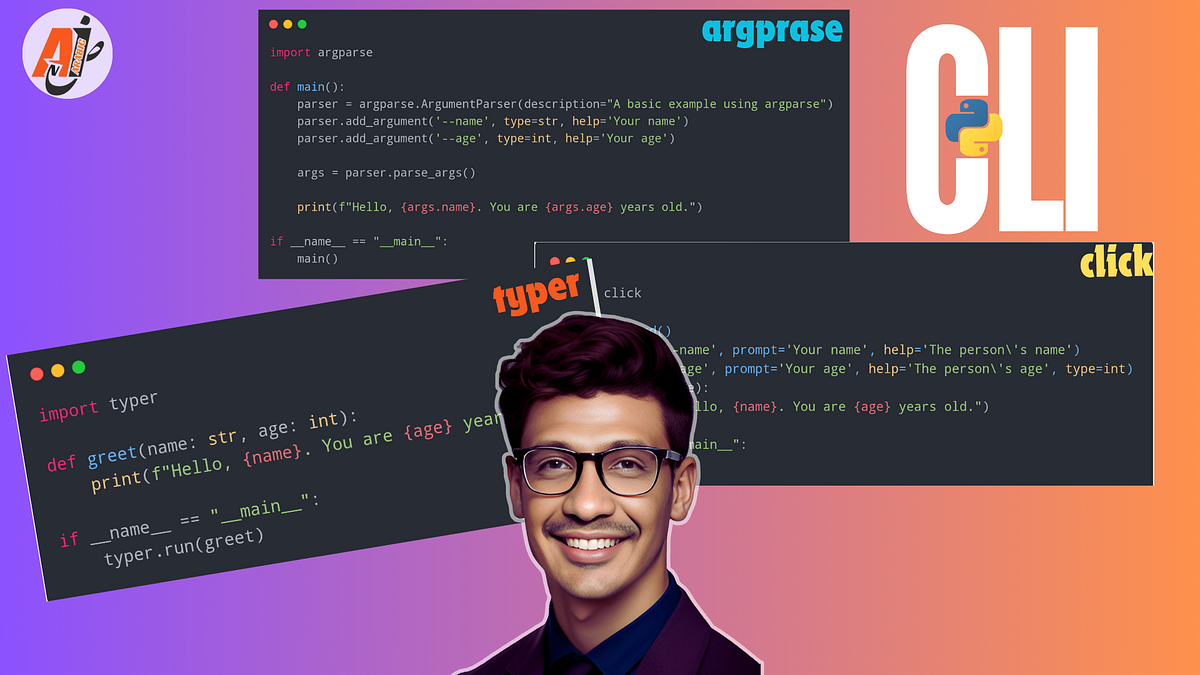
The article 'Building CLI Tools with Python' provides an excellent overview of the most popular CLI libraries. We'll start by looking at the fundamentals and a comparison of the libraries.
First, read the section 'Understanding CLI Tool Fundamentals' to solidify the concepts of commands, arguments, and options. Then, read 'Comparing Click, Typer, and argparse', paying close attention to the comparison table and the 'When to Use Typer' subsection. Notice how Typer's strengths in type safety and minimal code align with building maintainable, modern applications.
As the article highlights, Typer's clean, type-hint-based syntax makes it a superior choice for building robust applications quickly.
Part 2: Your First Typer Application
Let's dive into the code. The core of a Typer app is incredibly simple. You create an app object and then decorate regular Python functions to turn them into CLI commands.
Here’s a minimal "Hello World" example. Create a file named hello.py and add this code:
import typer


# 1. Create a Typer app object
app = typer.Typer()


# 2. Decorate a function to create a command
@app.command()
def hello(name: str, age: int):
    """
    Says hello and states the user's age.
    """
    print(f"Hello, {name}! You are {age} years old.")


# 3. Run the app
if __name__ == "__main__":
    app()
Now, run this from your terminal. Try these commands:
# Run with the required arguments
python hello.py Alice 30


# Run with --help to see the auto-generated help message
python hello.py --help
Notice how Typer automatically:
- Parses the positional arguments
Aliceand30. - Converts
30to an integer because of theage: inttype hint. - Generates a detailed
--helpmessage based on your function signature and docstring.
This is the power of a CLI framework – you write a simple Python function, and you get a robust command-line tool for free.
Part 3: Building Your Bug-Fix Prediction CLI
Now, let's apply this to your project. We'll refactor the logic from predict.py into a new, structured CLI application.
Step 3.1: A Better Project Structure
First, let's organize your project for scalability. A good structure separates the user interface (the CLI) from the core application logic (the prediction engine). Following the pattern from the Real Python guide on Typer is a great best practice.
- Create a new directory in
src/calledbugfix_predictor. - Add an empty
__init__.pyfile insidesrc/bugfix_predictor/to make it a Python package. - Move the core prediction logic into a new file:
src/bugfix_predictor/predictor.py. - Create the CLI interface in a new file:
src/bugfix_predictor/cli.py. - Create an entry point file:
src/bugfix_predictor/__main__.py.
Your project structure should now look like this:
your_project/
│
├── artifacts/
│   └── bugfix_pipeline.joblib
│
├── data/
│   └── unseen/
│       └── new_commits.csv
│
├── src/
│   └── bugfix_predictor/
│       ├── __init__.py
│       ├── cli.py
│       ├── predictor.py
│       └── __main__.py
│
└── ... (other files)
Step 3.2: Encapsulate the Prediction Logic
Open src/bugfix_predictor/predictor.py and add the following code. This function encapsulates the logic of loading the pipeline and making a prediction.
# src/bugfix_predictor/predictor.py
import joblib
import pandas as pd
from pathlib import Path


# Load the pipeline once when the module is imported.
# This is more efficient than loading it for every prediction.
PIPELINE_PATH = Path(__file__).parent.parent.parent / "artifacts" / "bugfix_pipeline.joblib"
PIPELINE = None

try:
    PIPELINE = joblib.load(PIPELINE_PATH)
except FileNotFoundError:
    print(f"Error: Pipeline file not found at {PIPELINE_PATH}")
    PIPELINE = None

def predict_from_df(df: pd.DataFrame) -> pd.DataFrame:
    """
    Makes bug-fix predictions on a pandas DataFrame.
    """
    if PIPELINE is None:
        raise RuntimeError("Pipeline is not loaded. Please check the file path.")

    predictions = PIPELINE.predict(df)
    probabilities = PIPELINE.predict_proba(df)

    df['is_bugfix_prediction'] = predictions
    df['bugfix_probability'] = probabilities[:, 1] # Probability of the 'True' class

    return df
This design is much cleaner. The predictor.py module is now a self-contained prediction engine, unaware of whether it's being called from a CLI, an API, or another script.
Step 3.3: Implement the CLI
Now, let's build the user-facing part in src/bugfix_predictor/cli.py. This script will define the commands and use the predictor module to do the actual work.
# src/bugfix_predictor/cli.py
import typer
import pandas as pd
from pathlib import Path
from . import predictor

app = typer.Typer()

@app.command()
def from_file(
    input_path: Path = typer.Argument(
        ..., # The ... makes this argument required
        exists=True,
        file_okay=True,
        dir_okay=False,
        readable=True,
        help="Path to the CSV file containing commit data."
    )
):
    """
    Predicts bug-fix commits from a CSV file.
    """
    typer.secho(f"1. Loading data from: {input_path}", fg=typer.colors.CYAN)
    try:
        input_df = pd.read_csv(input_path, parse_dates=['commit_date'])
    except Exception as e:
        typer.secho(f"Error reading file: {e}", fg=typer.colors.RED)
        raise typer.Exit(1)

    typer.secho("2. Making predictions...", fg=typer.colors.CYAN)
    try:
        results_df = predictor.predict_from_df(input_df)
    except RuntimeError as e:
        typer.secho(f"Prediction error: {e}", fg=typer.colors.RED)
        raise typer.Exit(1)

    typer.secho("3. Displaying results:", fg=typer.colors.CYAN)


    # Use secho for styled output
    typer.secho("\nPrediction Results:", bold=True)
    output_str = results_df[['commit_message', 'is_bugfix_prediction', 'bugfix_probability']].to_string()
    typer.secho(output_str)

if __name__ == "__main__":
    app()
Key things to notice:
typer.Argument(...): We declareinput_pathas a required argument. Typer provides powerful validation flags likeexists=Trueandreadable=Trueto automatically check the file path for you.typer.secho(): This function is likeprint(), but allows for easy color styling, making your CLI output much more user-friendly.
Step 3.4: Create the Entry Point
Finally, the __main__.py file makes your package runnable. This is a very common pattern in Python applications.
Add this code to src/bugfix_predictor/__main__.py:
# src/bugfix_predictor/__main__.py
from . import cli

def main():
    cli.app(prog_name="bugfix-predictor")

if __name__ == "__main__":
    main()
The prog_name argument ensures that the help messages show your tool's name correctly.
You can now run your complete CLI tool from the project root:
# Run the 'from-file' command on your sample data
python -m src.bugfix_predictor from-file data/unseen/new_commits.csv


# See the help message for your new command
python -m src.bugfix_predictor from-file --help
Part 4: Advanced CLI Features
You've built a functional CLI, but good tools often provide multiple ways to interact with them. Let's add a second command to predict from a single text string provided directly on the command line.
This demonstrates how easy it is to build a multi-command tool with Typer.
Build a Command-Line To-Do App With Python and Typer
The 'Build a Command-Line To-Do App' tutorial from Real Python is a goldmine of practical Typer patterns. We won't build the whole app, but we will borrow its excellent patterns for adding commands and handling input.
Please read the subsection 'Implement the add CLI Command'. Pay close attention to how it defines the add command, how it uses typer.Argument(...) to accept a required description, and typer.Option(...) for an optional priority. This is the exact pattern we'll use to add a new command to our tool.
Inspired by that example, add the following command to your src/bugfix_predictor/cli.py file, right below the from_file command:
# Add this to src/bugfix_predictor/cli.py

@app.command()
def from_text(
    commit_message: str = typer.Argument(
        ...,
        help="A single commit message to classify."
    )
):
    """
    Predicts whether a single commit message is a bug-fix.
    """
    typer.secho("1. Creating DataFrame from text...", fg=typer.colors.CYAN)


    # The model expects a DataFrame, so we create a dummy one
    input_df = pd.DataFrame([{"commit_message": commit_message}])

    typer.secho("2. Making prediction...", fg=typer.colors.CYAN)
    try:
        results_df = predictor.predict_from_df(input_df)
    except RuntimeError as e:
        typer.secho(f"Prediction error: {e}", fg=typer.colors.RED)
        raise typer.Exit(1)


    # Extract the single result
    prediction = results_df['is_bugfix_prediction'].iloc[0]
    probability = results_df['bugfix_probability'].iloc[0]

    typer.secho("\nPrediction Result:", bold=True)
    if prediction:
        typer.secho(f"This is a BUG-FIX (Probability: {probability:.2f})", fg=typer.colors.GREEN)
    else:
        typer.secho(f"This is NOT a bug-fix (Probability: {1-probability:.2f})", fg=typer.colors.YELLOW)
Now, try your new command from the project root:
# Test a bug-fix message
python -m src.bugfix_predictor from-text "Fix: null pointer on login"


# Test a feature message
python -m src.bugfix_predictor from-text "Feat: implement dark mode"


# Check the main help to see both commands listed
python -m src.bugfix_predictor --help
You now have a multi-command CLI tool that is far more flexible and user-friendly.
Conclusion
Fantastic work! You have taken a simple script and elevated it into a structured, professional command-line application. This is a critical skill for any developer who wants to build tools that are easy to use, maintain, and share.
Key Takeaways:
- CLI frameworks like Typer abstract away the complexities of parsing
sys.argv, providing automatic help text, type validation, and error handling. - A good application structure separates the UI (CLI) from the core logic (prediction engine), making the code more modular and reusable.
- Typer makes it simple to build multi-command CLIs, allowing you to provide different ways for users to interact with your tool.
- Features like colored output (
typer.secho) and argument validation significantly improve the user experience.
Preview of the Next Lesson:
You've created a powerful tool for local use. But what if you wanted to make your prediction service available to other applications over a network? In the next lesson, we will expose your ML pipeline as a REST API using a web framework like FastAPI. You'll find that much of the logic you've just written can be reused, as we swap out one type of user interface (a CLI) for another (a web API).