Introduction
In our previous lesson, you successfully configured your system by installing Git, connecting it to your RStudio environment, and establishing a secure link to your GitHub account. With that crucial one-time setup complete, your digital workbench is ready. Now, we shift from preparation to action.
This lesson focuses on the first practical step in using version control for an analysis project: initializing a Git repository. A repository (often shortened to "repo") is simply a project—a directory of files—whose history is tracked by Git. Our goal is to learn how to place an RStudio Project under version control. By the end of this lesson, you will be able to create a new project with version control from the start or add it to a project you've already begun.
The "Git-First" Approach: Starting a New Project
The most straightforward and recommended workflow is to create your Git repository at the same time you create your RStudio Project. This ensures that every change, right from the very beginning, is ready to be tracked.
When you create a new project in RStudio (File > New Project > New Directory > New Project), the dialog box gives you an option to initialize a Git repository.

Selecting this checkbox tells RStudio to run the necessary Git command (git init) in the background as it creates your new project directory.
The following video demonstrates this process. As you watch, notice how ticking the box is the only extra step needed.
First Steps in Learning the Use of Git & GitHub in RStudio
This clip from a Posit PBC webinar shows how to create a new RStudio Project that is immediately set up for version control. We will cover the subsequent steps of committing and pushing in later lessons.
Please watch the segment from the project creation. Focus on the "Create New Project" dialog and the appearance of the RStudio interface right after the project is created.
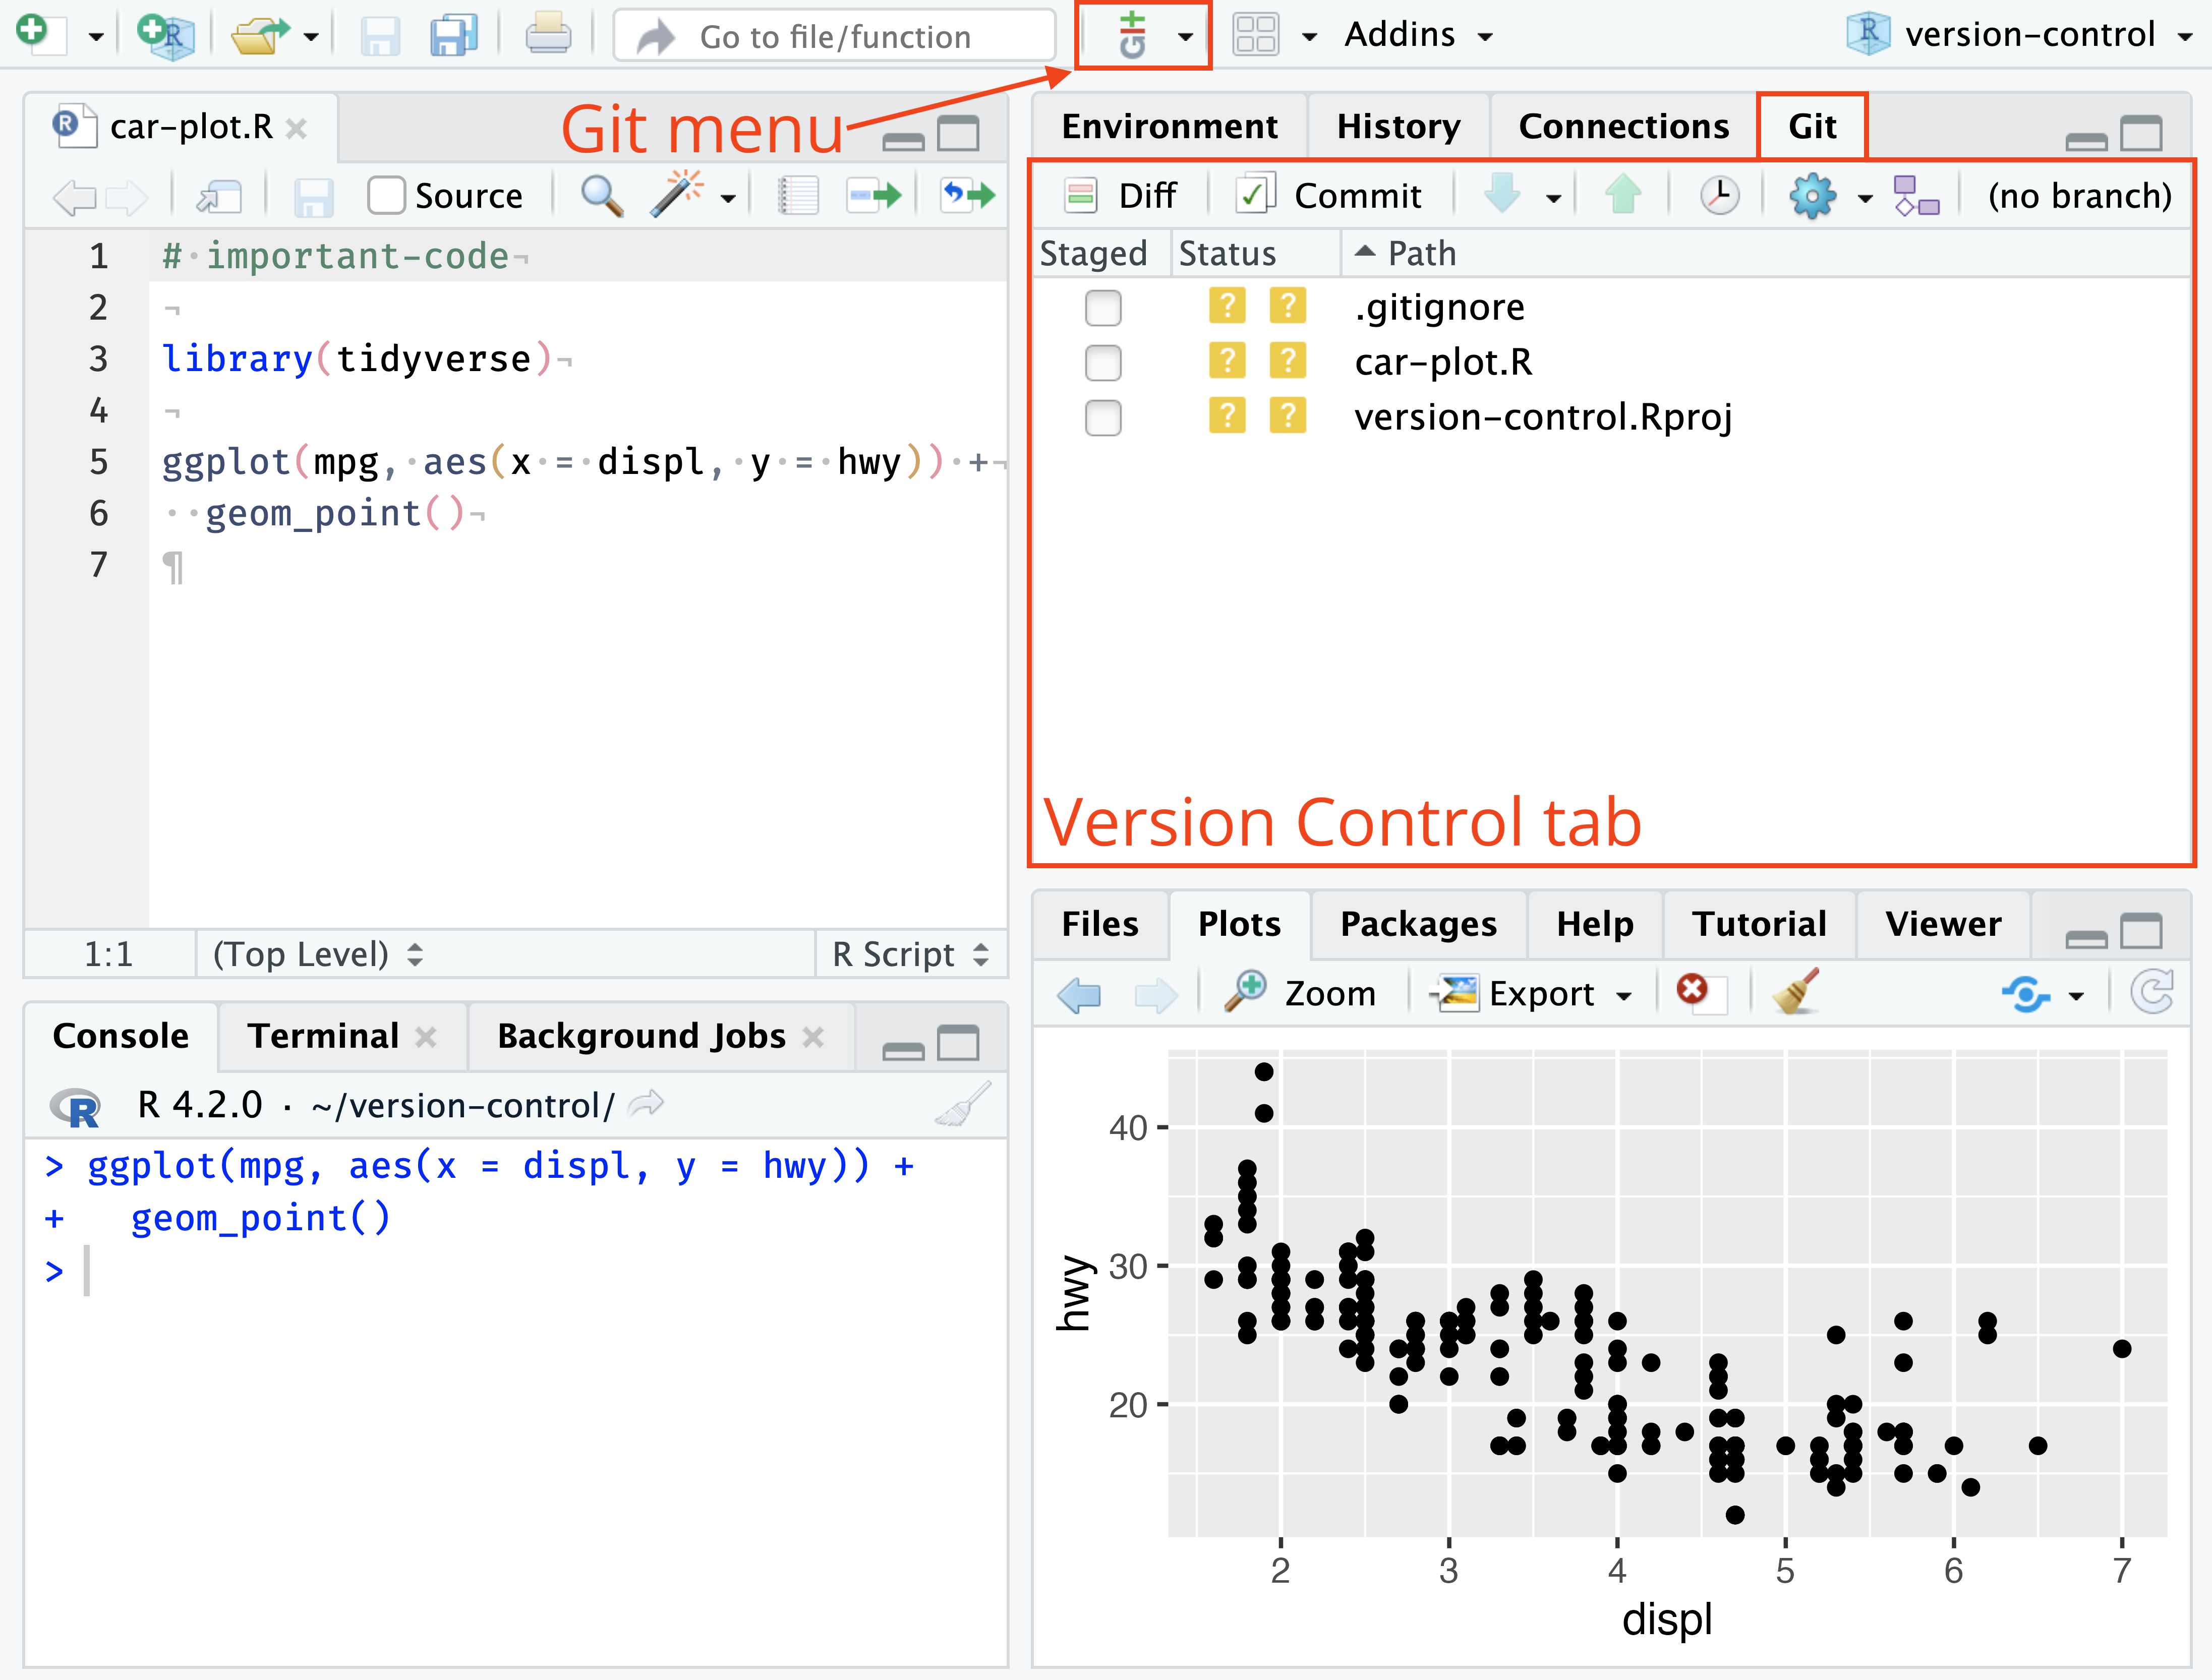
Once the project is created, the most significant change to your RStudio interface is the appearance of a new Git tab in the top-right pane, next to "Environment" and "History". This tab is your primary interface for most version control operations within RStudio. It lists any new, deleted, or modified files in your project.
The "Git-Later" Approach: Adding to an Existing Project
It's also common to start an analysis and only later decide that you need to track its history with Git. Fortunately, you can easily enable version control for any existing RStudio Project.
The excellent online book "Happy Git with R" by Jenny Bryan and collaborators is a go-to resource for these kinds of tasks. It outlines several ways to initialize a repository in an existing project.
Chapter 17 Existing project, GitHub last
This chapter from "Happy Git with R" describes how to add Git to a project you've already started. We'll focus on the part that initializes the local repository.
Please read the subsection 17.1.2 Make or verify a Git repo. This short text presents three methods for initializing a repository. Pay close attention to the second option, using the RStudio menu, as it's a very common and user-friendly method. The first option, using usethis::use_git(), is also a great one to know, as it fits into the programmatic workflows you are interested in.
As you just read, one of the most direct methods is using RStudio's built-in options. The following video provides a quick demonstration of this exact process.
Connecting an existing RStudio project to git and GitHub (CC145)
This video from the Riffomonas Project provides a clear, quick demonstration of enabling Git for an existing project using RStudio's menus, which was the second method described in the text you just read.
Watch the segment from this point, where the presenter navigates to Tools > Project Options... and enables Git version control. Notice how RStudio restarts and the Git pane appears, just as we discussed.
Whether you start a new project with Git or add it to an existing one, the end result is the same: your project directory is now a Git repository, and RStudio's version control interface is active and ready for your commands.
Under the Hood: The .git Directory
So, what does "initializing a repository" actually do?
Behind the scenes, both the checkbox in the "New Project" dialog and the options you just learned about execute a single command: git init. This command creates a special, hidden subdirectory in your project's root folder named .git.
This .git directory is the brain of your repository. It's where Git stores all the information about your project's history: every version of every file, every commit message, and all the metadata that links them together.
You will almost never need to interact with this directory directly. It’s crucial, however, to know it exists and to understand that this single folder is what turns a regular directory into a powerful, version-controlled repository. Be sure not to delete it or manually change its contents.
Conclusion
In this lesson, you have learned the essential first step of applying version control to your work. You are now equipped to start any project on the right foot or to bring an existing project into a reproducible workflow.
Key Takeaways:
- A Git repository is a project directory whose history is tracked by Git.
- New projects: The easiest way to start is by checking the "Create a git repository" box when creating a new RStudio Project.
- Existing projects: You can enable version control at any time via Tools > Project Options > Git/SVN or by running
usethis::use_git()in the console. - Initializing a repository creates a hidden
.gitdirectory, which contains the entire history of your project. - The appearance of the Git tab in RStudio confirms that your project is now a repository.
Preview of the Next Lesson:
Now that you have a repository, what's next? An empty repository doesn't track anything yet. In our next lesson, we will cover the fundamental Git workflow: staging and committing changes. You will learn how to select which changes you want to save and how to create your very first "commit"—a permanent, annotated snapshot of your project's state.